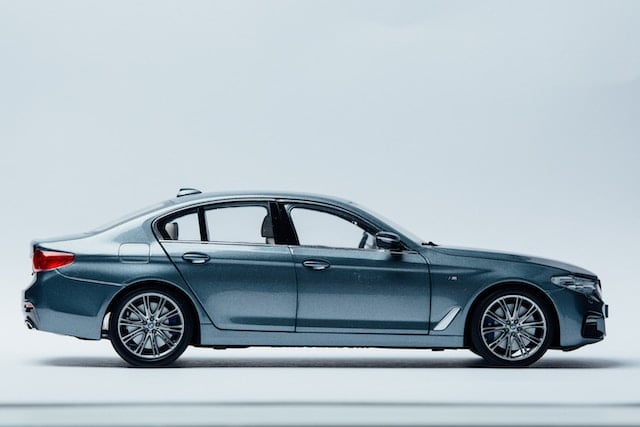
Semantic segmentation with U-Net

Deep Learning for Images with PyTorch

Michal Oleszak

Machine Learning Engineer

Semantic segmentation

  • No distinction between different instances of the same class
  • Useful for medical imaging or satellite image analysis
  • Popular architecture: U-Net
Deep Learning for Images with PyTorch

U-Net architecture

U-Net architecture diagram

Encoder:

  • Convolutional and pooling layers
  • Downsampling: reduces spatial dimensions while increasing depth
Deep Learning for Images with PyTorch

U-Net architecture

U-Net architecture diagram

Decoder:

  • Symmetric to the encoder
  • Upsamples feature maps with transposed convolutions
Deep Learning for Images with PyTorch

U-Net architecture

U-Net architecture diagram

Skip connections:

  • Links from the encoder to the decoder
  • Preserve details lost in downsampling
Deep Learning for Images with PyTorch

Transposed convolution

Transposed convolution diagram

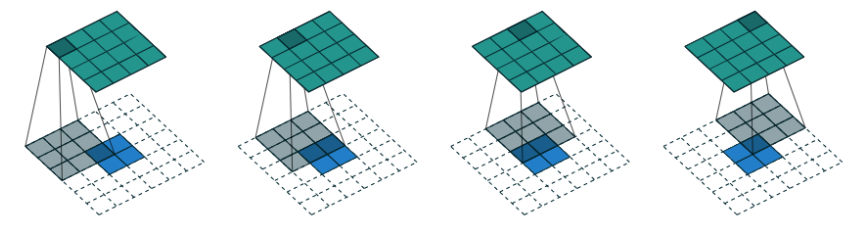
  • Upsamples feature maps in the decoder: increases height and width while reducing depth
  • Transposed convolution process:
    1. Insert zeros between or around the input feature map
    2. Perform a regular convolution on the zero-padded input
Deep Learning for Images with PyTorch

Transposed convolution in PyTorch

import torch.nn as nn

upsample = nn.ConvTranspose2d(
    in_channels=in_channels,
    out_channels=out_channels,
    kernel_size=2,
    stride=2,
)
Deep Learning for Images with PyTorch

U-Net: layer definitions

class UNet(nn.Module):
    def __init__(self, in_channels, out_channels):
        super(UNet, self).__init__()


self.enc1 = self.conv_block(in_channels, 64) self.enc2 = self.conv_block(64, 128) self.enc3 = self.conv_block(128, 256) self.enc4 = self.conv_block(256, 512) self.pool = nn.MaxPool2d(kernel_size=2, stride=2)
self.upconv3 = nn.ConvTranspose2d(512, 256, kernel_size=2, stride=2) self.upconv2 = nn.ConvTranspose2d(256, 128, kernel_size=2, stride=2) self.upconv1 = nn.ConvTranspose2d(128, 64, kernel_size=2, stride=2)
self.dec1 = self.conv_block(512, 256) self.dec2 = self.conv_block(256, 128) self.dec3 = self.conv_block(128, 64) self.out = nn.Conv2d(64, out_channels, kernel_size=1)
  • Encoder:
    • Convolutional blocks
      def conv_block(self, in_channels, out_channels):
      return nn.Sequential(
        nn.Conv2d(in_channels, out_channels),
        nn.ReLU(inplace=True),
        nn.Conv2d(out_channels, out_channels),
        nn.ReLU(inplace=True)
      )
      
    • Pooling layer
  • Decoder:
    • Transposed convolutions
    • Convolutional blocks
Deep Learning for Images with PyTorch

U-Net: forward method

def forward(self, x):

x1 = self.enc1(x) x2 = self.enc2(self.pool(x1)) x3 = self.enc3(self.pool(x2)) x4 = self.enc4(self.pool(x3))
x = self.upconv3(x4)
x = torch.cat([x, x3], dim=1)
x = self.dec1(x)
x = self.upconv2(x) x = torch.cat([x, x2], dim=1) x = self.dec2(x) x = self.upconv1(x) x = torch.cat([x, x1], dim=1) x = self.dec3(x)
return self.out(x)
  • Pass input through encoder's convolutional blocks and pooling layers
  • Decoder and skip connections:
    • Pass encoded input through transpose convolution
    • Concatenate with corresponding encoder output
    • Pass through convolution block
    • Repeat for all decoder steps
  • Return output of the last decoder step
Deep Learning for Images with PyTorch

Running inference

model = UNet()
model.eval()


image = Image.open("car.jpg") transform = transforms.Compose([transforms.ToTensor()]) image_tensor = transform(image).unsqueeze(0)
with torch.no_grad(): prediction = model(image_tensor).squeeze(0)
plt.imshow(prediction[1, :, :]) plt.show()

Original car image

Semantic mask overlaid onto the car image

Deep Learning for Images with PyTorch

Let's practice!

Deep Learning for Images with PyTorch

Preparing Video For Download...