Header e sidebar

Creare dashboard con shinydashboard

Png Kee Seng

Researcher

L'header
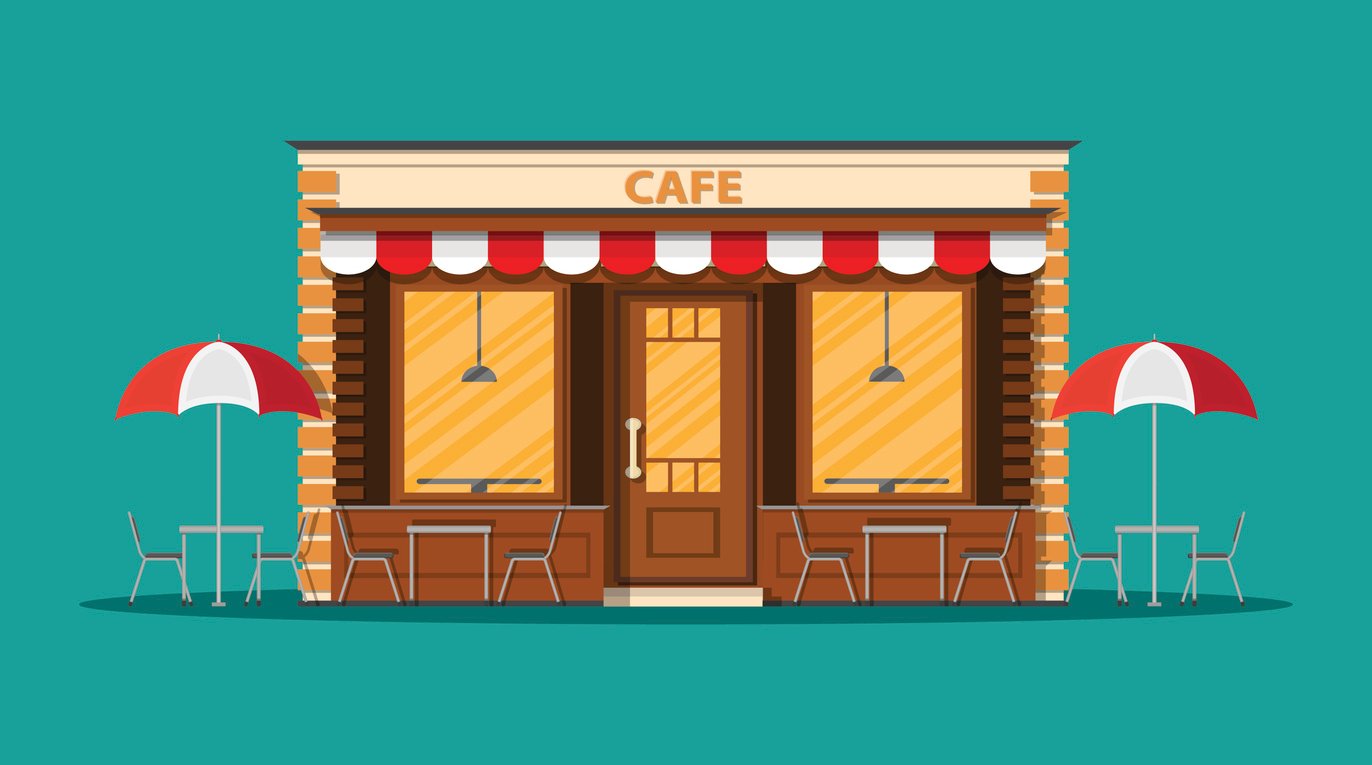
  • L'header è come l'insegna del ristorante
  • Può contenere il titolo del dashboard
  • Può contenere menu a discesa
    • Es.: messaggi, notifiche, attività

Ecco un esempio di semplice vetrina.

L'header è come l'insegna di un ristorante. Può includere elementi pratici o estetici. Ecco un esempio di front-end complesso.

1 Immagine di upklyak su Freepik
Creare dashboard con shinydashboard

Il titolo di shinydashboard

  • L'header è definito da dashboardHeader()
  • E se il titolo è troppo lungo?
    • Imposta l'argomento titleWidth
    • Predefinito: 230 pixel
header <- dashboardHeader(title = "Soccer tournament")
header <- dashboardHeader(title = "Analysis for global soccer tournament")
                            titleWidth = 400)
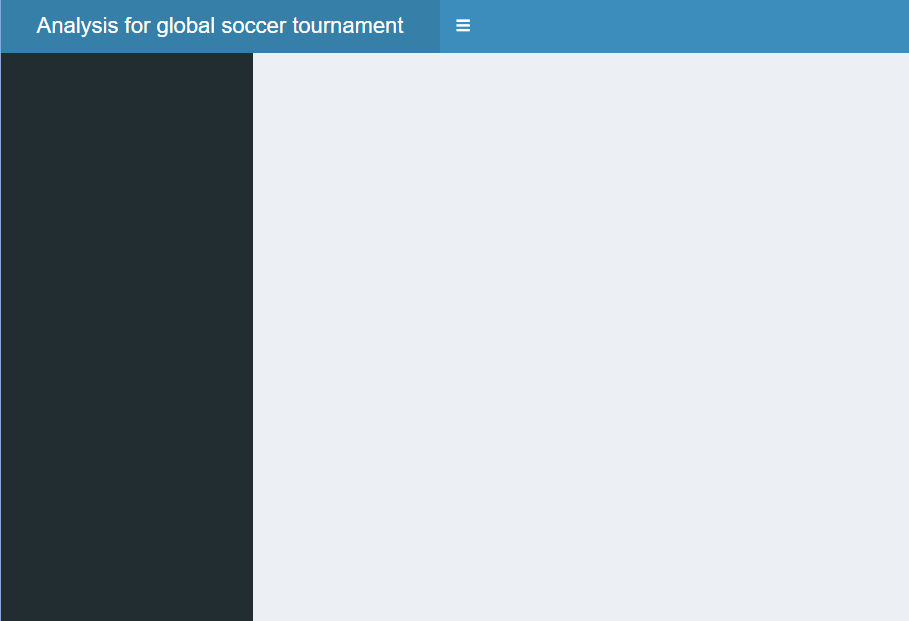
La larghezza dell'header può essere regolata per titoli lunghi.

Creare dashboard con shinydashboard

Aggiungere un menu a discesa con un messaggio

  • Puoi aggiungere menu a discesa all'header
  • Tre tipi di menu a discesa
    • Messaggi
    • Notifiche
    • Attività
  • Aggiungi dropdownMenu() di type "messages"
    • Aggiungi un messageItem()
    • Icona predefinita: icon("user")
    • Puoi anche impostare time
header <- dashboardHeader(
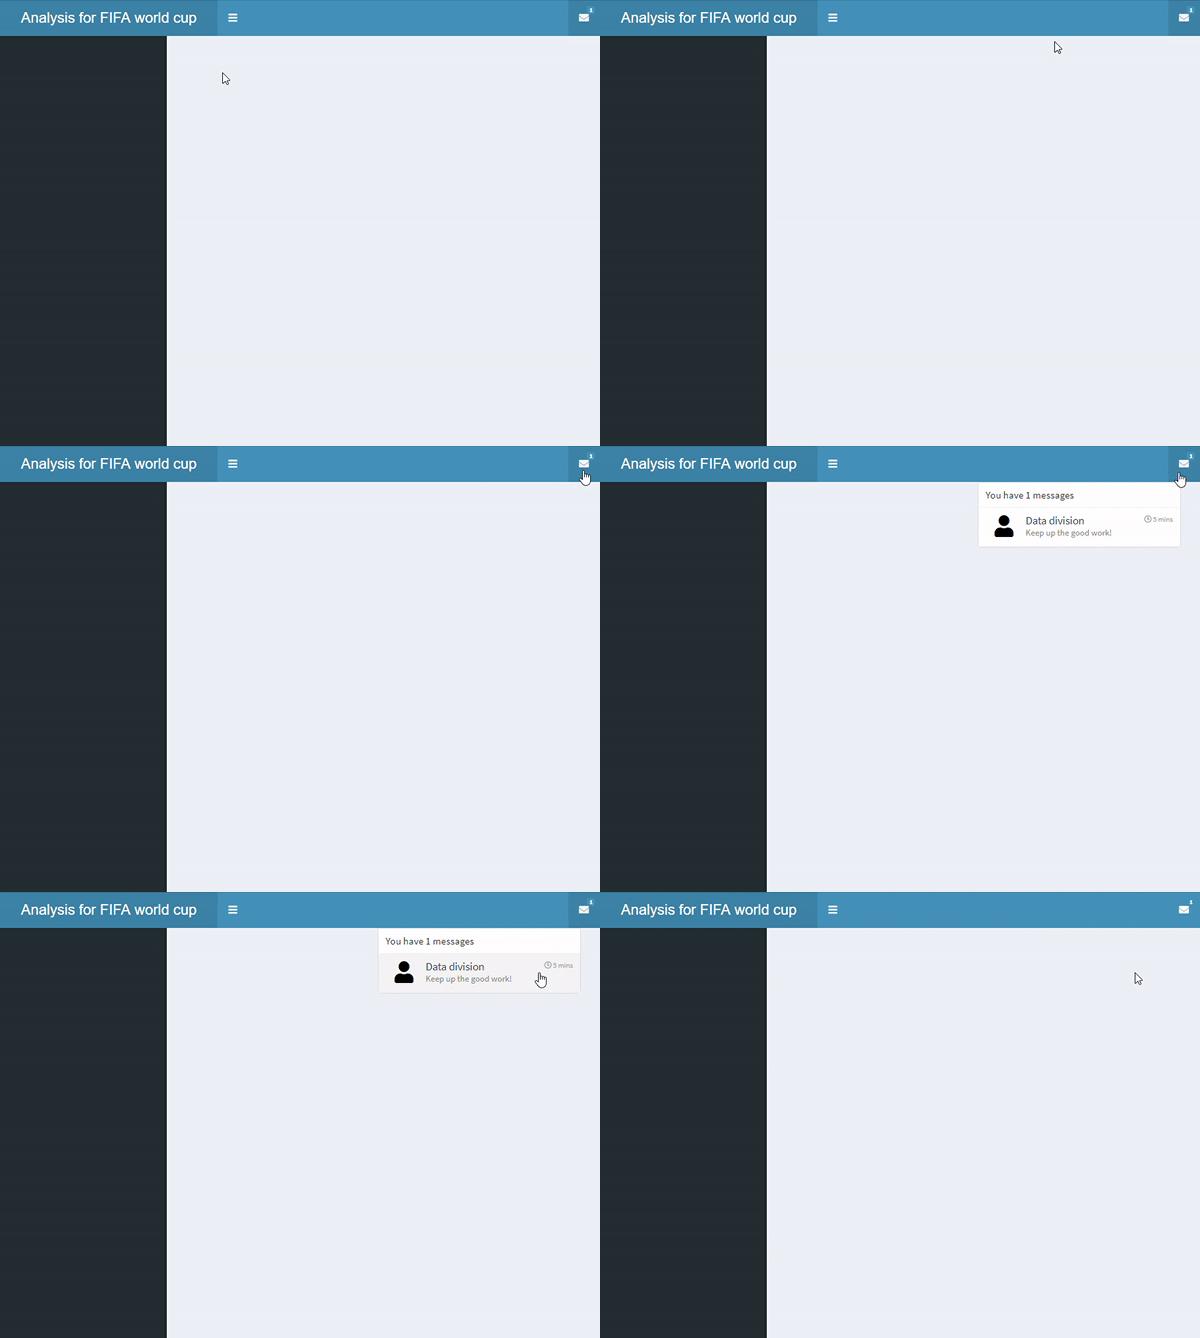
  title = "Analysis for FIFA world cup",
  titleWidth = 300,
  dropdownMenu(type = "messages",

messageItem("Data division", "Keep up the good work!",
time = "5 mins"
)))

Menu a discesa con un messaggio.

Creare dashboard con shinydashboard

Aggiungere un menu a discesa con più messaggi

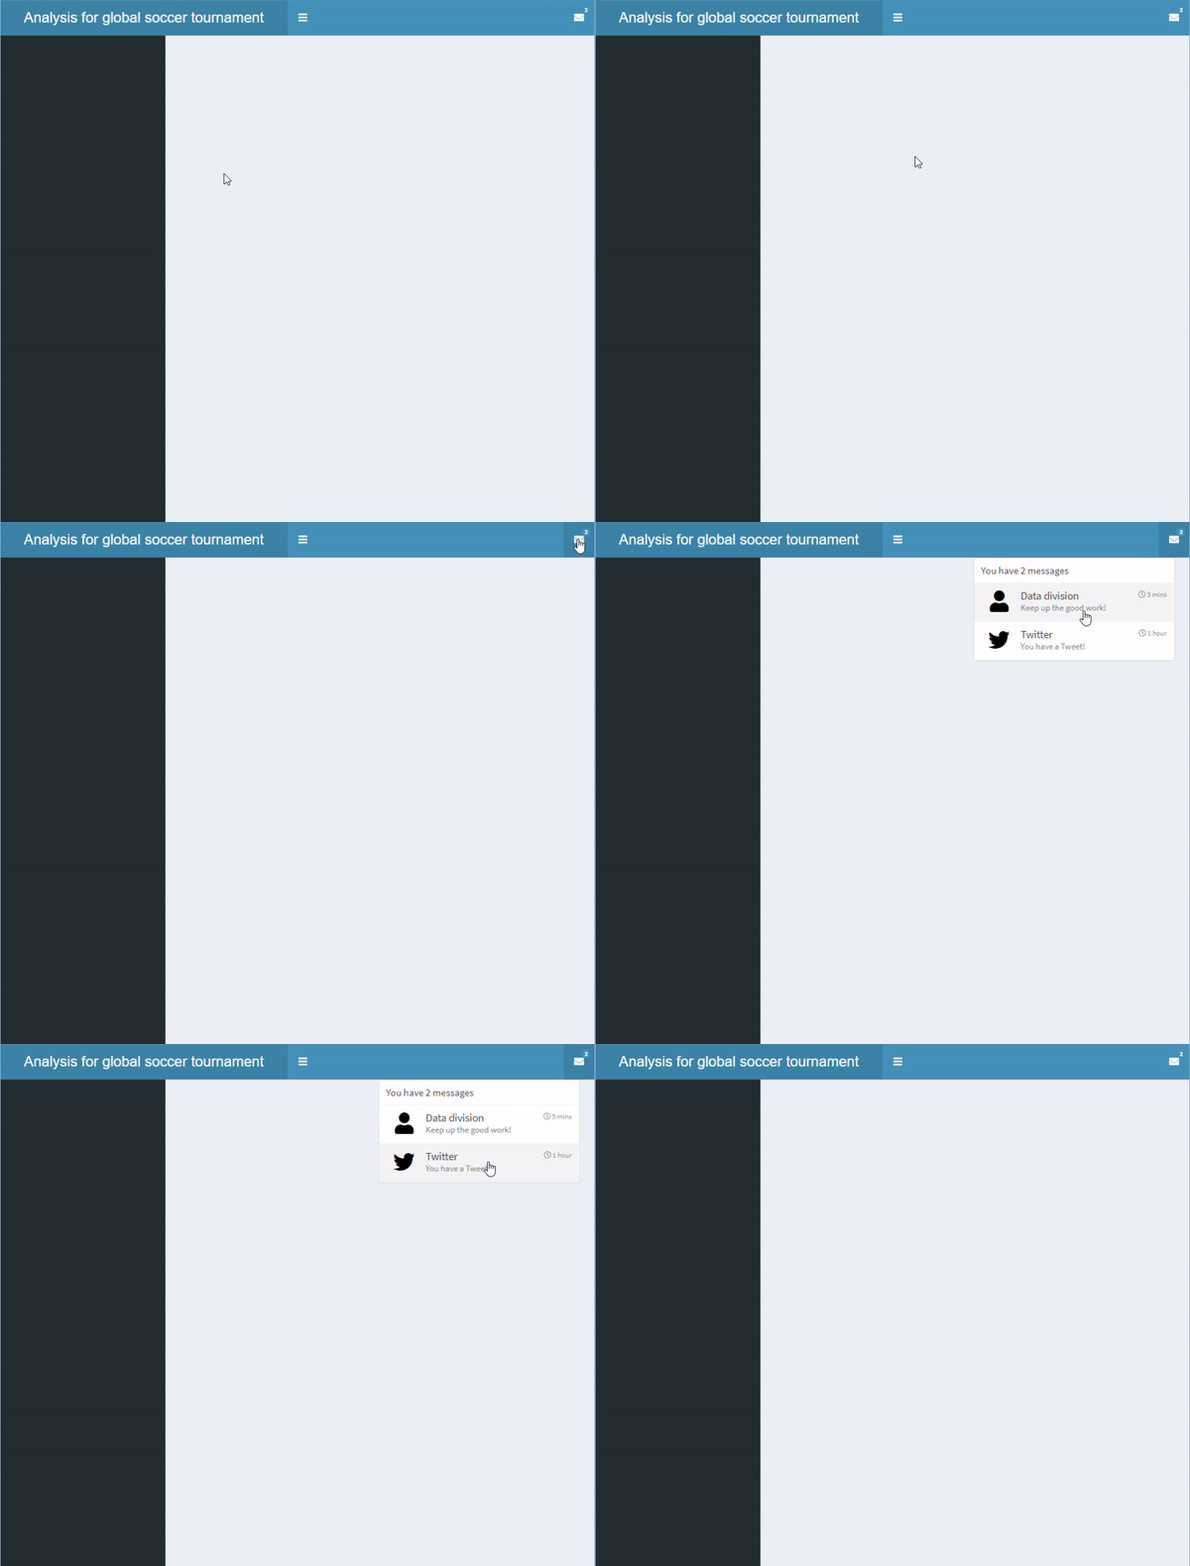
  • Aggiungi un altro messageItem() dentro dropdownMenu() chiamato "Twitter"

Un menu a discesa con due messaggi.

header <- dashboardHeader(
  title = "Analysis for global soccer tournament",
  titleWidth = 400,
  dropdownMenu(type = "messages",
    messageItem("Data division",
      "Keep up the good work!",
      time = "5 mins"
    ),

messageItem("Twitter", "You have a Tweet!", time = "1 hour", icon=icon("twitter") ) ) )
Creare dashboard con shinydashboard

Aggiungere un menu a discesa con più item
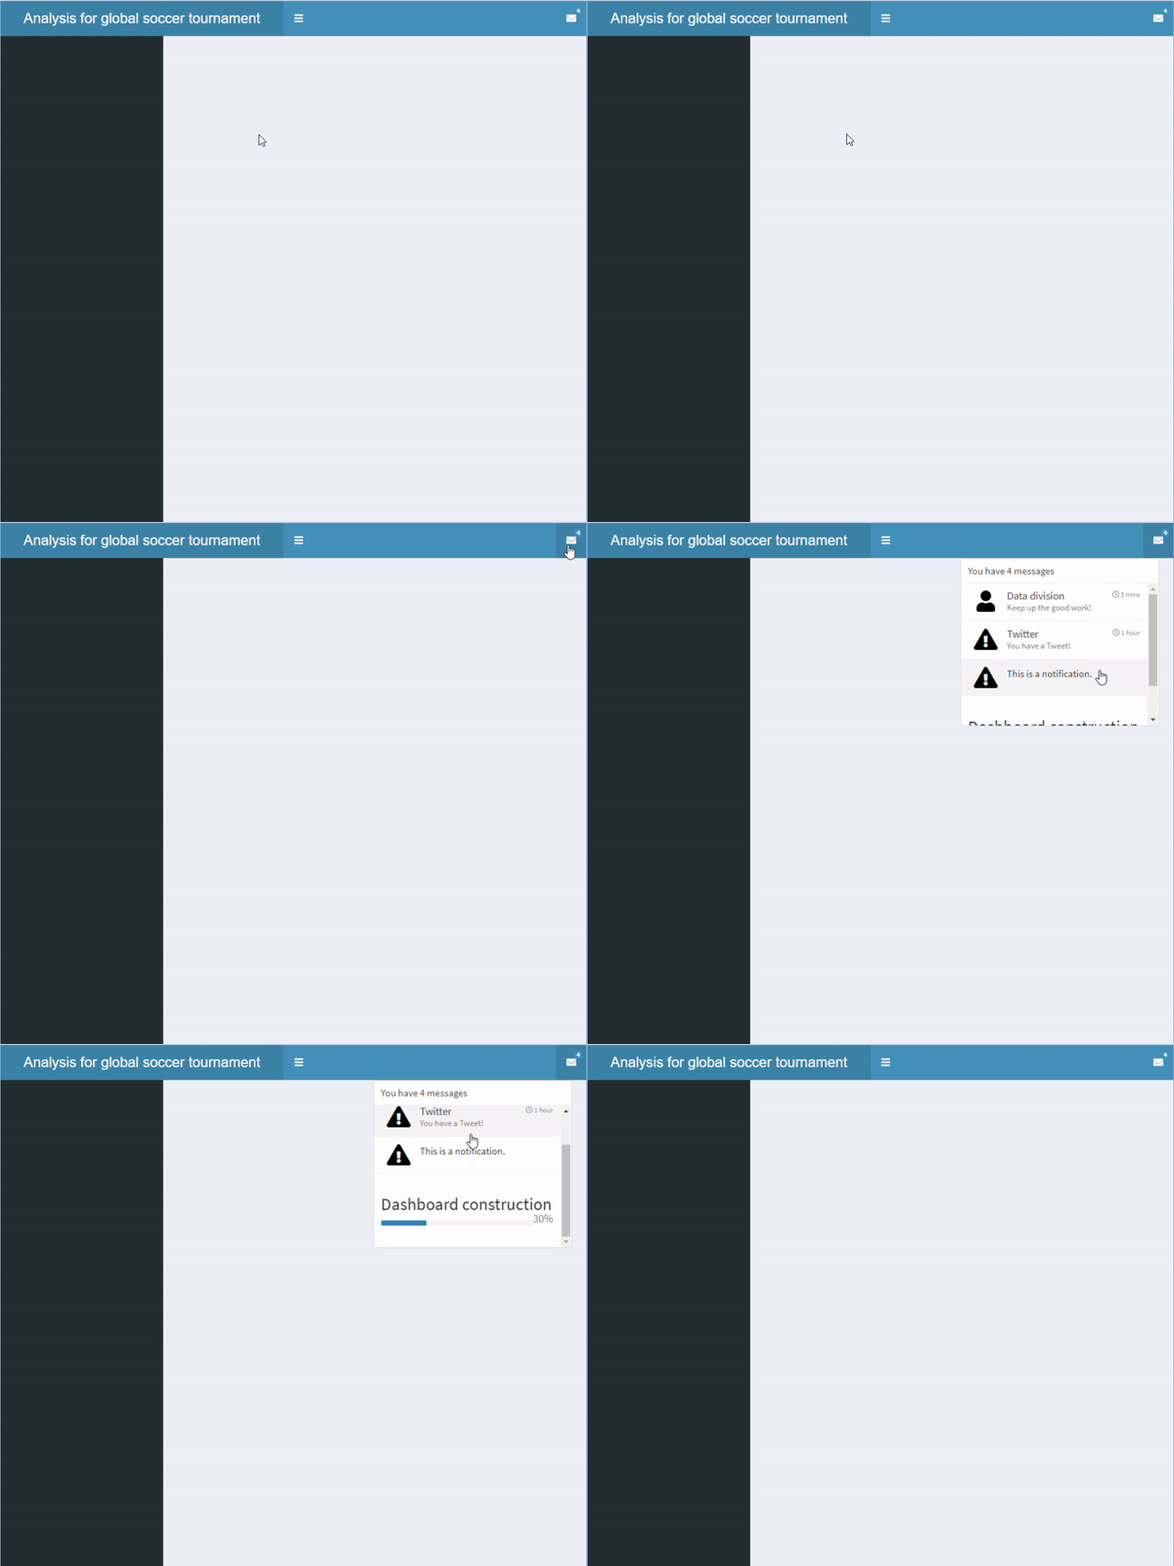
  • Possiamo aggiungere anche altri tipi di item
    • messageItem()
    • notificationItem()
    • taskItem()
  • Aspetto diverso per ciascuno
    • messageItem(): icona predefinita icon("user")
    • notificationItem(): icona predefinita icon("exclamation-triangle")
    • taskItem(): include una barra di avanzamento
header <- dashboardHeader(
  title = "Analysis for global soccer tournament",
  titleWidth = 400,
  dropdownMenu(type = "messages",

messageItem("Data division", "Keep up the good work!", time = "5 mins"), messageItem("Twitter", "You have a Tweet!", time = "1 hour", icon=icon("twitter")),
notificationItem("This is a notification." ),
taskItem(value = 30, color = "blue", "Dashboard construction") ))
Creare dashboard con shinydashboard

Aggiungere un menu a discesa con più item

Un menu a discesa con più elementi

Creare dashboard con shinydashboard

Aggiungere più menu a discesa

  • Possiamo anche aggiungere un altro menu a discesa
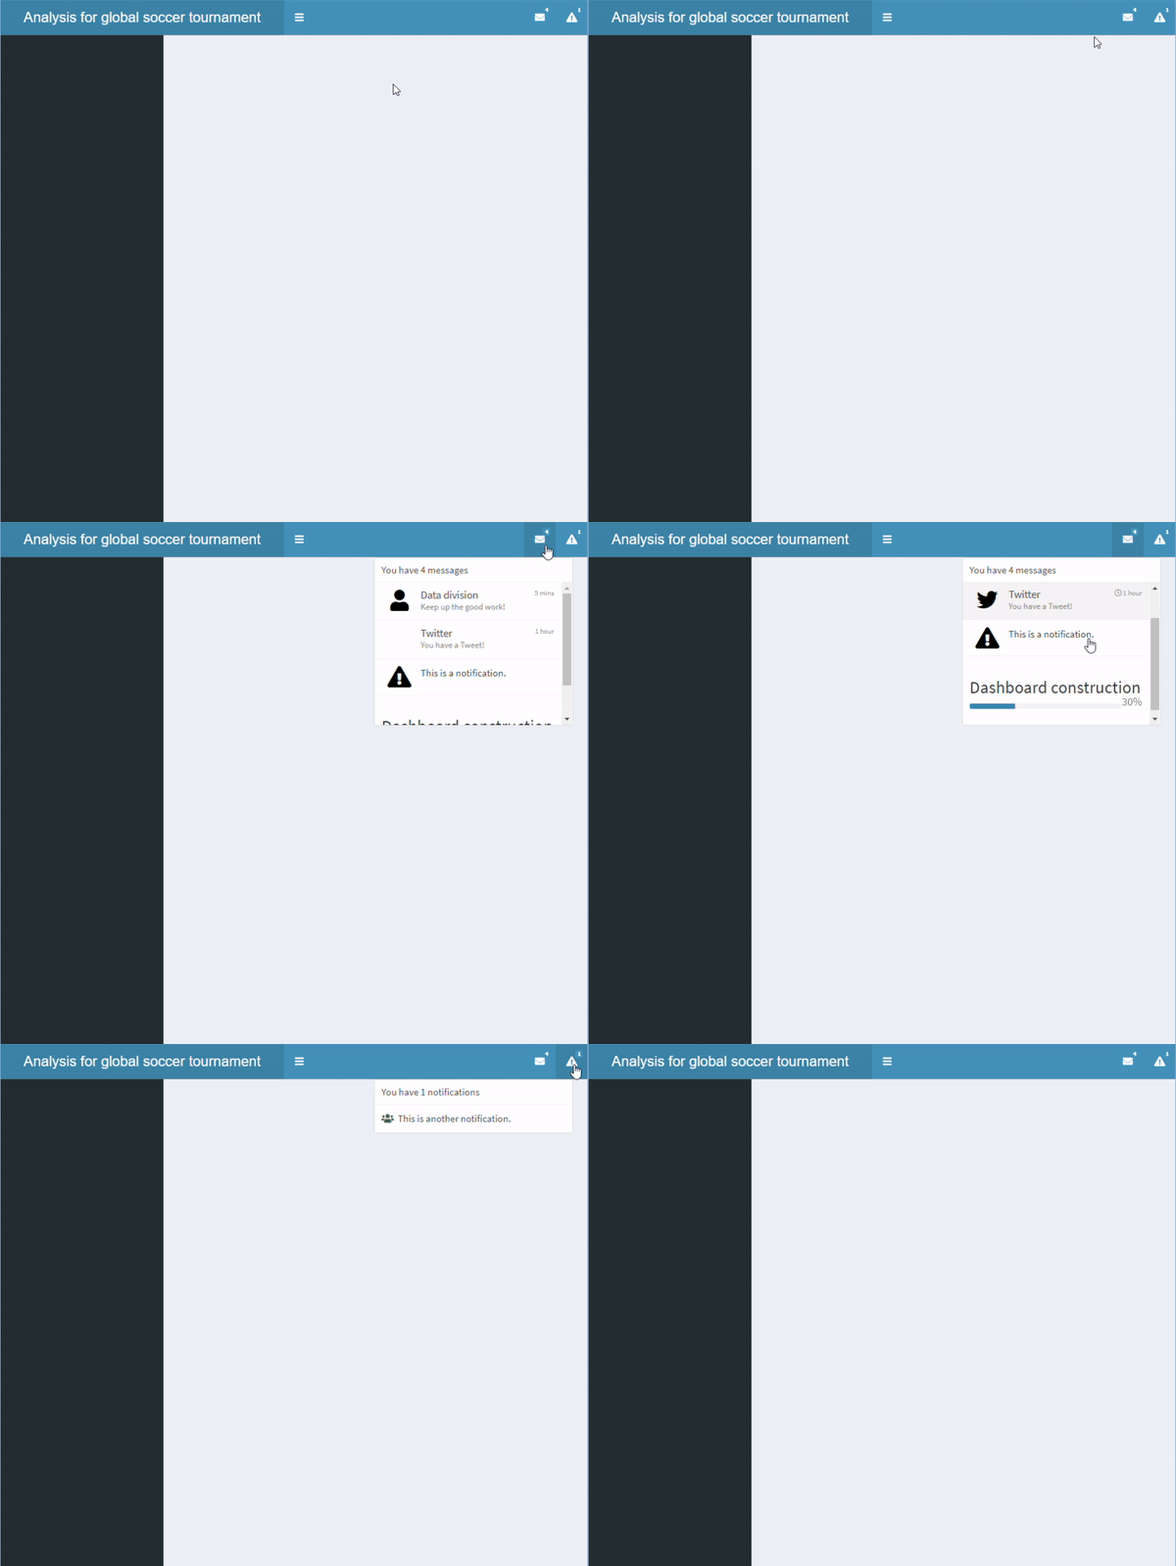
Un header con più di un menu a discesa.

header <- dashboardHeader(
  title = "Analysis for global soccer tournament",
  titleWidth = 400,

dropdownMenu(type = "messages", messageItem("Data division", "Keep up the good work!", time = "5 mins"), messageItem("Twitter", "You have a Tweet!", time = "1 hour", icon=icon("twitter")), notificationItem("This is a notification."), taskItem(value = 30, color = "blue", "Dashboard construction")),
dropdownMenu(type = "notifications", notificationItem(icon = icon("users"), "This is another notification." )))
Creare dashboard con shinydashboard

La sidebar

  • La sidebar è definita da dashboardSidebar()
  • La larghezza si regola con width
  • sidebarMenu() permette di aggiungere più pagine in un shinydashboard
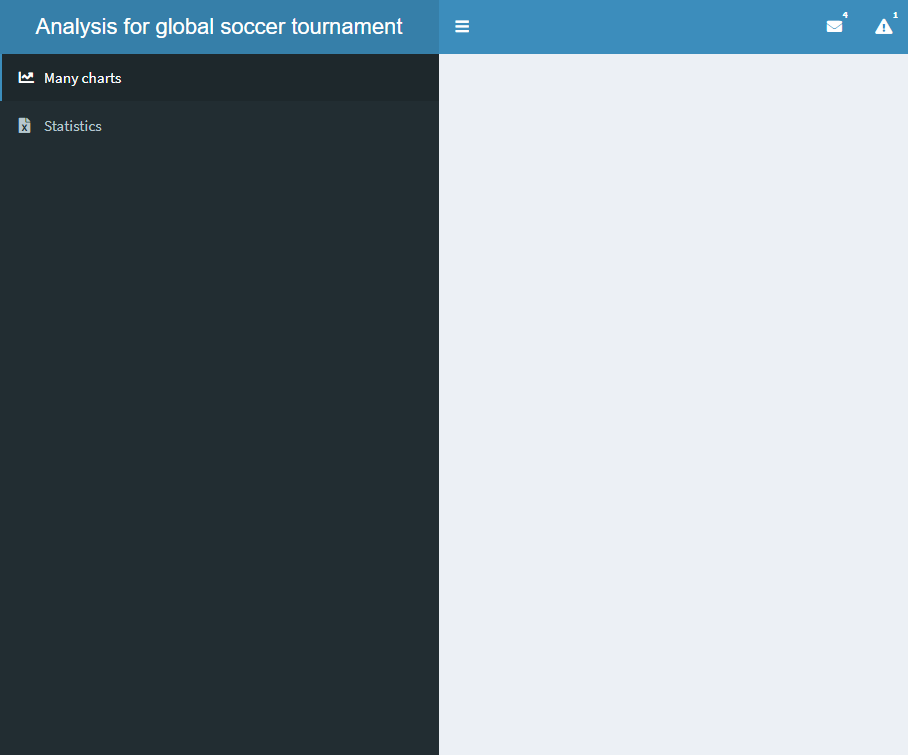
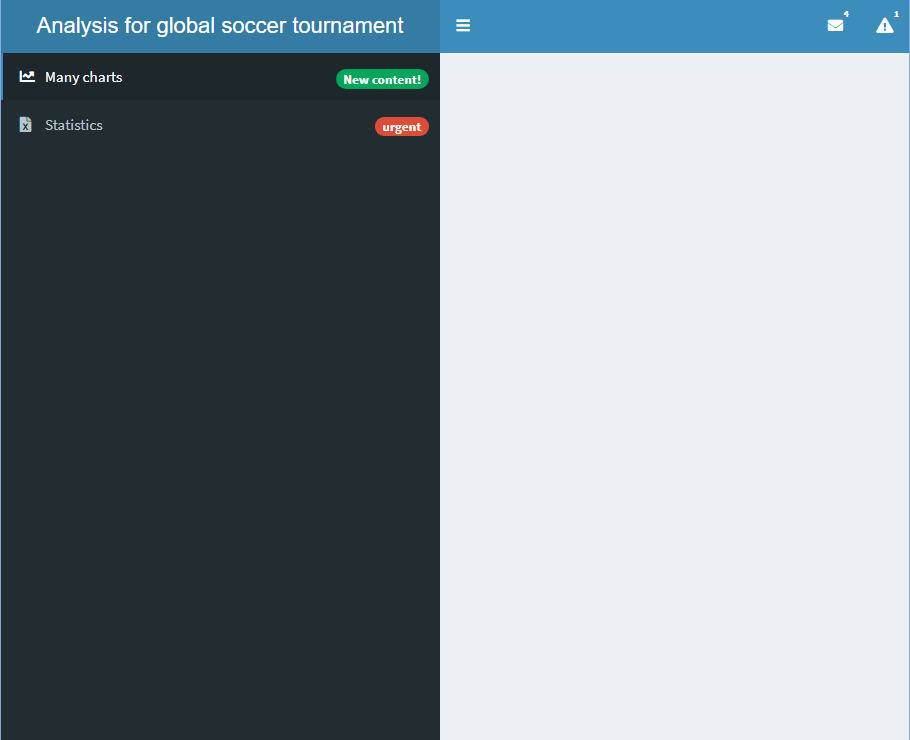
Una sidebar con due pulsanti

sidebar <- dashboardSidebar()
sidebar <- dashboardSidebar(width=400)
sidebar <- dashboardSidebar(width=400,
  sidebarMenu(
    id = "pages",
    menuItem("Many charts", tabName = "charts", 
        icon = icon("chart-line")),
    menuItem("Statistics", icon = icon("file-excel"), 
        tabName = "stats")
  )
)
sidebar <- dashboardSidebar(disable = TRUE)
Creare dashboard con shinydashboard

Aggiungere un badge

  • Si può aggiungere anche un badge
    • Imposta badgeLabel e badgeColor

Una sidebar con badge aggiuntivi

sidebar <- dashboardSidebar(width=400,
  sidebarMenu(
    id = "pages",
    menuItem("Many charts", tabName = "charts", 
             icon = icon("chart-line"),

badgeLabel = "New content!", badgeColor = "green"),
menuItem("Statistics", icon = icon("file-excel"), tabName = "stats",
badgeLabel = "urgent", badgeColor = "red")
) )
Creare dashboard con shinydashboard

Aggiungere sottoschede

  • Aggiungi sottoschede con menuSubItem()
  • Nota: non puoi aggiungere badge a una scheda con sottoschede
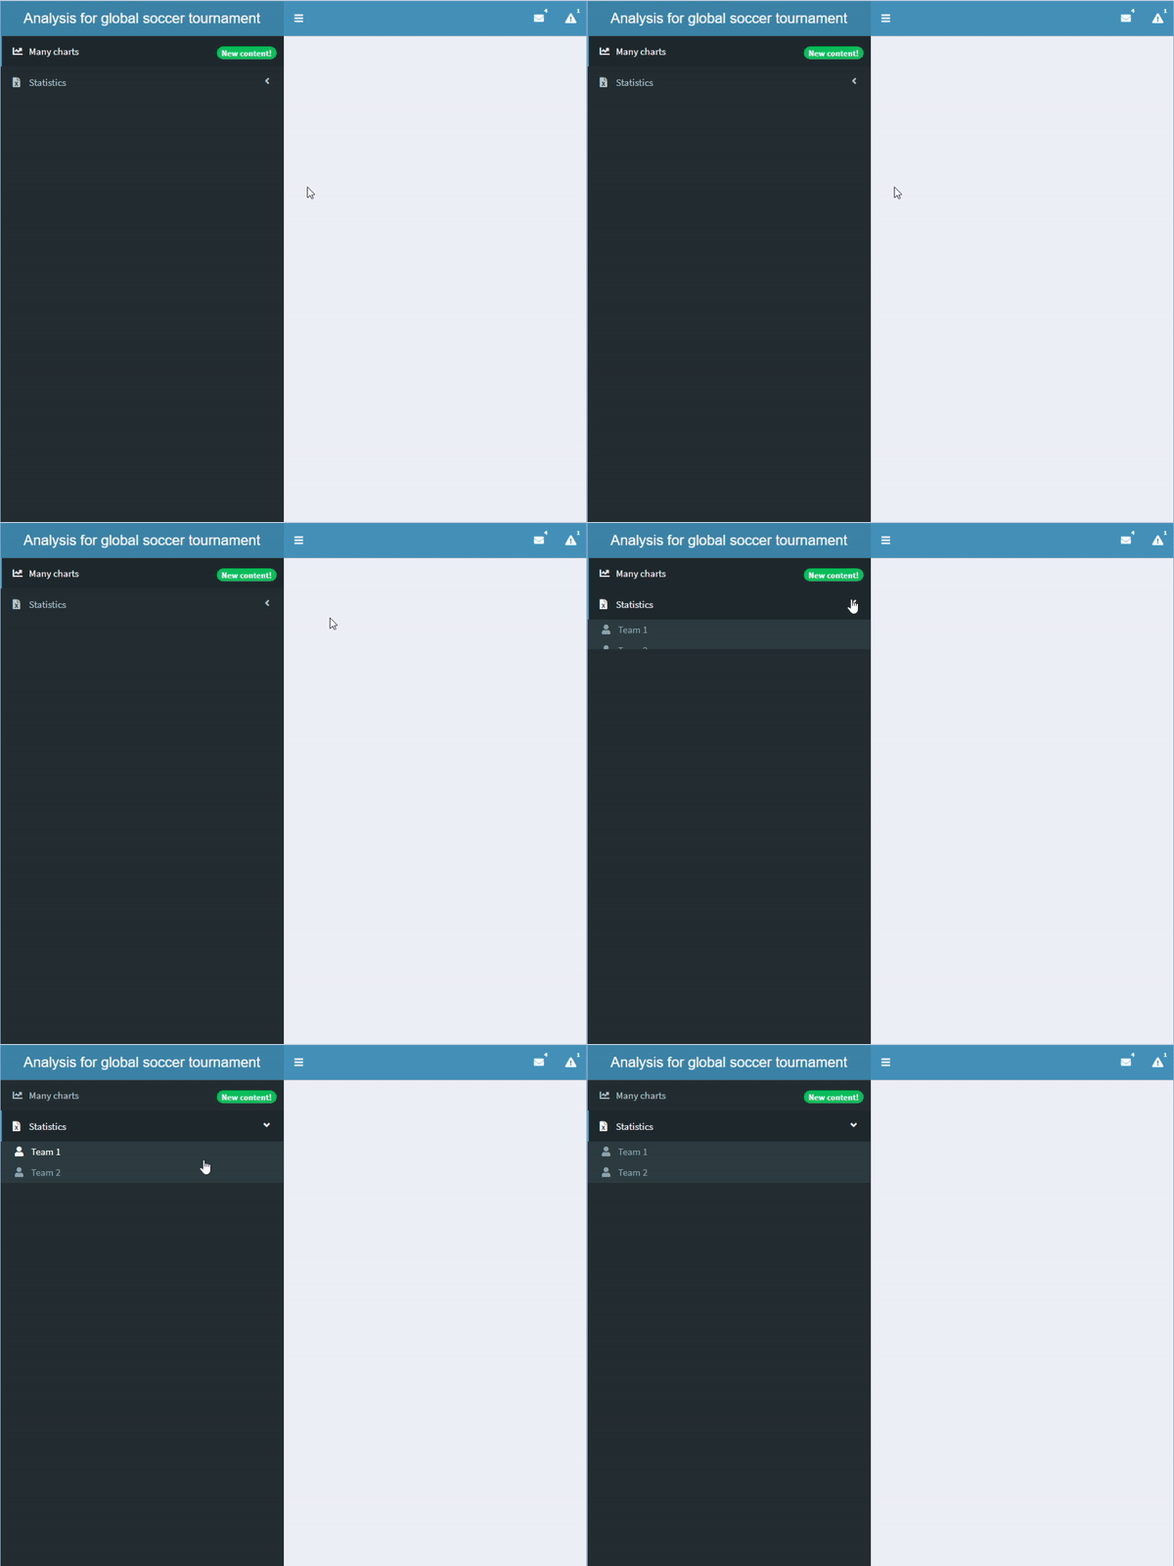
Una sidebar con sottoschede

sidebar <- dashboardSidebar(width=400,
  sidebarMenu(
    id = "pages",
    menuItem("Many charts", tabName = "charts", 
             icon = icon("chart-line"),
             badgeLabel = "New content!", 
             badgeColor = "green"),
    menuItem("Statistics", icon = icon("file-excel"), 
            tabName = "stats", 
            menuSubItem("Team 1", tabName = "team1", 
                     icon=icon("user")),
            menuSubItem("Team 2", tabName = "team2", 
                     icon=icon("user")))
  )
)
Creare dashboard con shinydashboard

Aggiungere input e output nella sidebar

  • Puoi aggiungere input e output nella sidebar
  • Devi anche definirli nel server

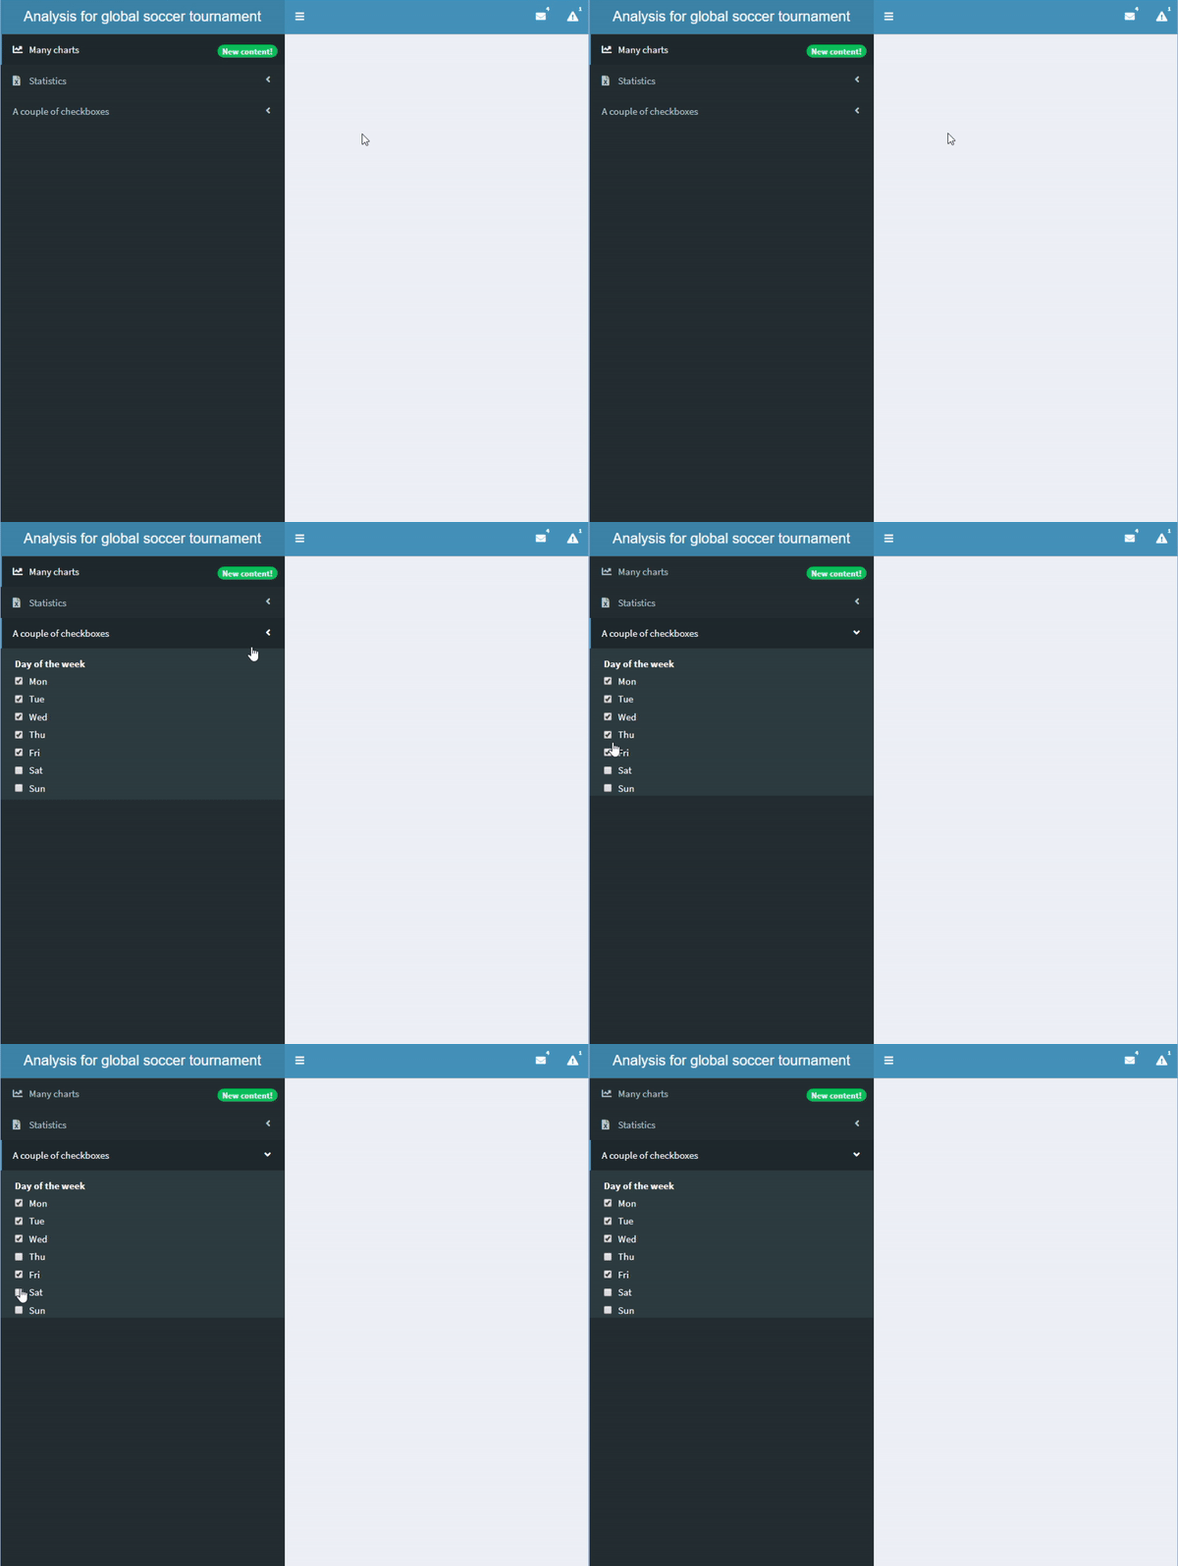
Una sidebar con checkboxGroupInput().

sidebar <- dashboardSidebar(width=400,
  sidebarMenu(
    id = "pages",
    menuItem("Many charts", tabName = "charts", 
             icon = icon("chart-line"),
             badgeLabel = "New content!", 
             badgeColor = "green"),
    menuItem("Statistics", icon = icon("file-excel"), 
            tabName = "stats", 
            menuSubItem("Team 1", tabName = "team1", 
            icon=icon("user")),
            menuSubItem("Team 2", tabName = "team2", 
            icon=icon("user"))),

menuItem("A couple of checkboxes", checkboxGroupInput("checkboxes", "Day of the week", choices = c("Mon","Tue","Wed","Thu","Fri","Sat","Sun"), selected = c("Mon","Tue","Wed","Thu","Fri"))) ) )
Creare dashboard con shinydashboard

Ayo berlatih!

Creare dashboard con shinydashboard

Preparing Video For Download...