Phần đầu trang và thanh bên

Xây dựng Dashboard với shinydashboard

Png Kee Seng

Researcher

Phần đầu trang

  • Phần đầu trang giống như biển hiệu nhà hàng
  • Có thể chứa tiêu đề bảng điều khiển
  • Có thể có menu thả xuống
    • Ví dụ: tin nhắn, thông báo, tác vụ

Đây là ví dụ về một cửa hàng đơn giản.

Phần đầu trang giống biển hiệu nhà hàng. Nó có thể chứa các yếu tố thực tiễn hoặc thẩm mỹ khác. Đây là ví dụ về một mặt tiền phức tạp.

1 Image by upklyak on Freepik
Xây dựng Dashboard với shinydashboard

Tiêu đề shinydashboard

  • Phần đầu trang được định nghĩa bằng dashboardHeader()
  • Nếu tiêu đề quá dài thì sao?
    • Thiết lập tham số titleWidth
    • Mặc định là 230 pixel
header <- dashboardHeader(title = "Soccer tournament")
header <- dashboardHeader(title = "Analysis for global soccer tournament")
                            titleWidth = 400)
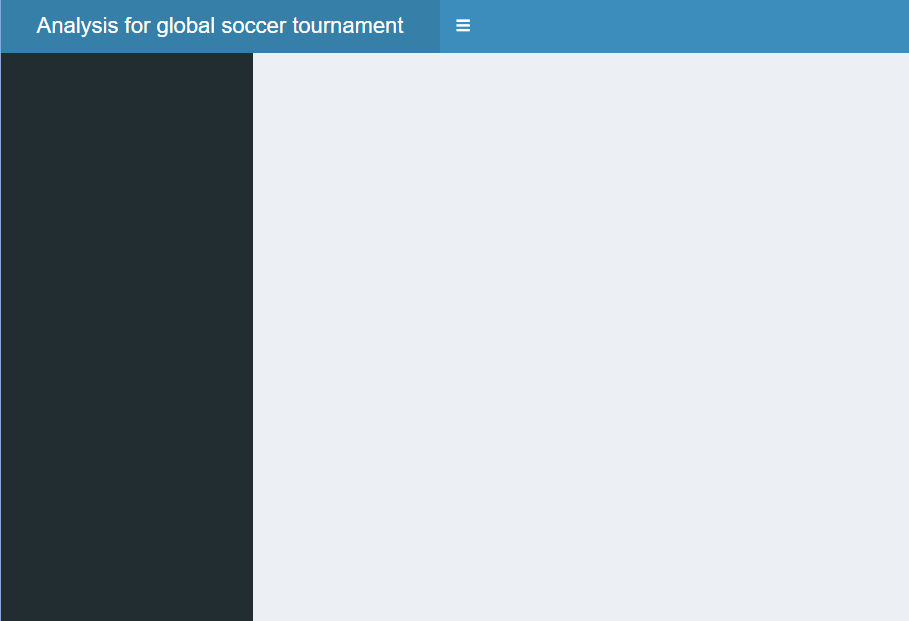
Có thể điều chỉnh độ rộng đầu trang để chứa tiêu đề dài.

Xây dựng Dashboard với shinydashboard

Thêm menu thả xuống với một tin nhắn

  • Có thể thêm menu thả xuống vào đầu trang
  • Ba loại menu thả xuống
    • Tin nhắn
    • Thông báo
    • Tác vụ
  • Thêm dropdownMenu() với type "messages"
    • Thêm một messageItem()
    • Biểu tượng mặc định là icon("user")
    • Cũng có thể đặt time
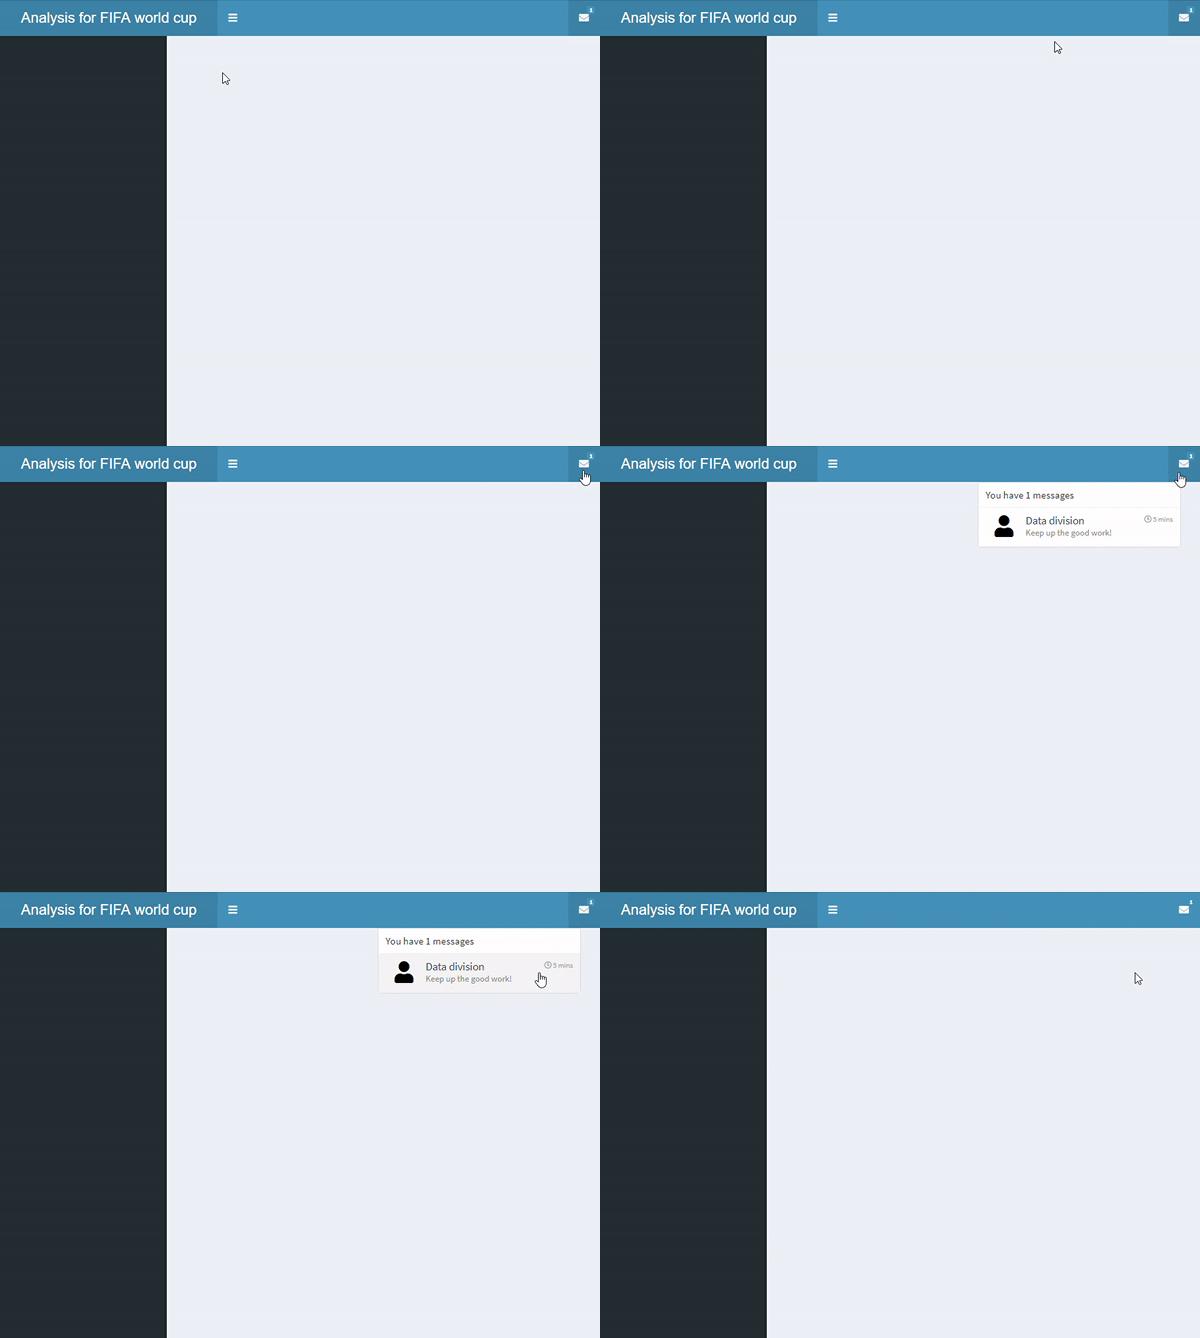
header <- dashboardHeader(
  title = "Analysis for FIFA world cup",
  titleWidth = 300,
  dropdownMenu(type = "messages",

messageItem("Data division", "Keep up the good work!",
time = "5 mins"
)))

Menu thả xuống với một mục tin nhắn.

Xây dựng Dashboard với shinydashboard

Thêm menu thả xuống với nhiều tin nhắn

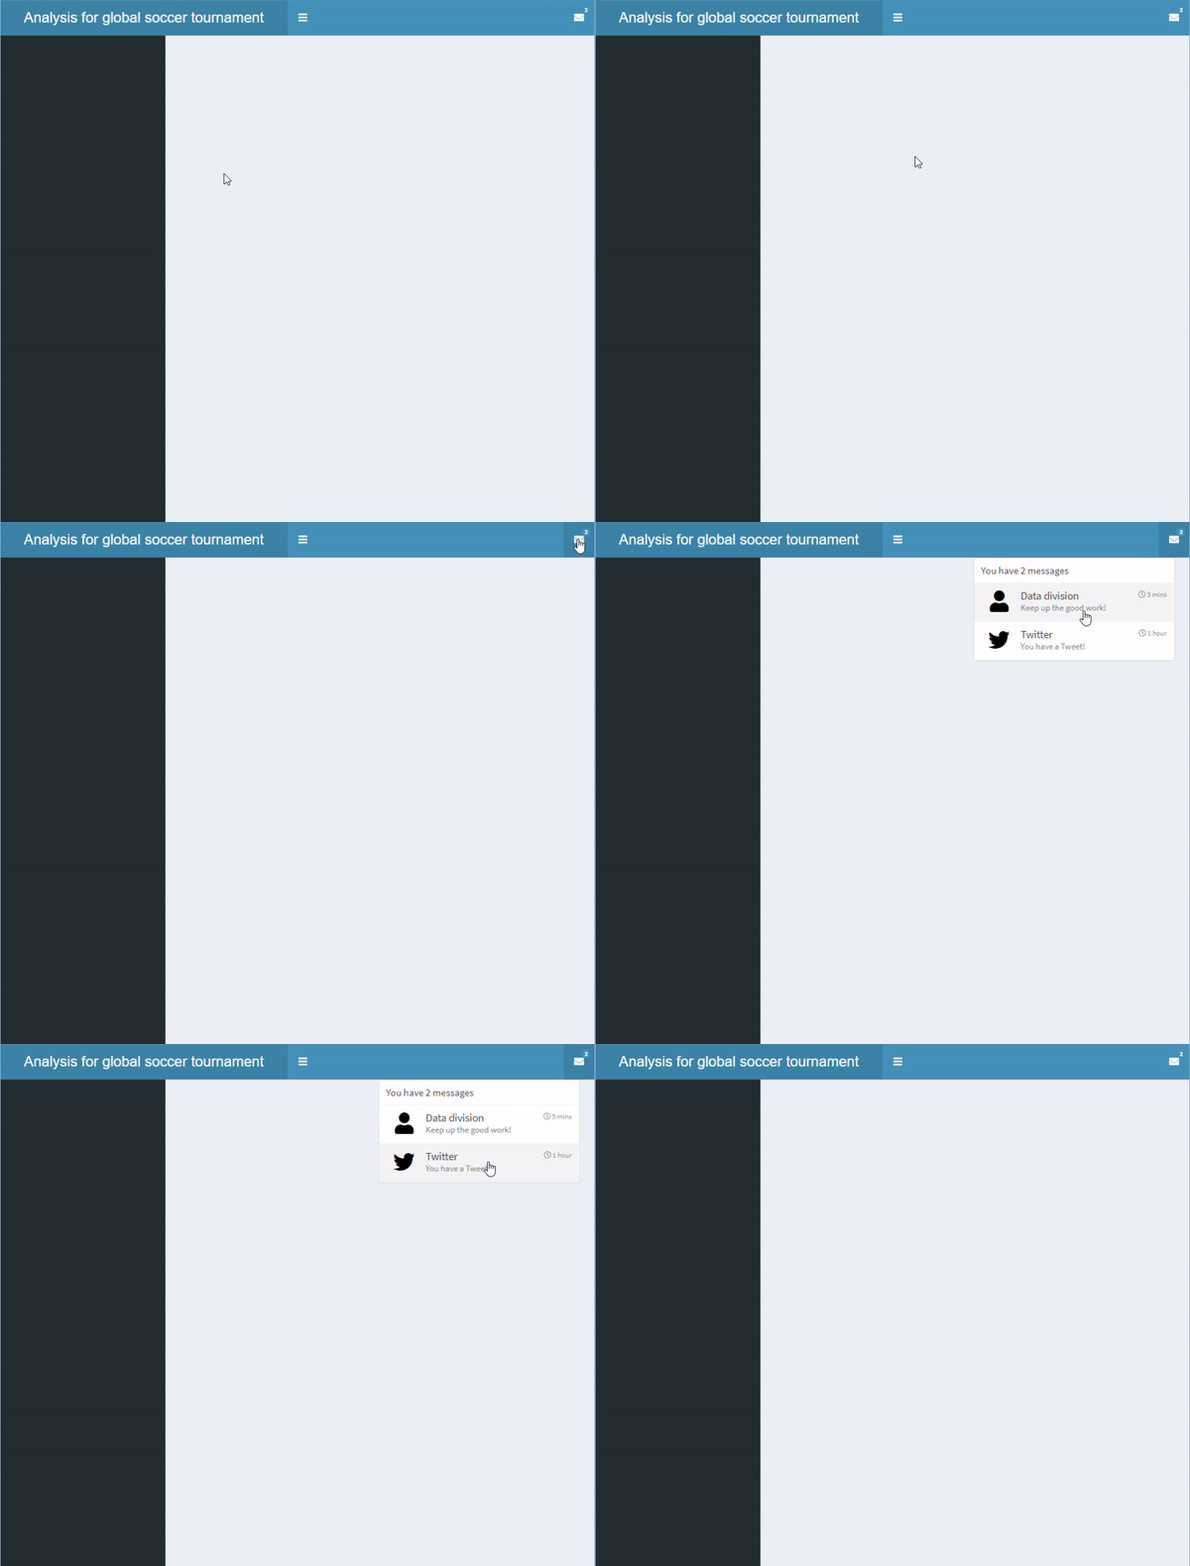
  • Thêm một messageItem() nữa trong dropdownMenu() tên "Twitter"

Một menu thả xuống với hai mục tin nhắn.

header <- dashboardHeader(
  title = "Analysis for global soccer tournament",
  titleWidth = 400,
  dropdownMenu(type = "messages",
    messageItem("Data division",
      "Keep up the good work!",
      time = "5 mins"
    ),

messageItem("Twitter", "You have a Tweet!", time = "1 hour", icon=icon("twitter") ) ) )
Xây dựng Dashboard với shinydashboard

Thêm menu thả xuống với nhiều mục

  • Ta cũng có thể thêm các loại mục khác
    • messageItem()
    • notificationItem()
    • taskItem()
  • Có khác biệt về giao diện
    • messageItem(): Biểu tượng mặc định là icon("user")
    • notificationItem(): Biểu tượng mặc định là icon("exclamation-triangle")
    • taskItem(): Có thanh tiến độ
header <- dashboardHeader(
  title = "Analysis for global soccer tournament",
  titleWidth = 400,
  dropdownMenu(type = "messages",

messageItem("Data division", "Keep up the good work!", time = "5 mins"), messageItem("Twitter", "You have a Tweet!", time = "1 hour", icon=icon("twitter")),
notificationItem("This is a notification." ),
taskItem(value = 30, color = "blue", "Dashboard construction") ))
Xây dựng Dashboard với shinydashboard

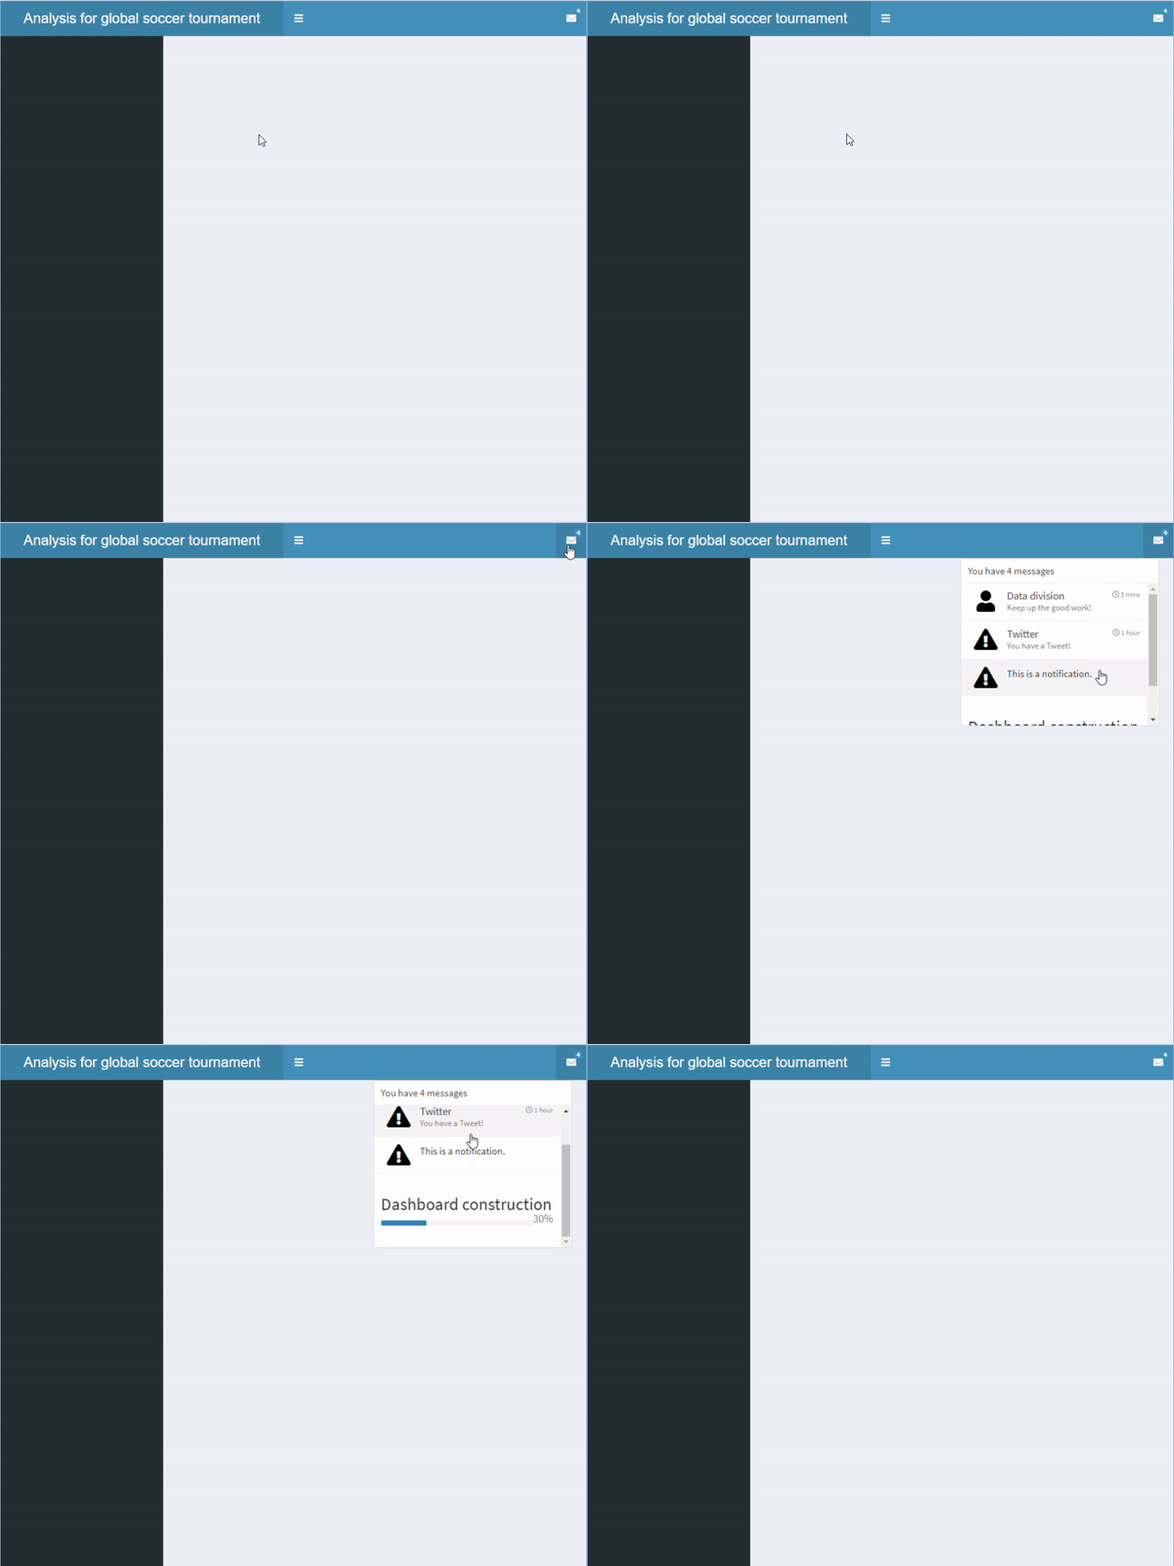
Thêm menu thả xuống với nhiều mục

Một menu thả xuống với nhiều mục

Xây dựng Dashboard với shinydashboard

Thêm nhiều menu thả xuống

  • Ta cũng có thể thêm một menu thả xuống khác
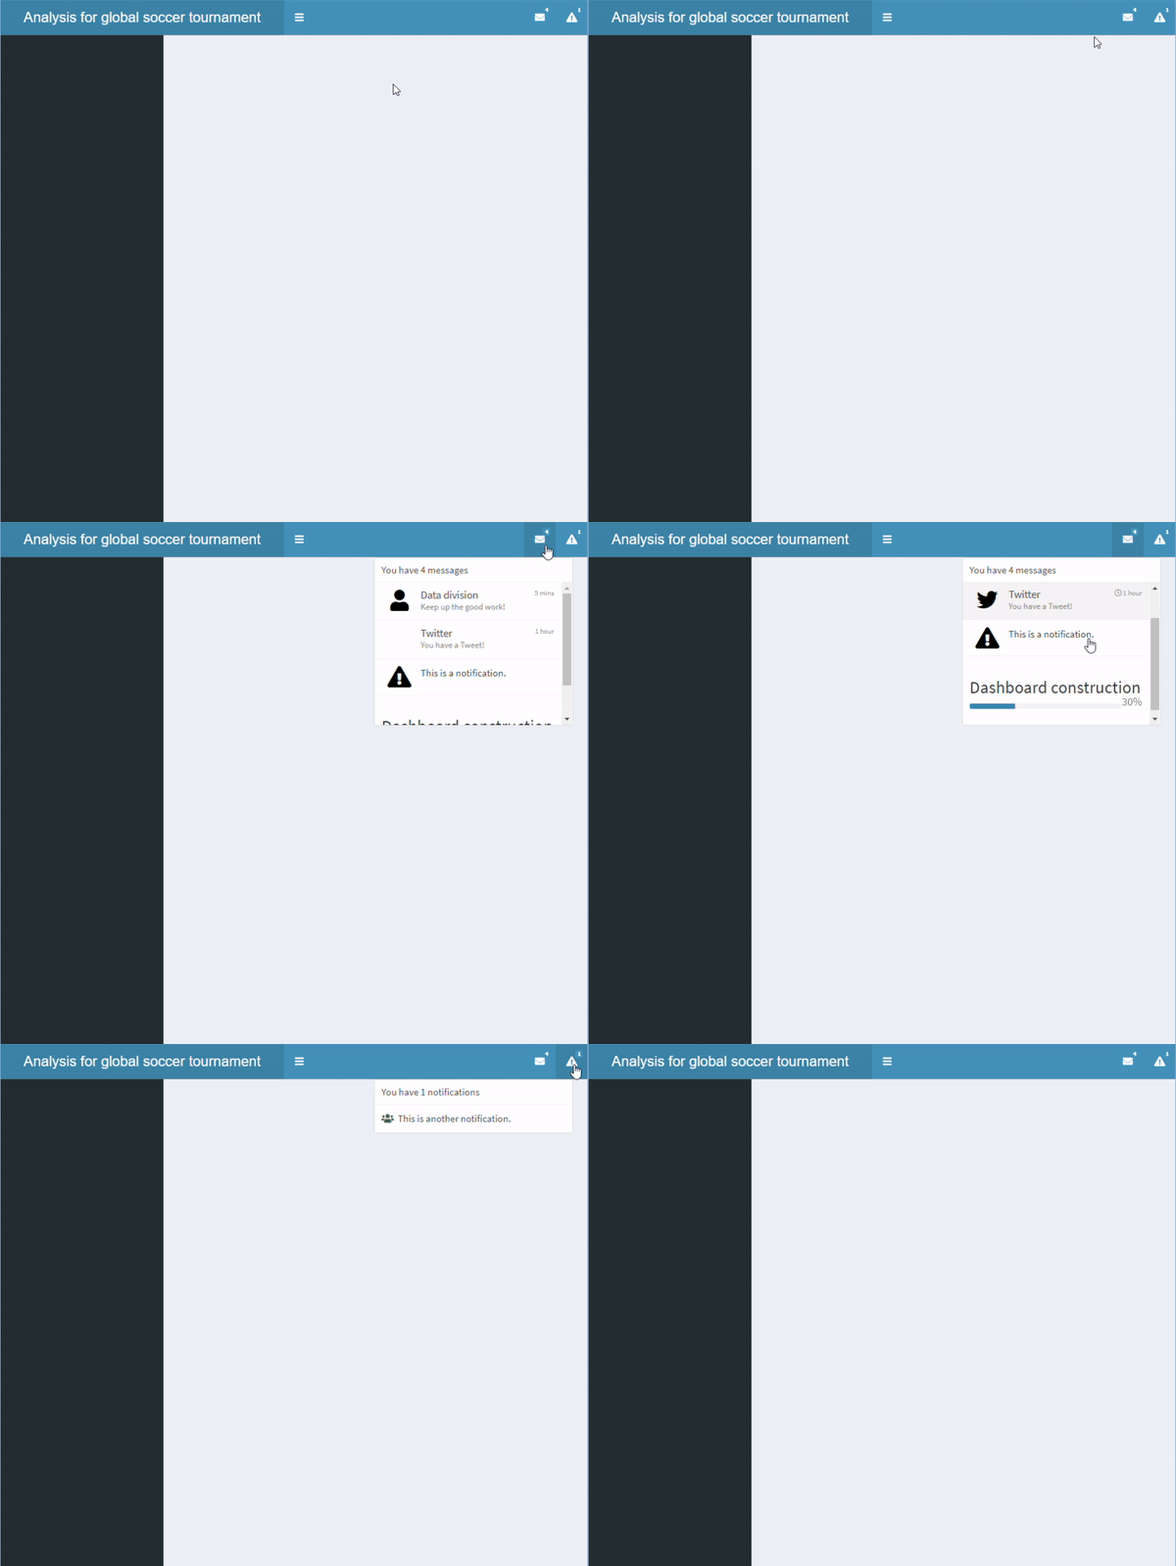
Một đầu trang với nhiều hơn một menu thả xuống.

header <- dashboardHeader(
  title = "Analysis for global soccer tournament",
  titleWidth = 400,

dropdownMenu(type = "messages", messageItem("Data division", "Keep up the good work!", time = "5 mins"), messageItem("Twitter", "You have a Tweet!", time = "1 hour", icon=icon("twitter")), notificationItem("This is a notification."), taskItem(value = 30, color = "blue", "Dashboard construction")),
dropdownMenu(type = "notifications", notificationItem(icon = icon("users"), "This is another notification." )))
Xây dựng Dashboard với shinydashboard

Thanh bên

  • Thanh bên được định nghĩa bằng dashboardSidebar()
  • Có thể điều chỉnh độ rộng bằng tham số width
  • sidebarMenu() cho phép đặt nhiều trang trong shinydashboard
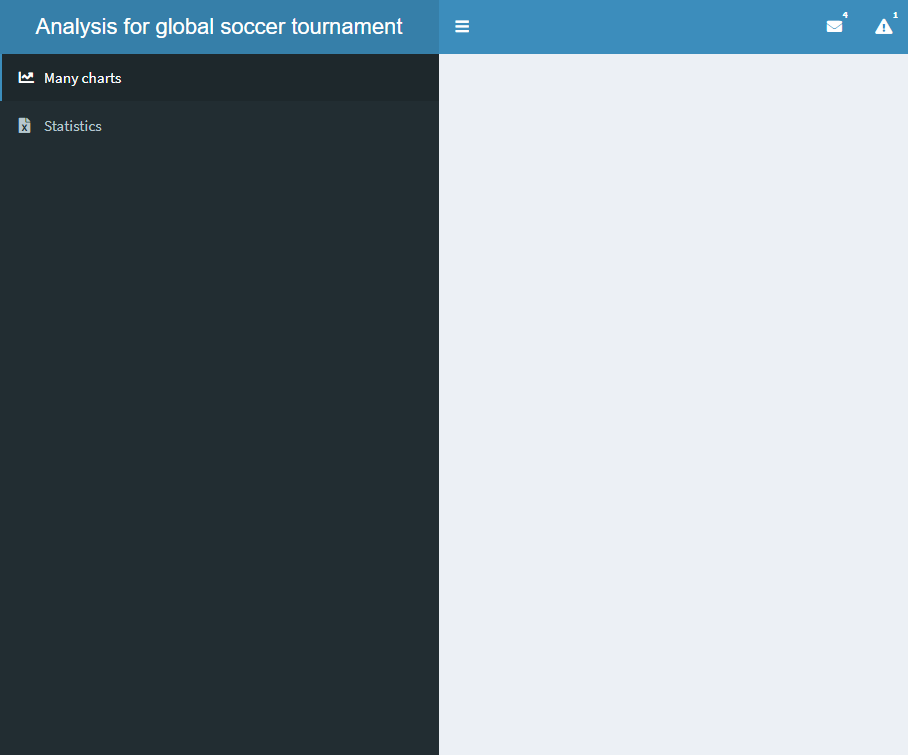
Thanh bên với hai nút

sidebar <- dashboardSidebar()
sidebar <- dashboardSidebar(width=400)
sidebar <- dashboardSidebar(width=400,
  sidebarMenu(
    id = "pages",
    menuItem("Many charts", tabName = "charts", 
        icon = icon("chart-line")),
    menuItem("Statistics", icon = icon("file-excel"), 
        tabName = "stats")
  )
)
sidebar <- dashboardSidebar(disable = TRUE)
Xây dựng Dashboard với shinydashboard

Thêm huy hiệu

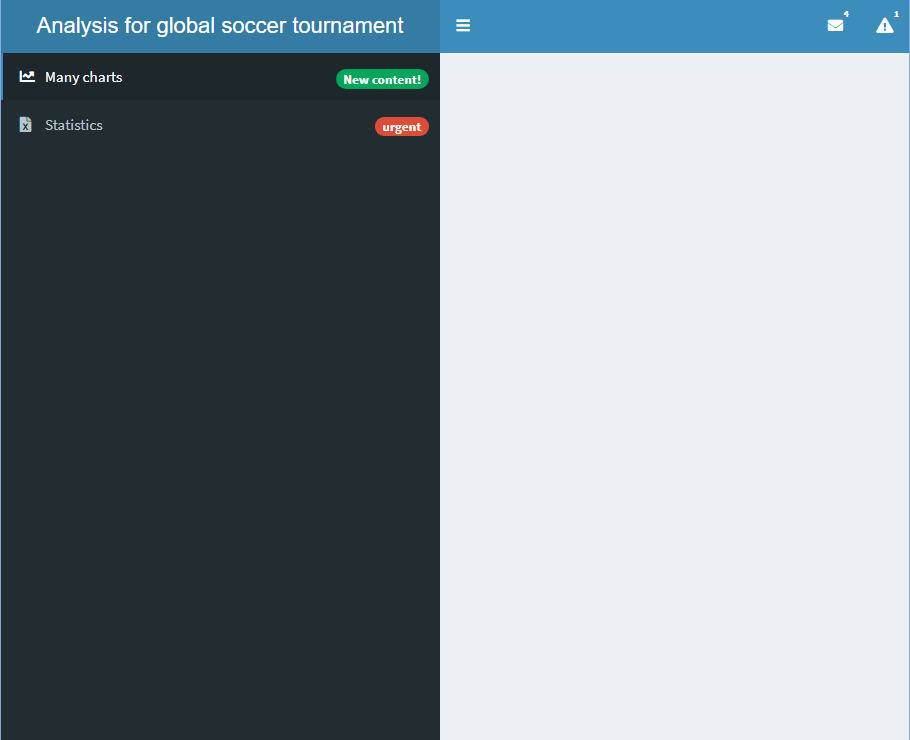
  • Cũng có thể thêm huy hiệu
    • Thiết lập badgeLabelbadgeColor

Thanh bên với các huy hiệu bổ sung

sidebar <- dashboardSidebar(width=400,
  sidebarMenu(
    id = "pages",
    menuItem("Many charts", tabName = "charts", 
             icon = icon("chart-line"),

badgeLabel = "New content!", badgeColor = "green"),
menuItem("Statistics", icon = icon("file-excel"), tabName = "stats",
badgeLabel = "urgent", badgeColor = "red")
) )
Xây dựng Dashboard với shinydashboard

Thêm thẻ con

  • Có thể thêm thẻ con bằng menuSubItem()
  • Lưu ý: không thể thêm huy hiệu cho thẻ có thẻ con
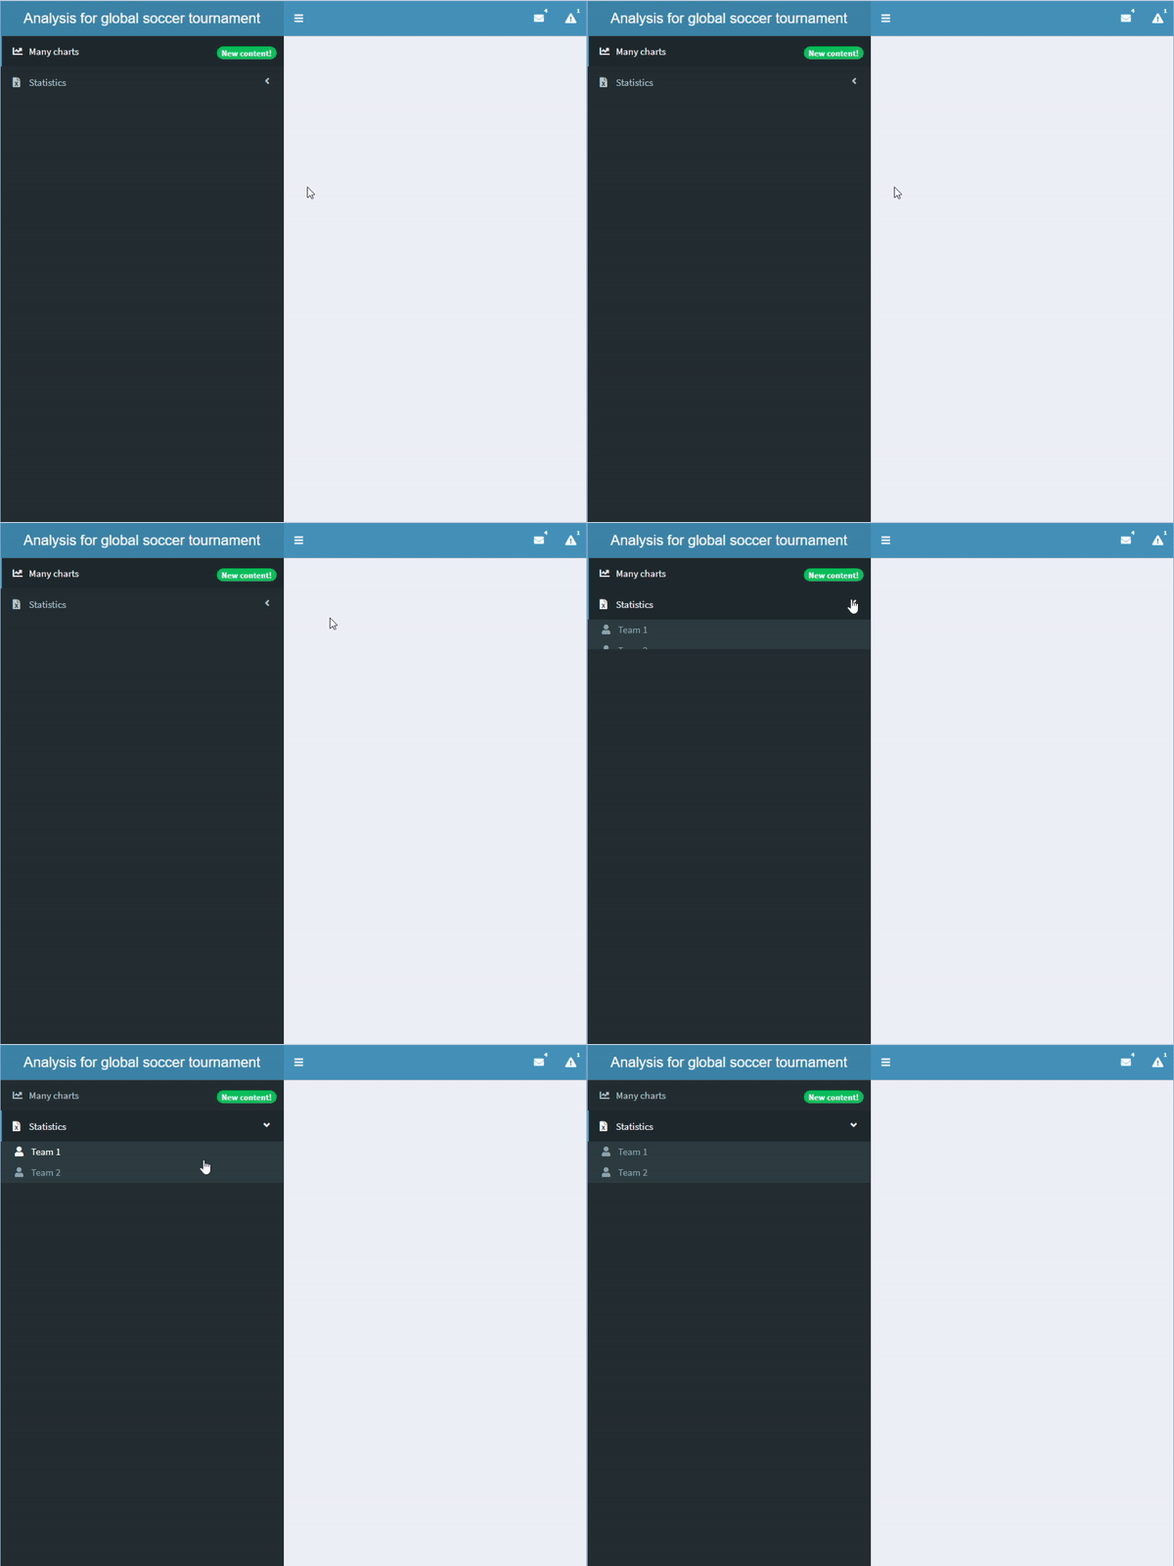
Thanh bên có thẻ con

sidebar <- dashboardSidebar(width=400,
  sidebarMenu(
    id = "pages",
    menuItem("Many charts", tabName = "charts", 
             icon = icon("chart-line"),
             badgeLabel = "New content!", 
             badgeColor = "green"),
    menuItem("Statistics", icon = icon("file-excel"), 
            tabName = "stats", 
            menuSubItem("Team 1", tabName = "team1", 
                     icon=icon("user")),
            menuSubItem("Team 2", tabName = "team2", 
                     icon=icon("user")))
  )
)
Xây dựng Dashboard với shinydashboard

Thêm input và output ở thanh bên

  • Có thể thêm input và output vào thanh bên
  • Cần định nghĩa input và output trong server
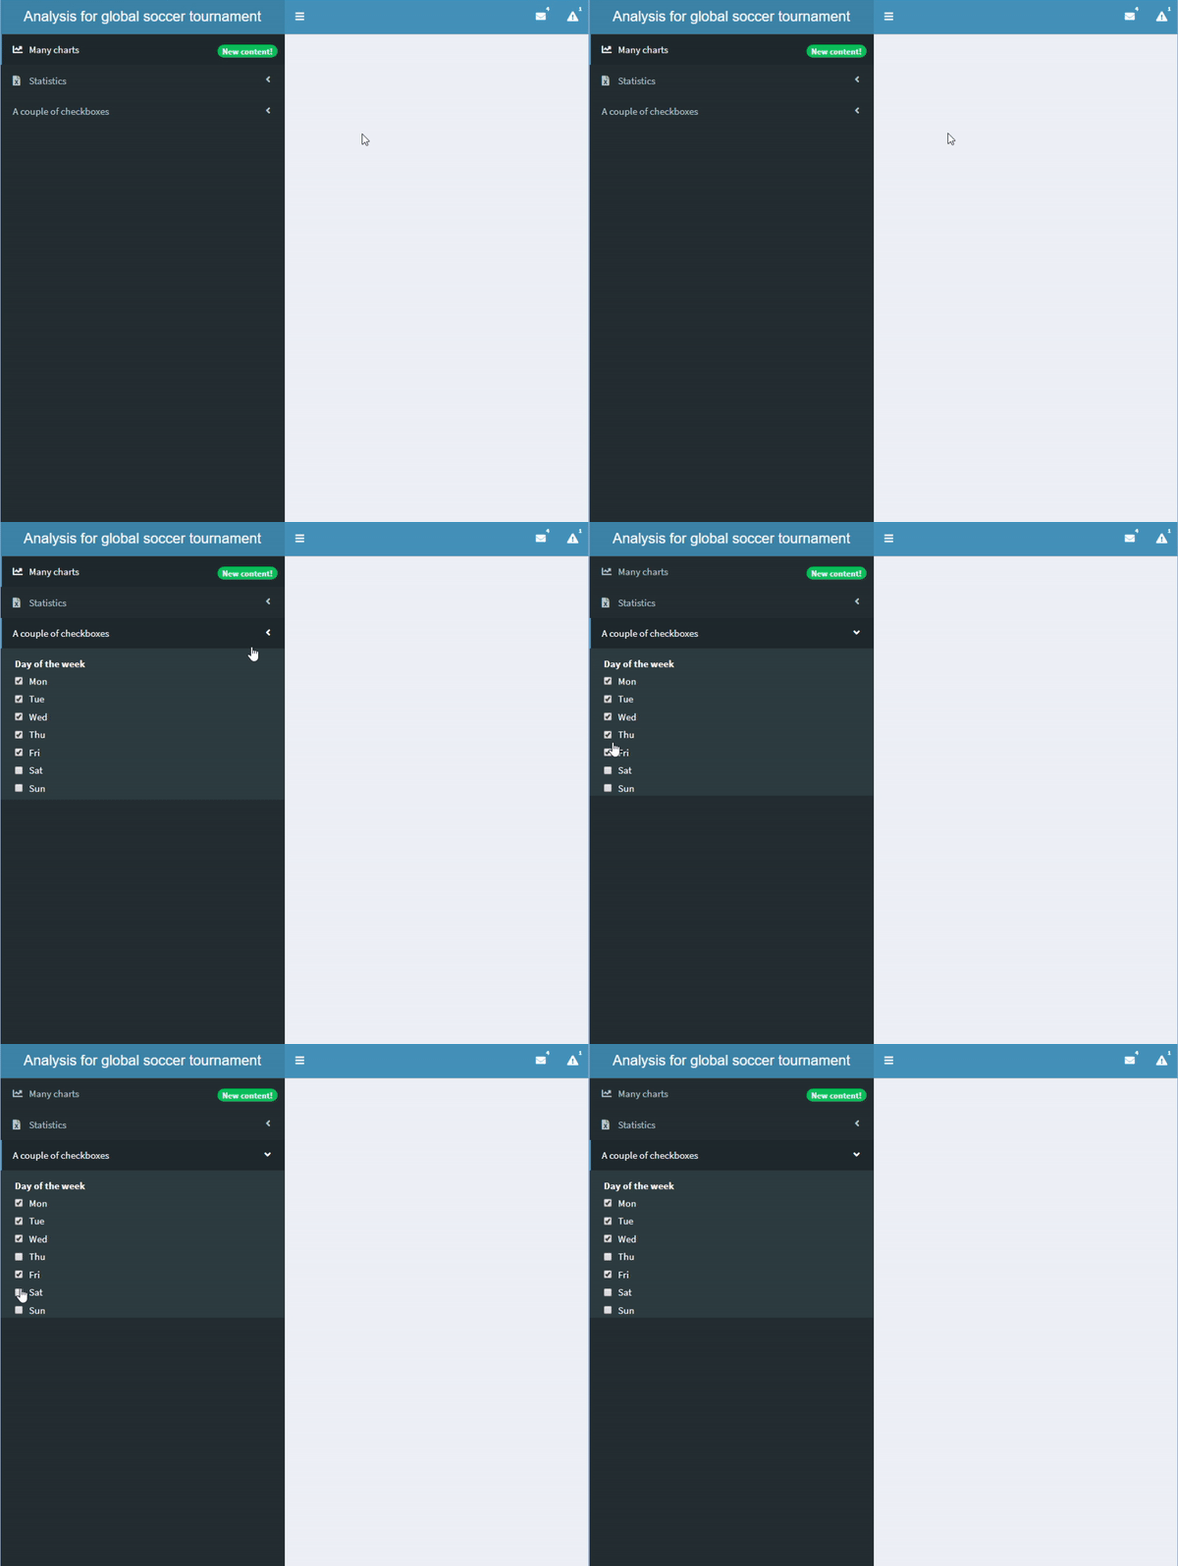
Thanh bên có checkboxGroupInput().

sidebar <- dashboardSidebar(width=400,
  sidebarMenu(
    id = "pages",
    menuItem("Many charts", tabName = "charts", 
             icon = icon("chart-line"),
             badgeLabel = "New content!", 
             badgeColor = "green"),
    menuItem("Statistics", icon = icon("file-excel"), 
            tabName = "stats", 
            menuSubItem("Team 1", tabName = "team1", 
            icon=icon("user")),
            menuSubItem("Team 2", tabName = "team2", 
            icon=icon("user"))),

menuItem("A couple of checkboxes", checkboxGroupInput("checkboxes", "Day of the week", choices = c("Mon","Tue","Wed","Thu","Fri","Sat","Sun"), selected = c("Mon","Tue","Wed","Thu","Fri"))) ) )
Xây dựng Dashboard với shinydashboard

Passons à la pratique !

Xây dựng Dashboard với shinydashboard

Preparing Video For Download...