헤더와 사이드바

shinydashboard로 대시보드 만들기

Png Kee Seng

Researcher

헤더
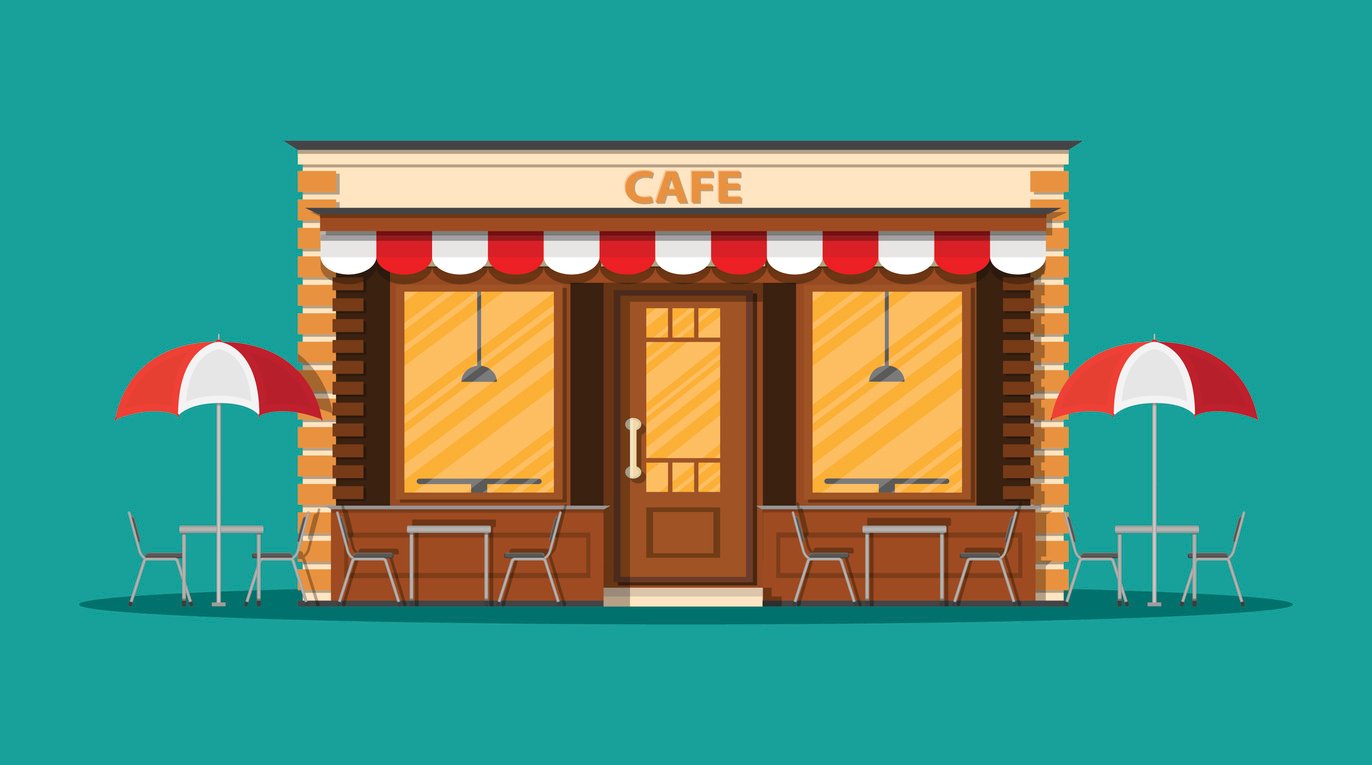
  • 헤더는 식당 간판과 같습니다
  • 대시보드 제목을 포함할 수 있습니다
  • 드롭다운 메뉴를 포함할 수 있습니다
    • 예: 메시지, 알림, 작업

간단한 가게 외관 예시.

헤더는 식당 간판과 비슷하며 실용적·미적 요소를 담을 수 있습니다. 복잡한 전면 예시입니다.

1 Image by upklyak on Freepik
shinydashboard로 대시보드 만들기

shinydashboard 제목

  • 헤더는 dashboardHeader()로 정의합니다
  • 제목이 너무 길면 어떻게 하나요?
    • titleWidth 인수를 설정합니다
    • 기본값은 230픽셀
header <- dashboardHeader(title = "Soccer tournament")
header <- dashboardHeader(title = "Analysis for global soccer tournament")
                            titleWidth = 400)
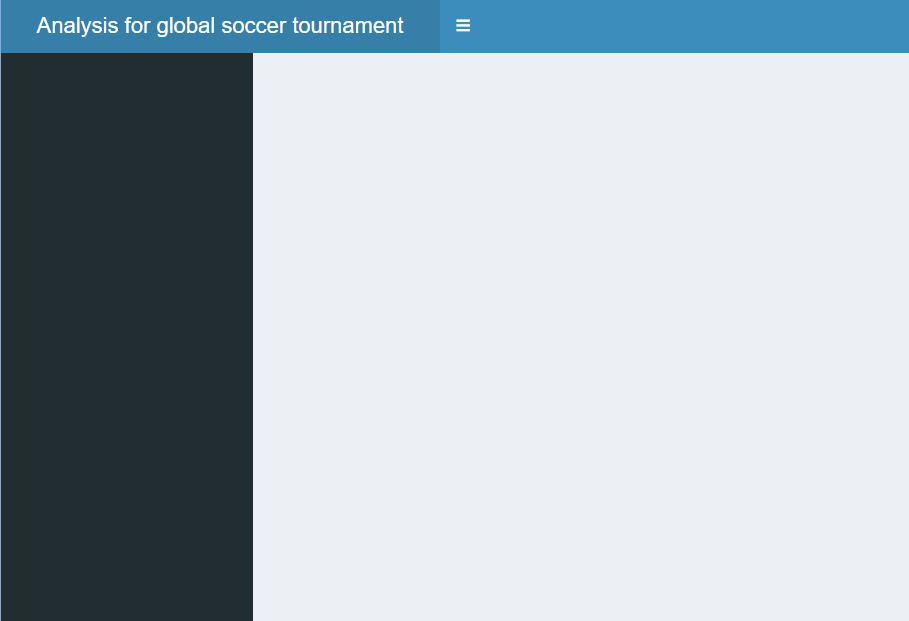
긴 제목에 맞게 헤더 너비를 조정할 수 있습니다.

shinydashboard로 대시보드 만들기

메시지가 있는 드롭다운 메뉴 추가

  • 헤더에 드롭다운 메뉴를 추가할 수 있습니다
  • 드롭다운 메뉴는 세 종류입니다
    • 메시지
    • 알림
    • 작업
  • type이 "messages"인 dropdownMenu()를 추가합니다
    • messageItem()을 추가합니다
    • 기본 아이콘은 icon("user")입니다
    • time도 설정할 수 있습니다
header <- dashboardHeader(
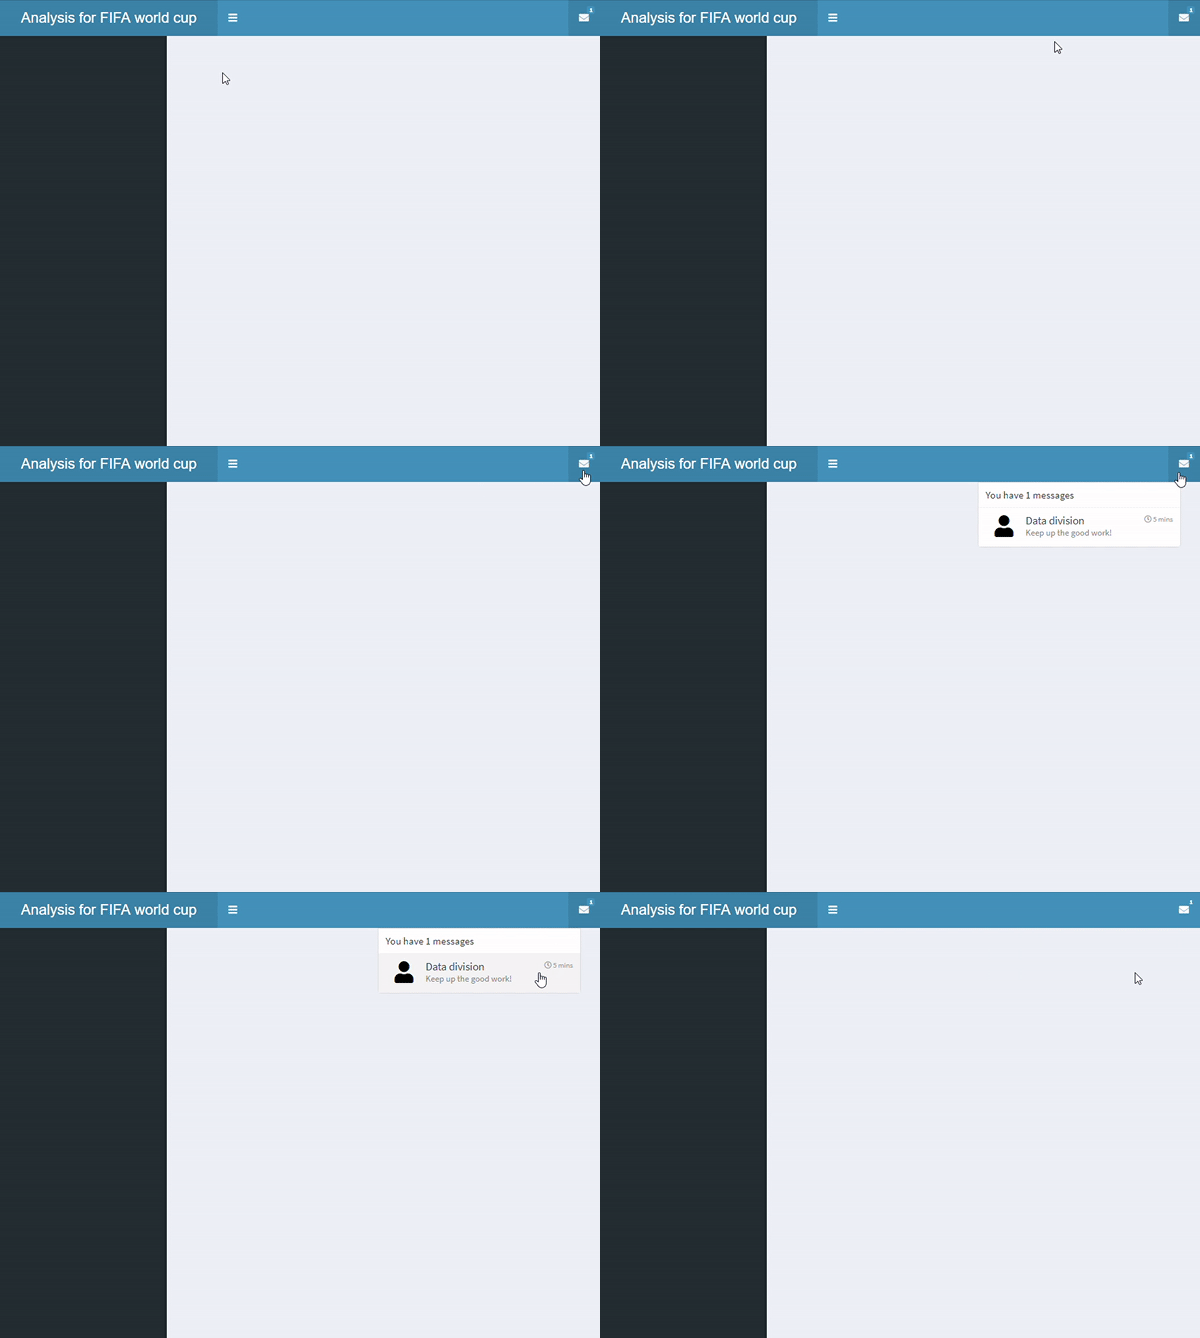
  title = "Analysis for FIFA world cup",
  titleWidth = 300,
  dropdownMenu(type = "messages",

messageItem("Data division", "Keep up the good work!",
time = "5 mins"
)))

메시지 항목 하나가 있는 드롭다운 메뉴.

shinydashboard로 대시보드 만들기

여러 메시지가 있는 드롭다운 메뉴 추가

  • dropdownMenu() 안에 또 다른 messageItem()을 추가하고 이름을 "Twitter"로 하십시오
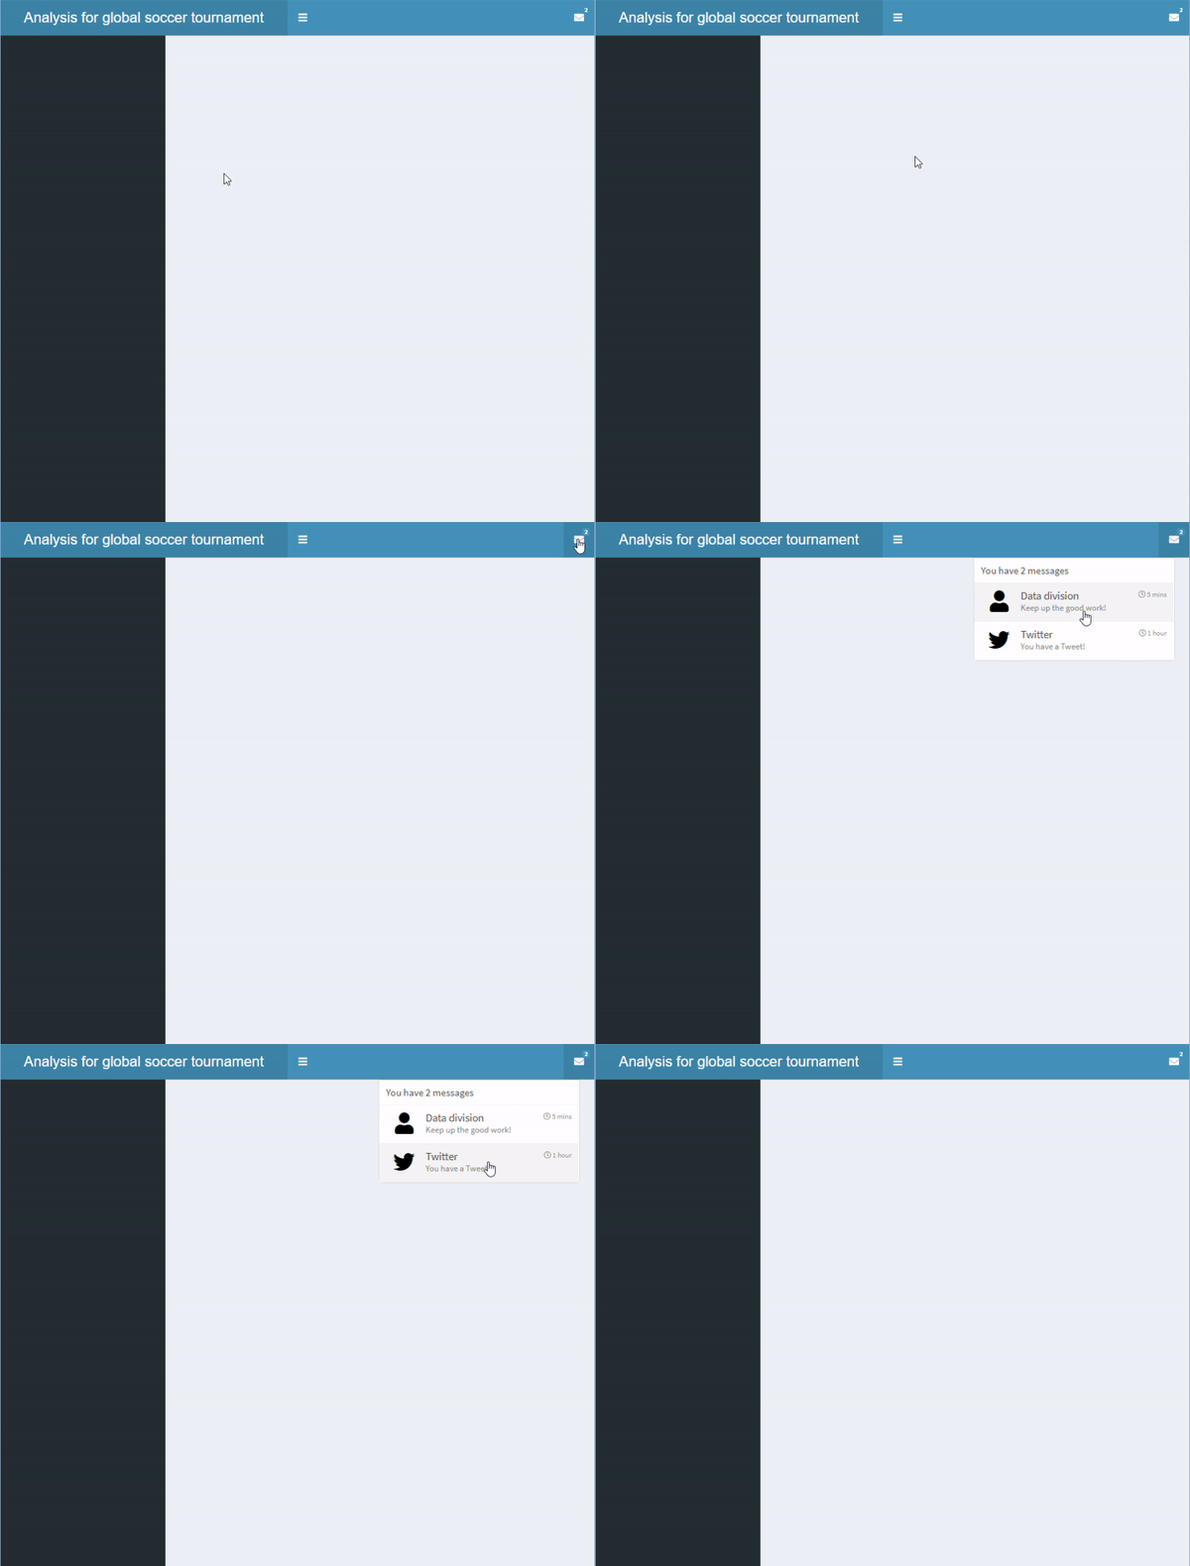
두 개의 메시지 항목이 있는 드롭다운 메뉴.

header <- dashboardHeader(
  title = "Analysis for global soccer tournament",
  titleWidth = 400,
  dropdownMenu(type = "messages",
    messageItem("Data division",
      "Keep up the good work!",
      time = "5 mins"
    ),

messageItem("Twitter", "You have a Tweet!", time = "1 hour", icon=icon("twitter") ) ) )
shinydashboard로 대시보드 만들기

여러 항목이 있는 드롭다운 메뉴 추가

  • 다른 유형의 항목도 추가할 수 있습니다
    • messageItem()
    • notificationItem()
    • taskItem()
  • 모양이 서로 다릅니다
    • messageItem(): 기본 아이콘은 icon("user")
    • notificationItem(): 기본 아이콘은 icon("exclamation-triangle")
    • taskItem(): 진행률 표시줄 포함
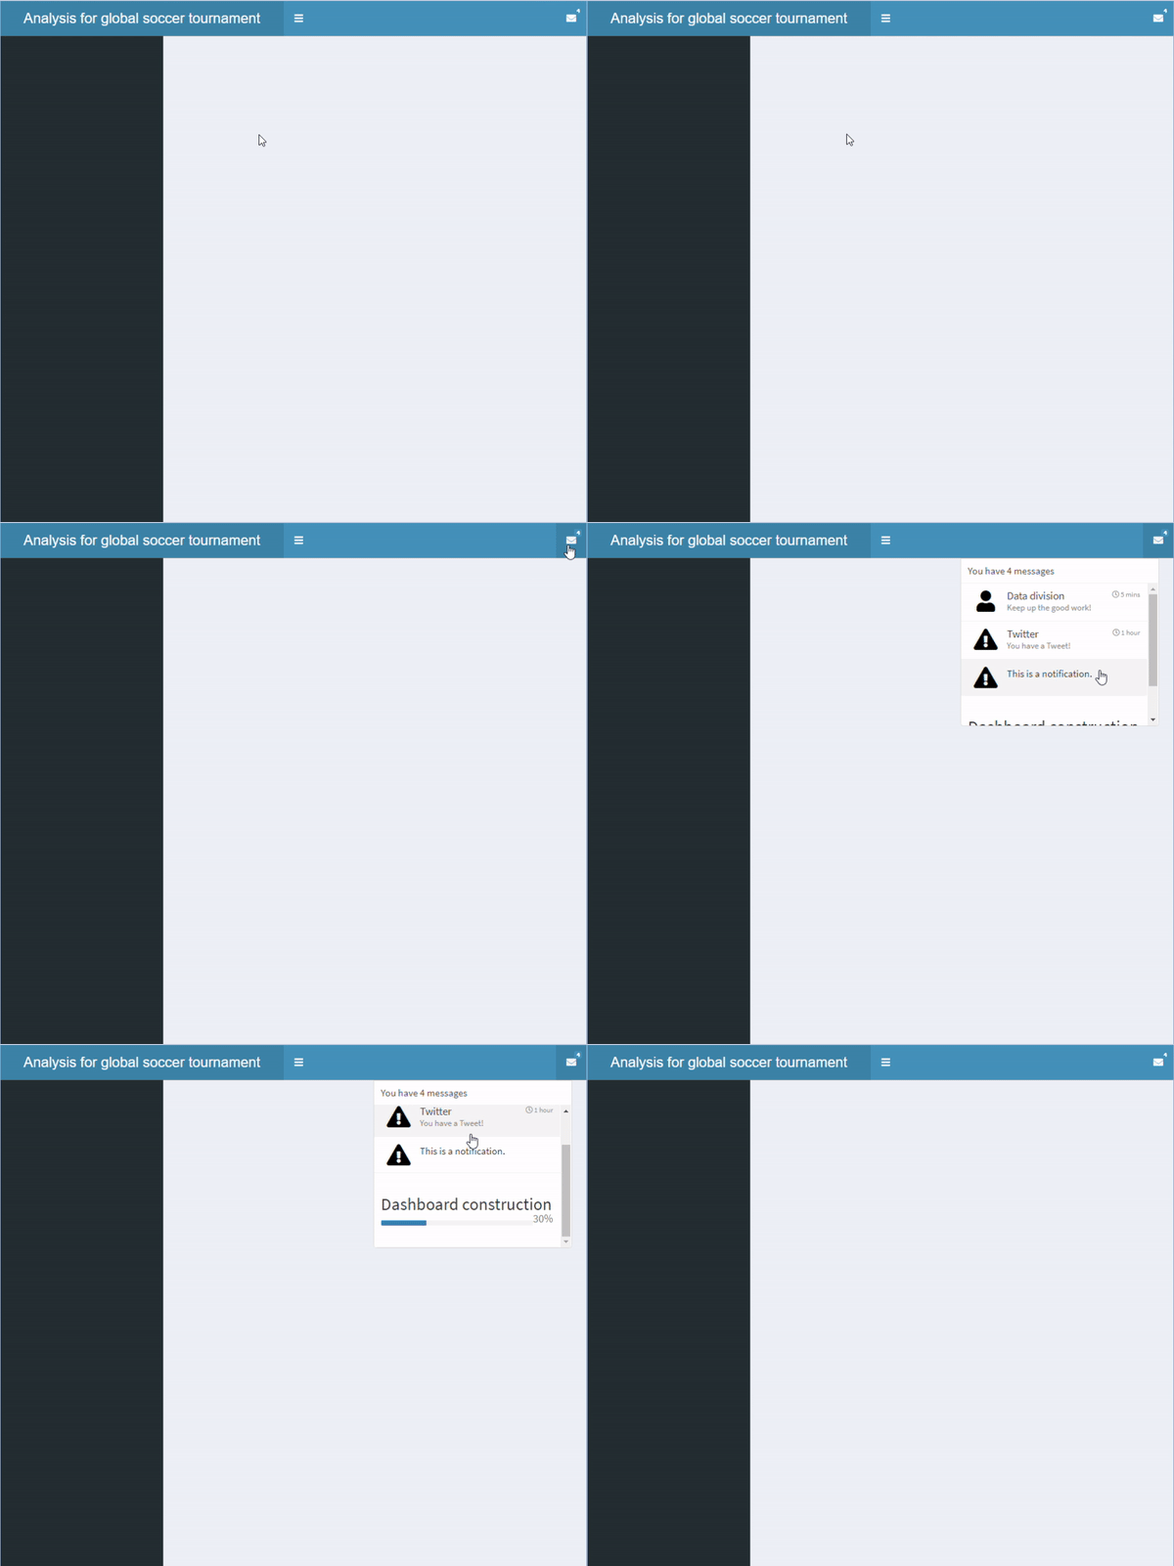
header <- dashboardHeader(
  title = "Analysis for global soccer tournament",
  titleWidth = 400,
  dropdownMenu(type = "messages",

messageItem("Data division", "Keep up the good work!", time = "5 mins"), messageItem("Twitter", "You have a Tweet!", time = "1 hour", icon=icon("twitter")),
notificationItem("This is a notification." ),
taskItem(value = 30, color = "blue", "Dashboard construction") ))
shinydashboard로 대시보드 만들기

여러 항목이 있는 드롭다운 메뉴 추가

여러 항목이 있는 드롭다운 메뉴

shinydashboard로 대시보드 만들기

드롭다운 메뉴 더 추가하기

  • 드롭다운 메뉴를 하나 더 추가할 수도 있습니다

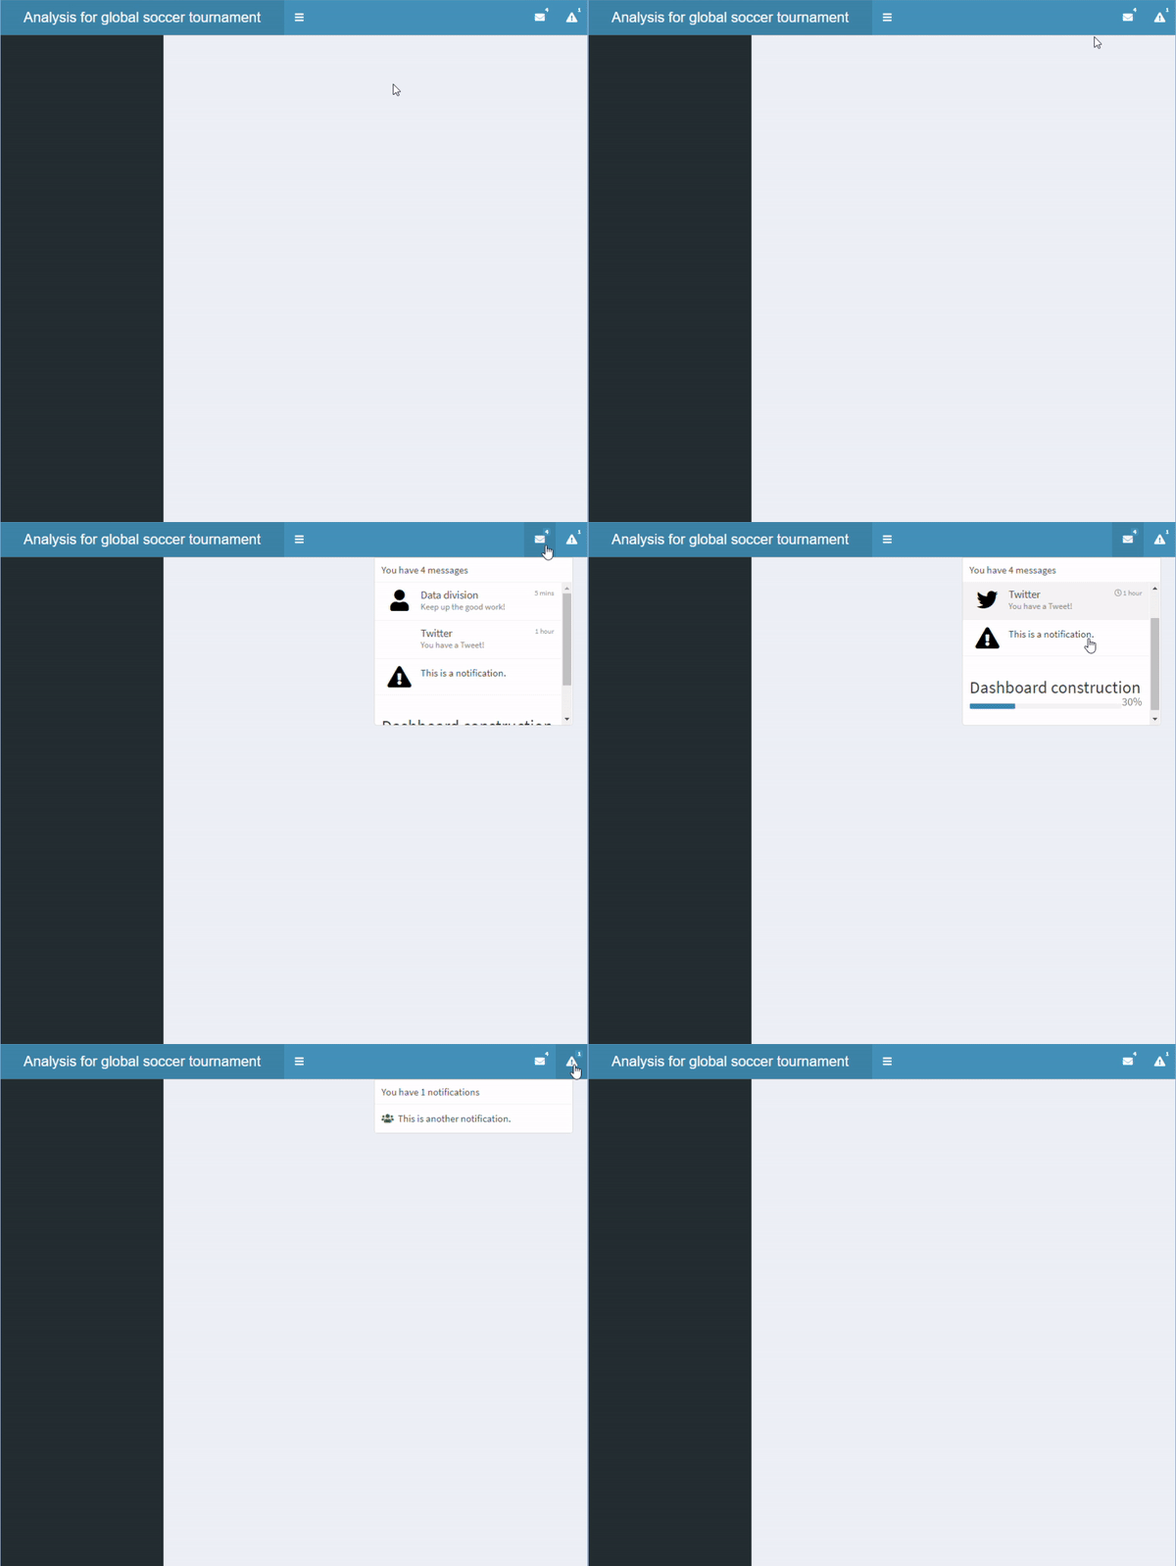
드롭다운 메뉴가 두 개 이상 있는 헤더.

header <- dashboardHeader(
  title = "Analysis for global soccer tournament",
  titleWidth = 400,

dropdownMenu(type = "messages", messageItem("Data division", "Keep up the good work!", time = "5 mins"), messageItem("Twitter", "You have a Tweet!", time = "1 hour", icon=icon("twitter")), notificationItem("This is a notification."), taskItem(value = 30, color = "blue", "Dashboard construction")),
dropdownMenu(type = "notifications", notificationItem(icon = icon("users"), "This is another notification." )))
shinydashboard로 대시보드 만들기

사이드바

  • 사이드바는 dashboardSidebar()로 정의합니다
  • width로 사이드바 너비를 조정할 수 있습니다
  • sidebarMenu()로 여러 페이지를 배치할 수 있습니다

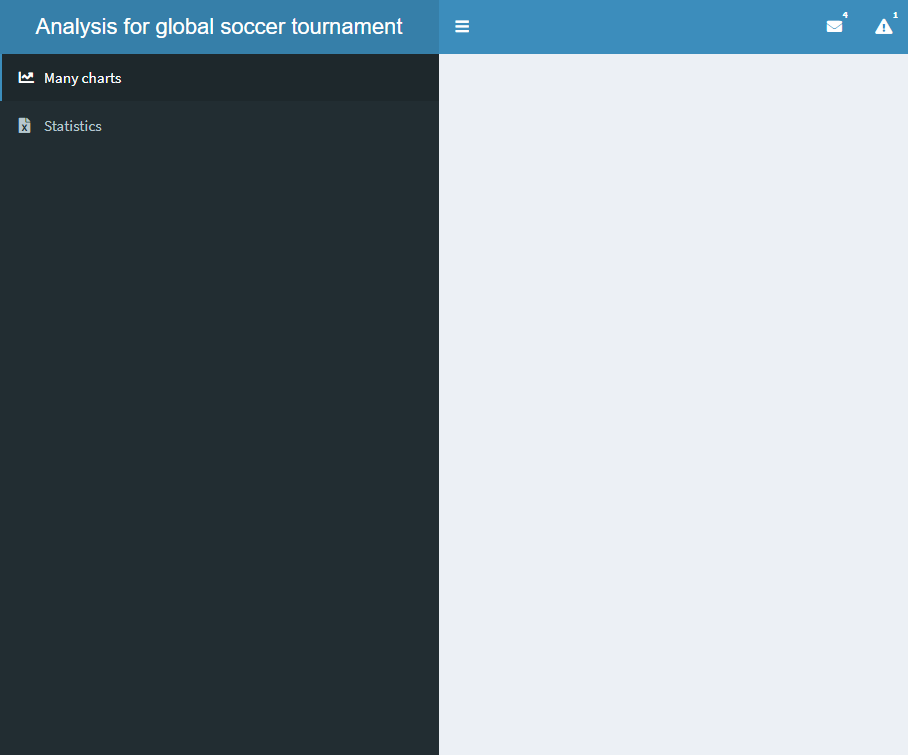
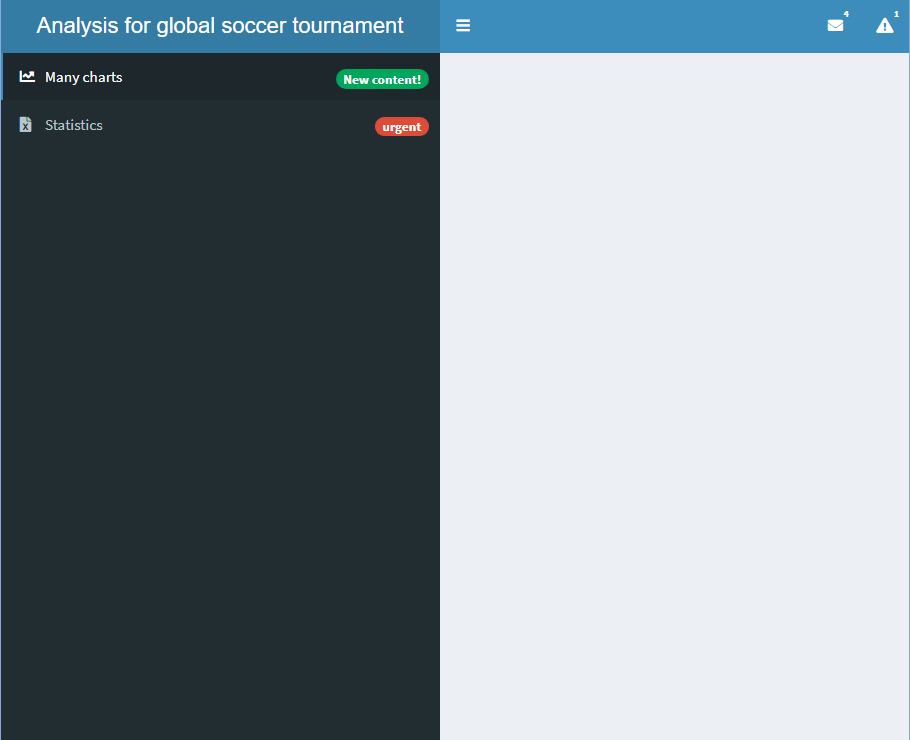
두 개의 버튼이 있는 사이드바

sidebar <- dashboardSidebar()
sidebar <- dashboardSidebar(width=400)
sidebar <- dashboardSidebar(width=400,
  sidebarMenu(
    id = "pages",
    menuItem("Many charts", tabName = "charts", 
        icon = icon("chart-line")),
    menuItem("Statistics", icon = icon("file-excel"), 
        tabName = "stats")
  )
)
sidebar <- dashboardSidebar(disable = TRUE)
shinydashboard로 대시보드 만들기

배지 추가하기

  • 배지를 추가할 수도 있습니다
    • badgeLabel과 badgeColor를 설정하십시오

배지가 추가된 사이드바

sidebar <- dashboardSidebar(width=400,
  sidebarMenu(
    id = "pages",
    menuItem("Many charts", tabName = "charts", 
             icon = icon("chart-line"),

badgeLabel = "New content!", badgeColor = "green"),
menuItem("Statistics", icon = icon("file-excel"), tabName = "stats",
badgeLabel = "urgent", badgeColor = "red")
) )
shinydashboard로 대시보드 만들기

하위 탭 추가하기

  • menuSubItem()으로 하위 탭을 추가합니다
  • 하위 탭이 있는 탭에는 배지를 추가할 수 없습니다

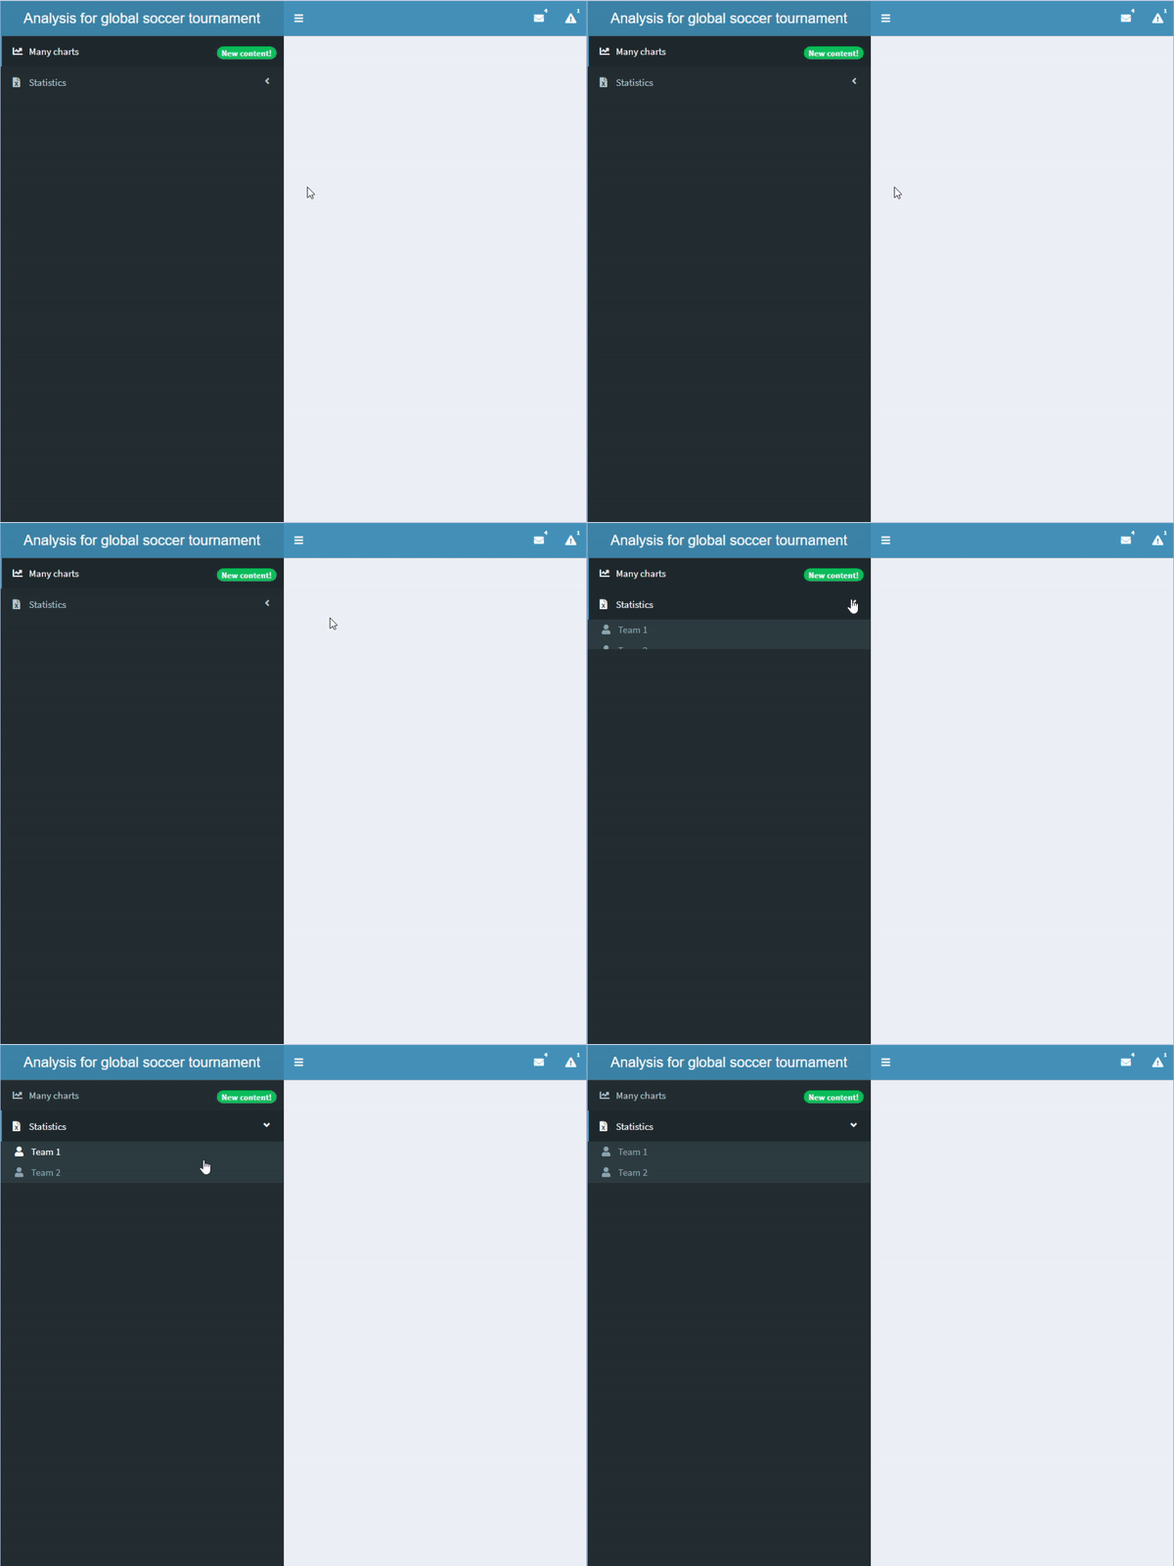
하위 탭이 있는 사이드바

sidebar <- dashboardSidebar(width=400,
  sidebarMenu(
    id = "pages",
    menuItem("Many charts", tabName = "charts", 
             icon = icon("chart-line"),
             badgeLabel = "New content!", 
             badgeColor = "green"),
    menuItem("Statistics", icon = icon("file-excel"), 
            tabName = "stats", 
            menuSubItem("Team 1", tabName = "team1", 
                     icon=icon("user")),
            menuSubItem("Team 2", tabName = "team2", 
                     icon=icon("user")))
  )
)
shinydashboard로 대시보드 만들기

사이드바에 입력/출력 추가하기

  • 사이드바에 입력/출력을 추가할 수 있습니다
  • server에도 입력/출력을 정의해야 합니다

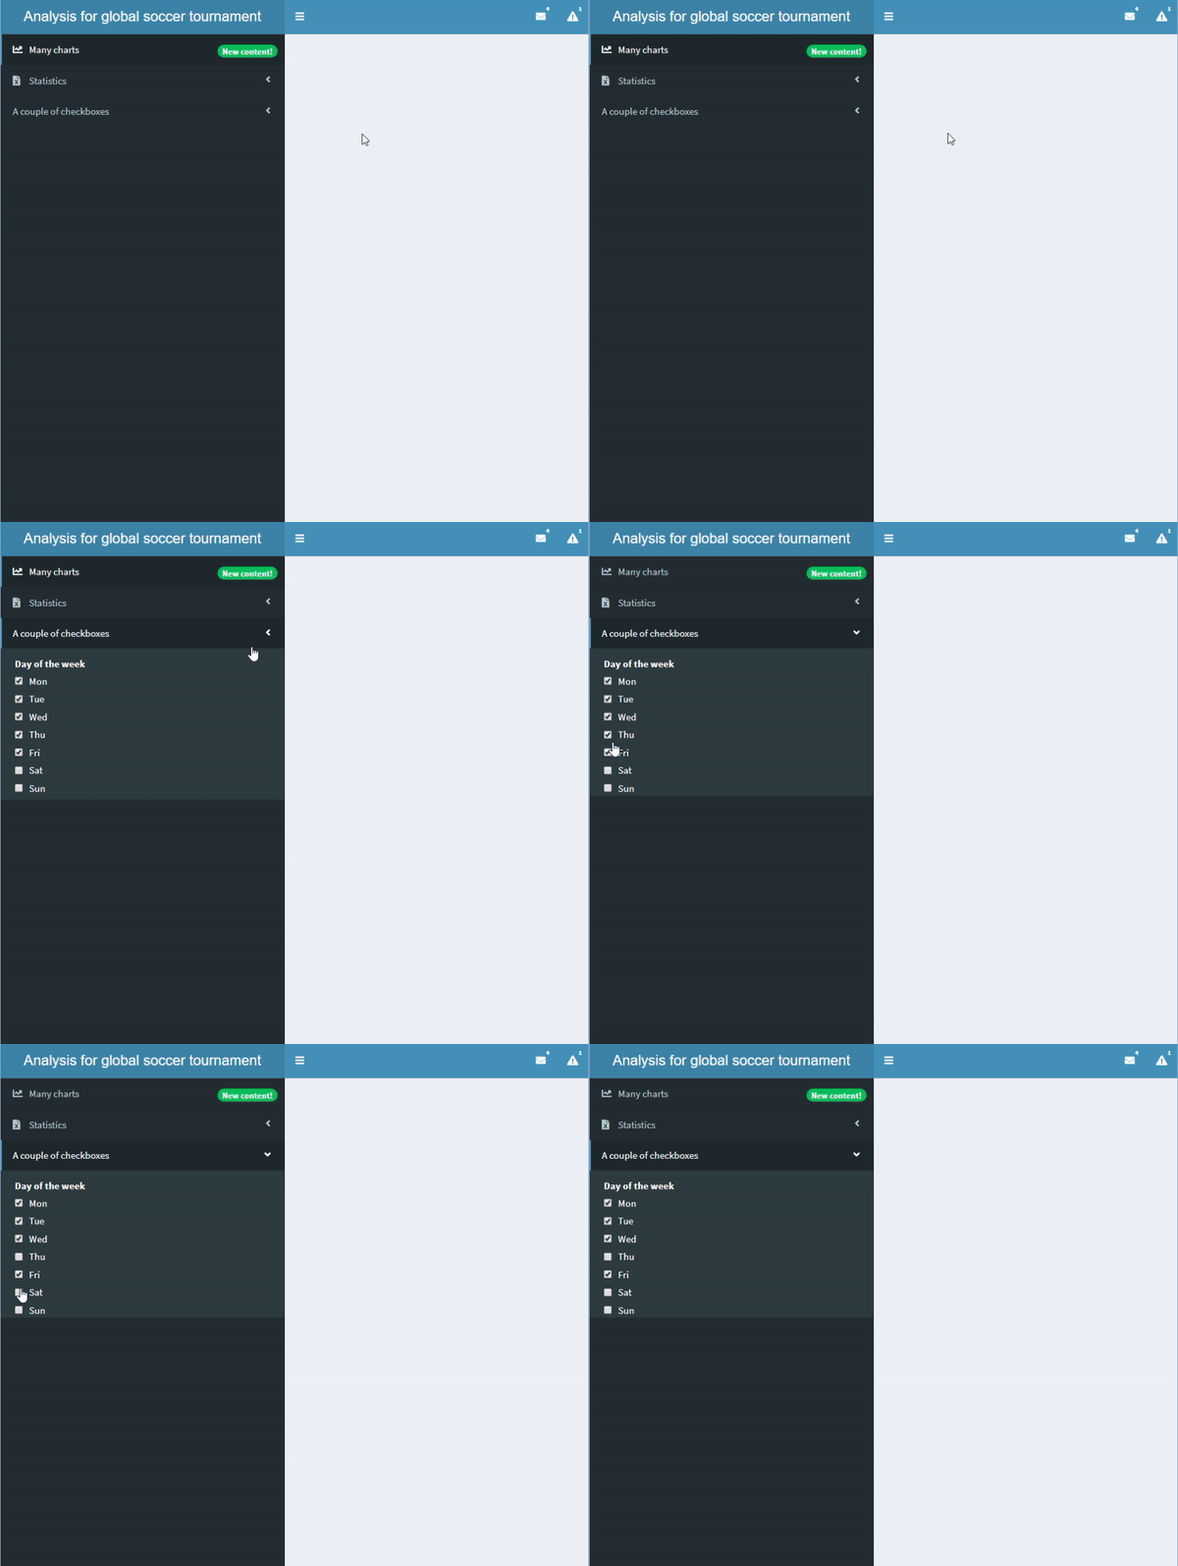
checkboxGroupInput()이 포함된 사이드바.

sidebar <- dashboardSidebar(width=400,
  sidebarMenu(
    id = "pages",
    menuItem("Many charts", tabName = "charts", 
             icon = icon("chart-line"),
             badgeLabel = "New content!", 
             badgeColor = "green"),
    menuItem("Statistics", icon = icon("file-excel"), 
            tabName = "stats", 
            menuSubItem("Team 1", tabName = "team1", 
            icon=icon("user")),
            menuSubItem("Team 2", tabName = "team2", 
            icon=icon("user"))),

menuItem("A couple of checkboxes", checkboxGroupInput("checkboxes", "Day of the week", choices = c("Mon","Tue","Wed","Thu","Fri","Sat","Sun"), selected = c("Mon","Tue","Wed","Thu","Fri"))) ) )
shinydashboard로 대시보드 만들기

연습해 봅시다!

shinydashboard로 대시보드 만들기

Preparing Video For Download...