Navigating Power Apps Studio

Introduction to Power Apps

Luise Freese

Azure & Power Platform Architect

The maker portal
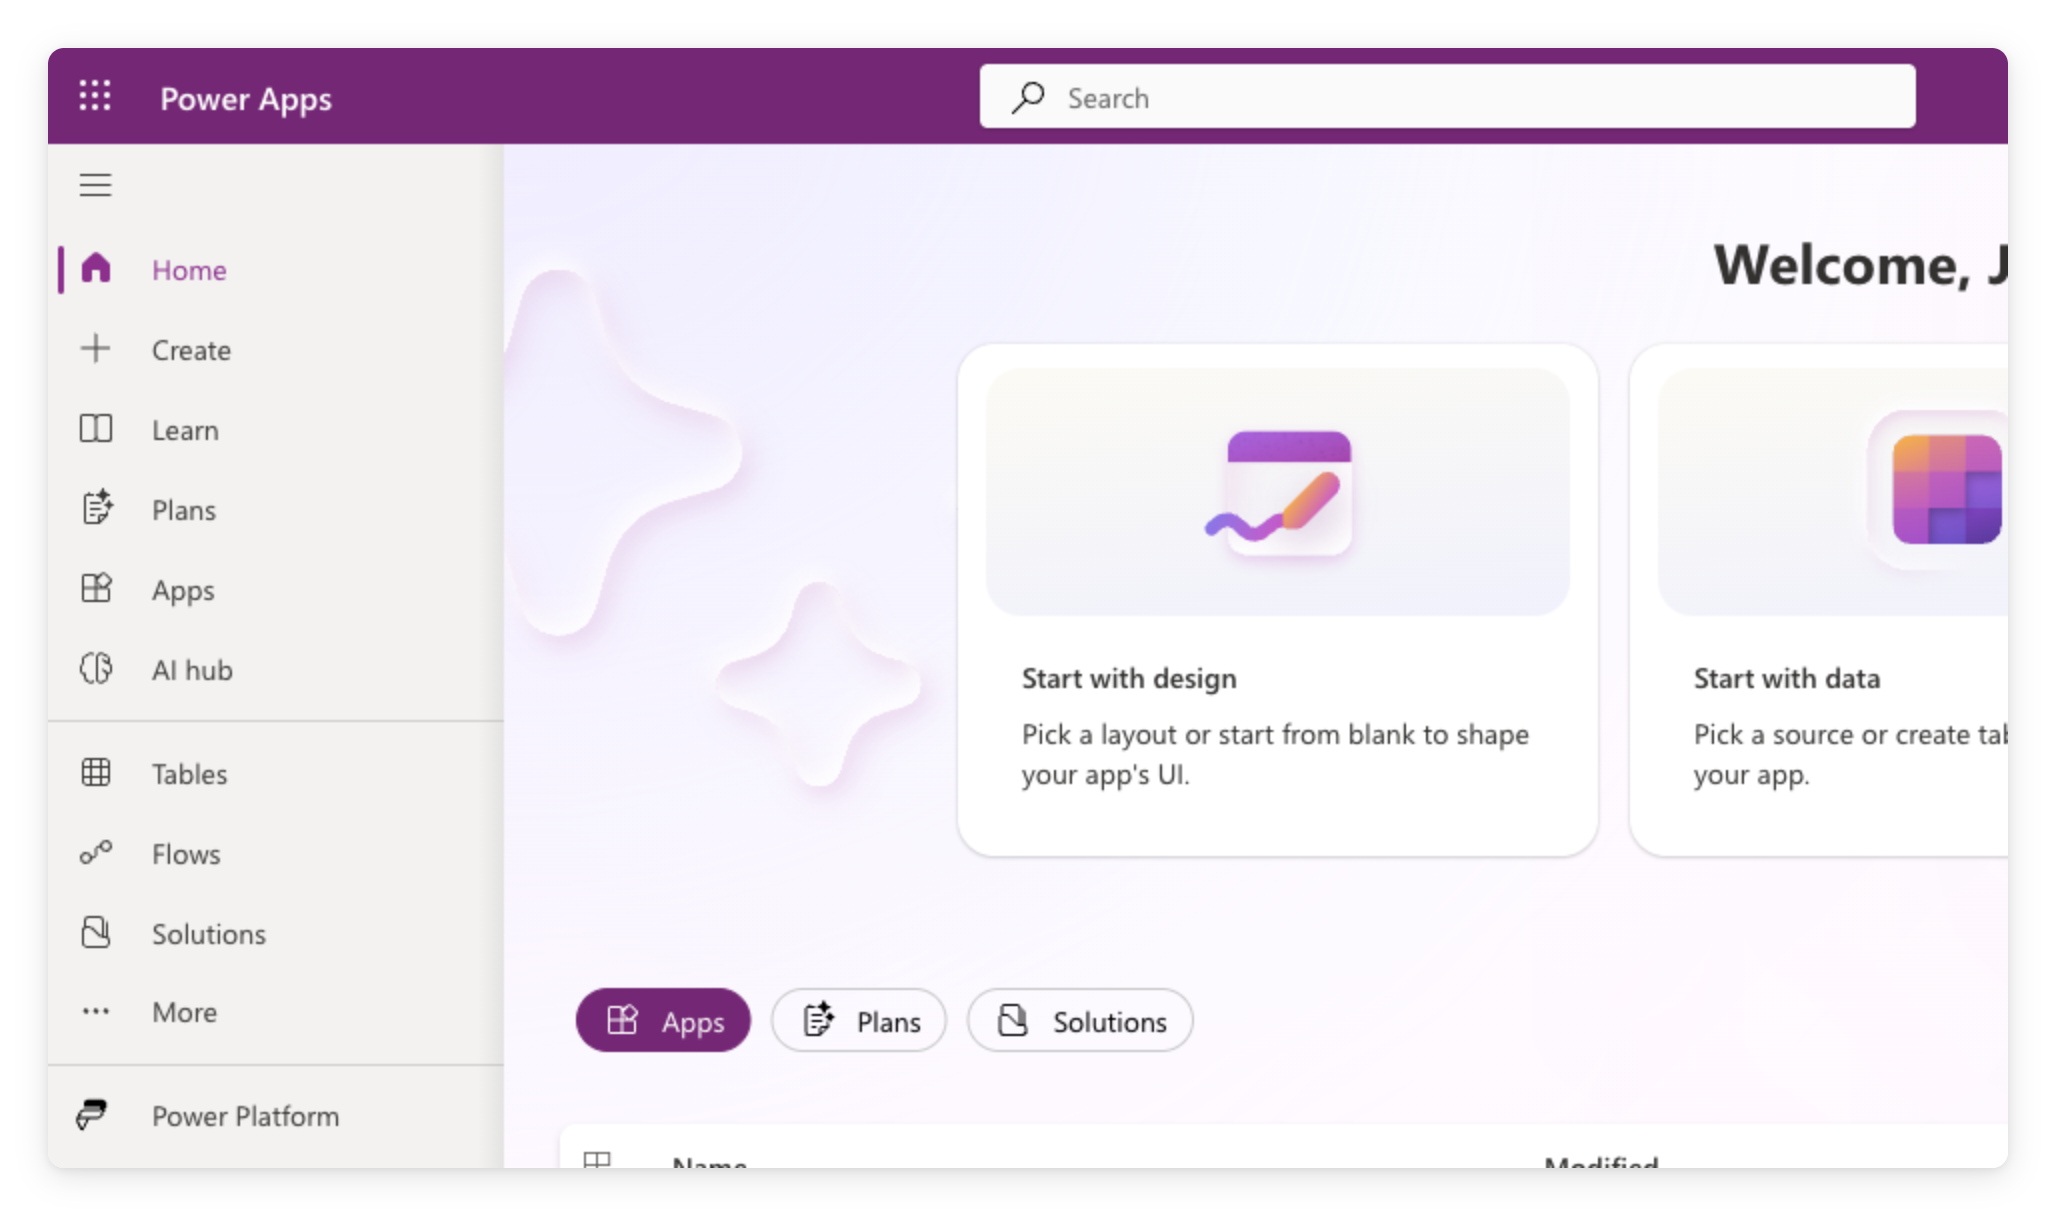
 

  • Sign in at make.powerapps.com with your work account
  • Left navigation: Home, + Create, Apps, Tables, Flows
  • Everything you build in this course lives here


Power Apps maker portal home page at make.powerapps.com, showing the left navigation and welcome screen with Start-with tiles

Introduction to Power Apps

Creating a blank canvas app


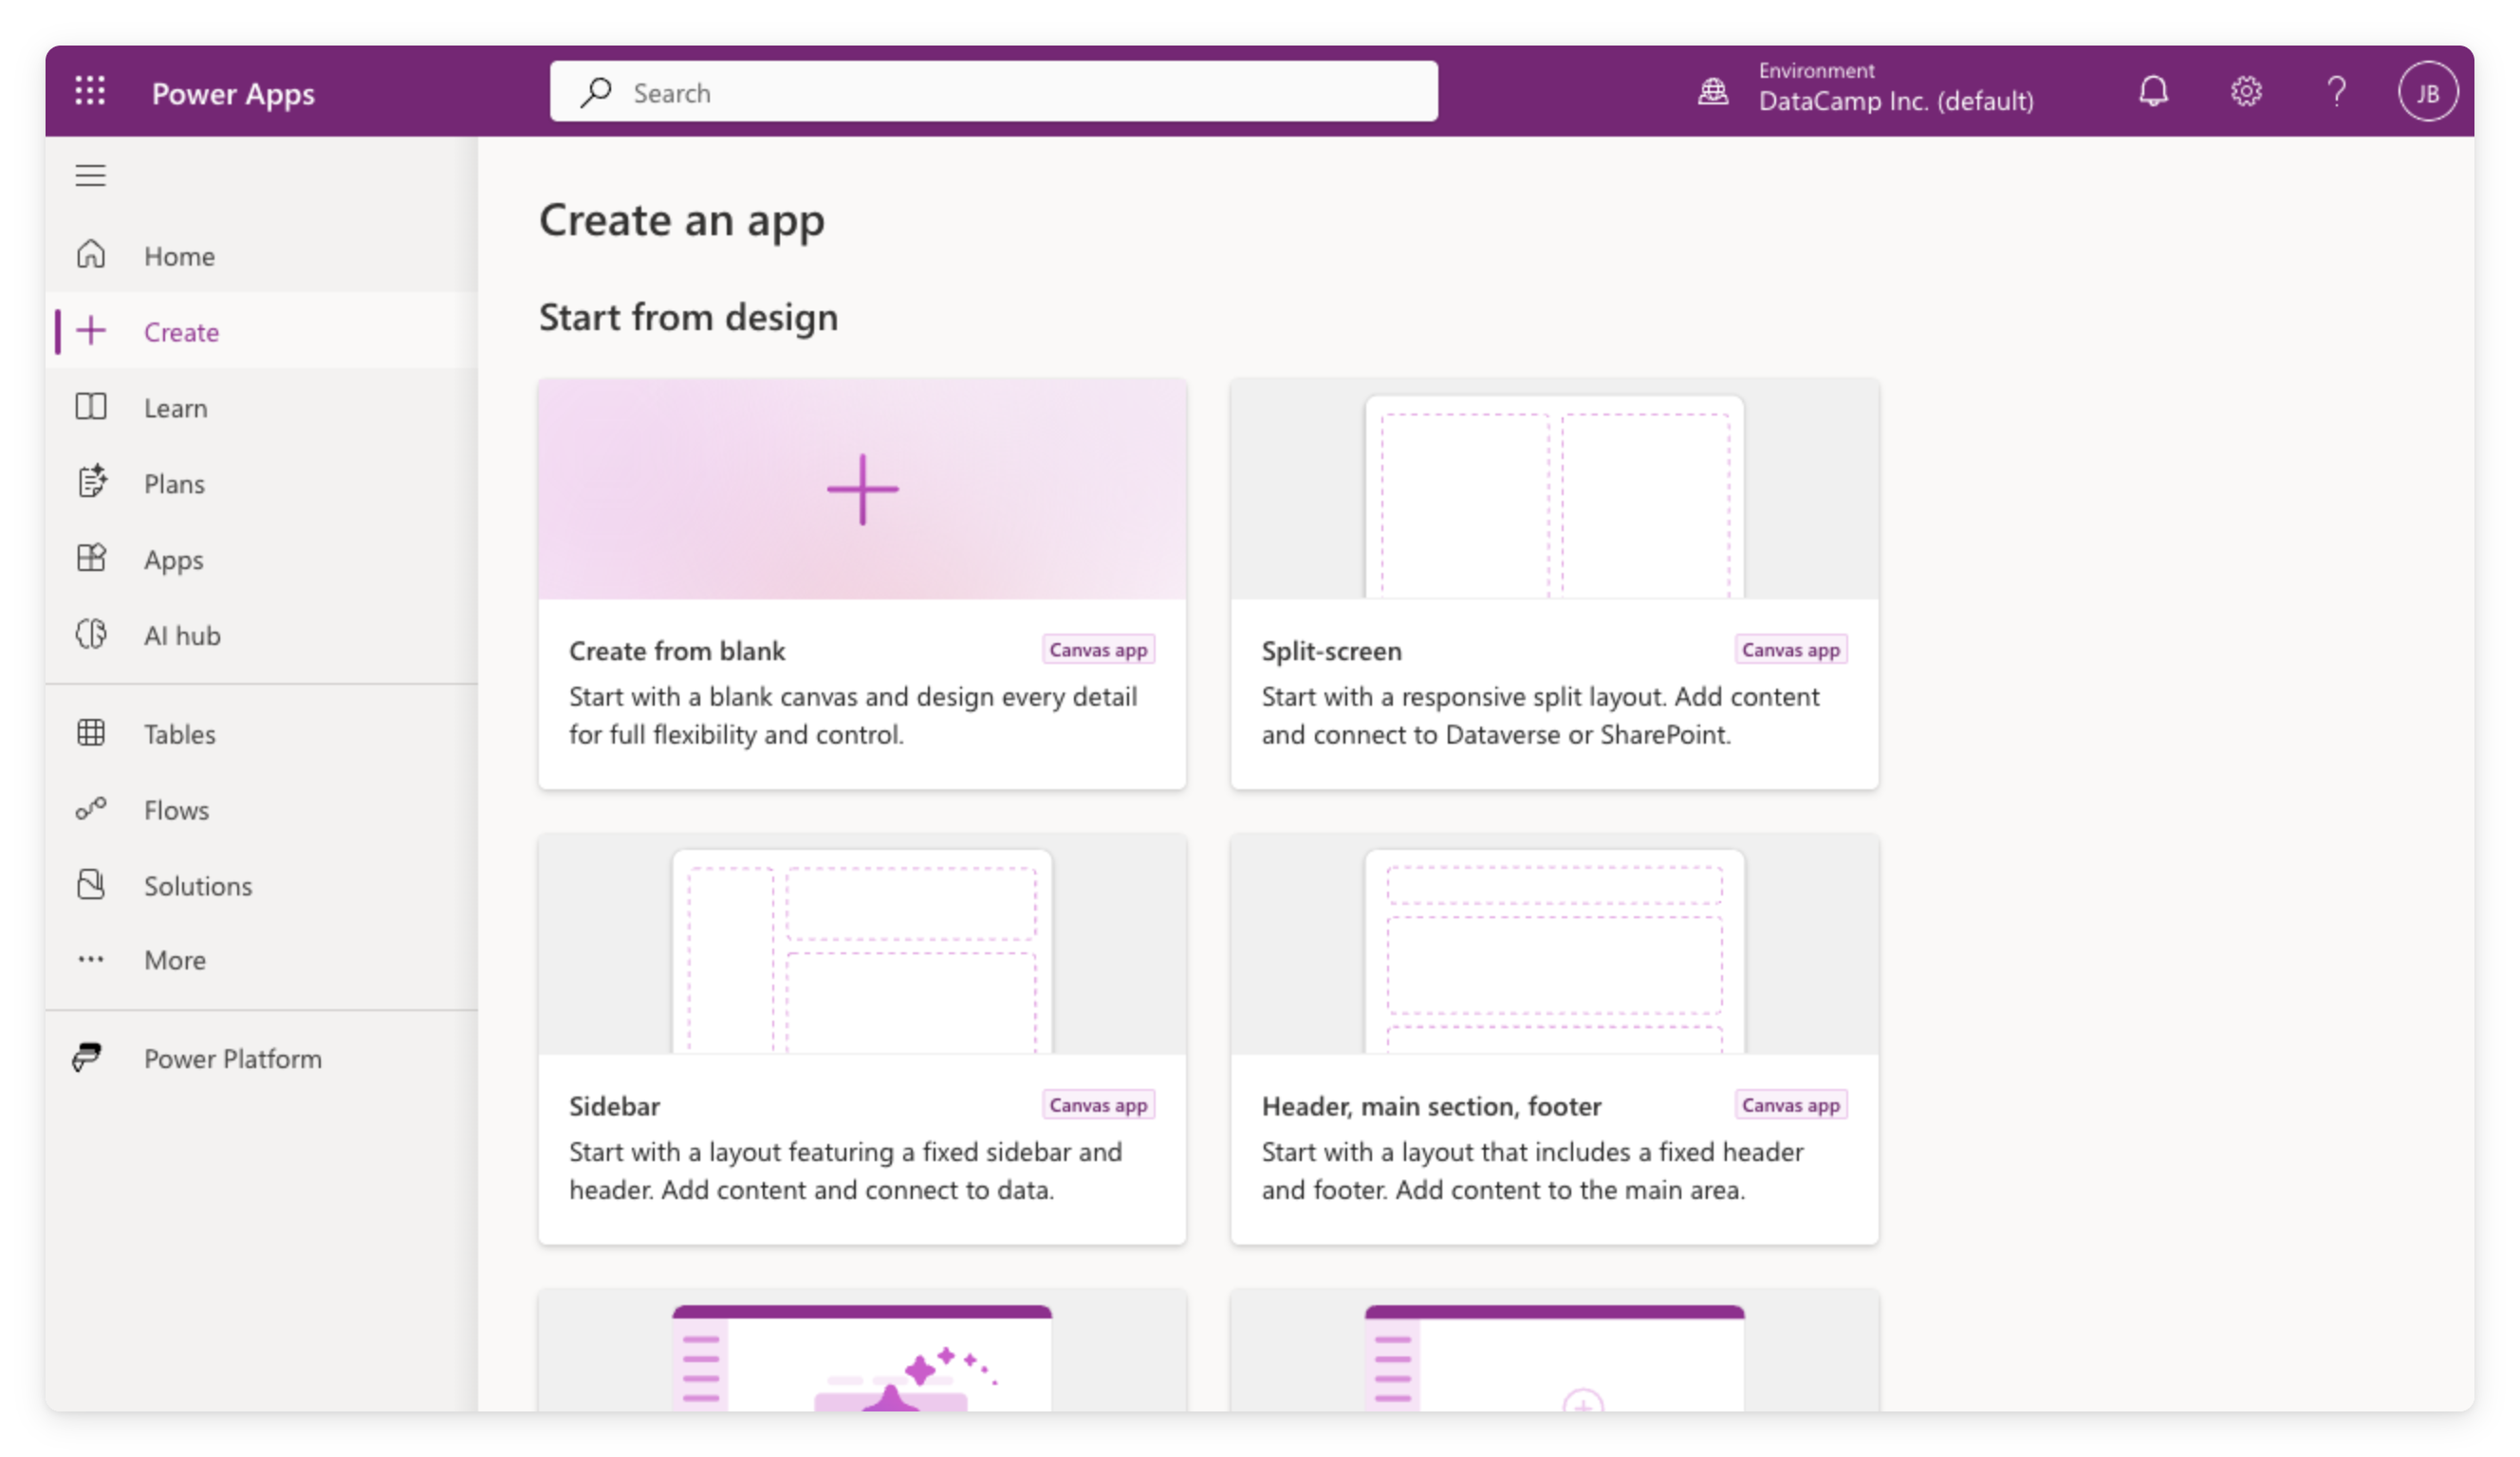
  • In the left nav, click + Create
  • Under Start from design, choose Create from blank
  • Pick Tablet or Phone; you name it when you save


Power Apps Create page at make.powerapps.com showing Start from design options including Create from blank, Split-screen, Sidebar, and Header layouts

Introduction to Power Apps

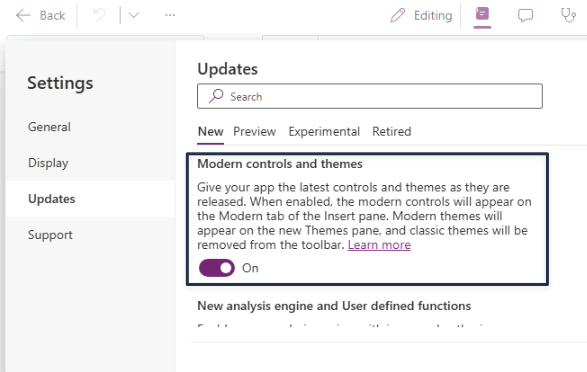
Turn modern controls on

  • App-level setting
  • Off by default
  • Already on if a teammate enabled it first
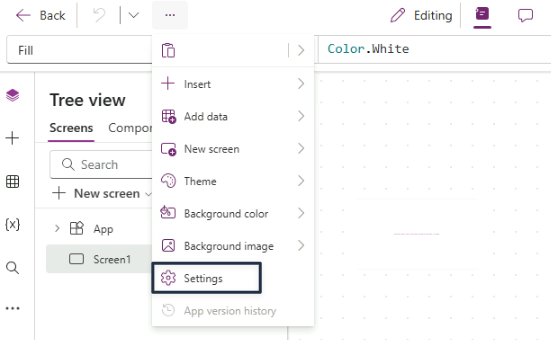
 

The three-dot menu open in the Power Apps Studio command bar, with Settings highlighted below Insert, Add data, New screen, Theme, and the background options


The Power Apps Settings dialog on the Updates tab, New sub-tab selected, with the Modern controls and themes toggle switched On

Introduction to Power Apps

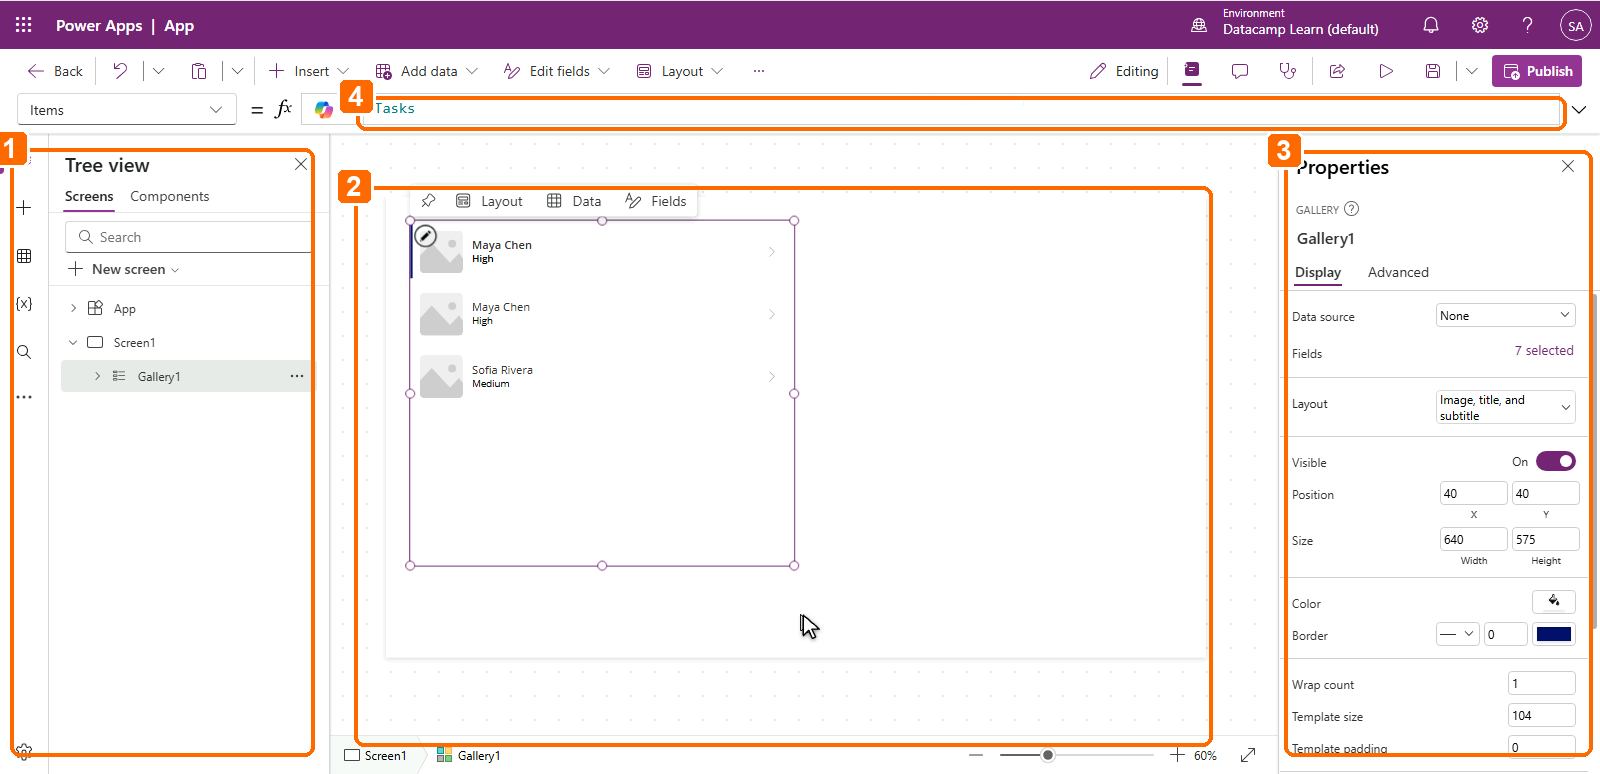
Inside the studio editor


1. Tree View (left): every screen and control; click to select, double-click to rename

2. Canvas (center): arrange controls visually

3. Properties panel (right): settings for the selected control

4. Formula bar (top): write Power Fx expressions


Power Apps Studio with four numbered callouts: 1 marks the Tree view on the left, 2 the canvas in the center, 3 the Properties panel on the right, and 4 the formula bar across the top

Introduction to Power Apps

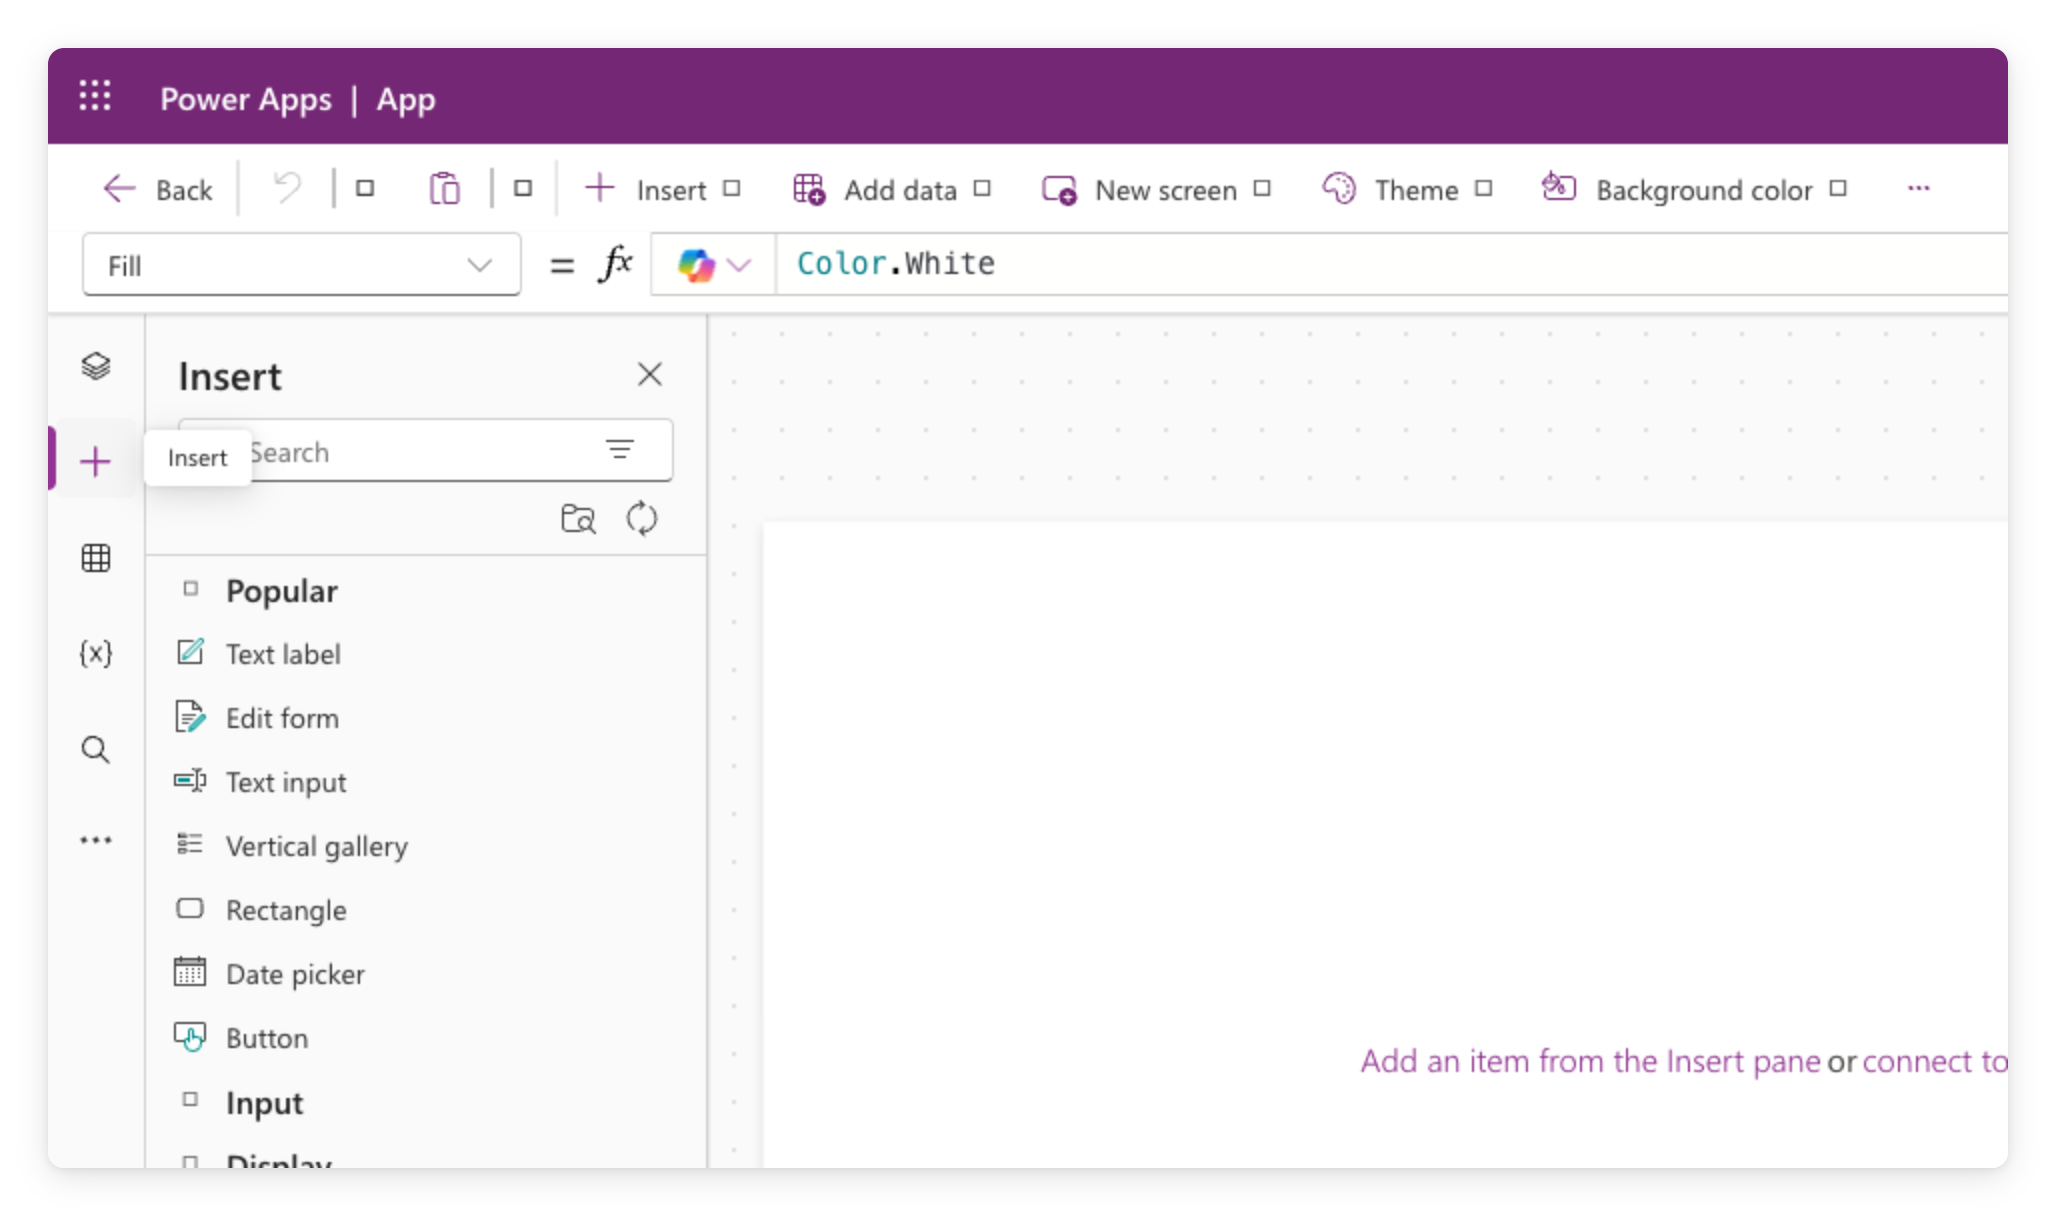
Adding controls


  • Click + Insert to open the catalog
  • Drop in a Text label, Text input, Button
  • Each control has properties: Text, Fill, Size, more


Power Apps Studio Insert panel open from the toolbar, listing control categories such as Text label, Button, and Gallery

Introduction to Power Apps

Preview your app


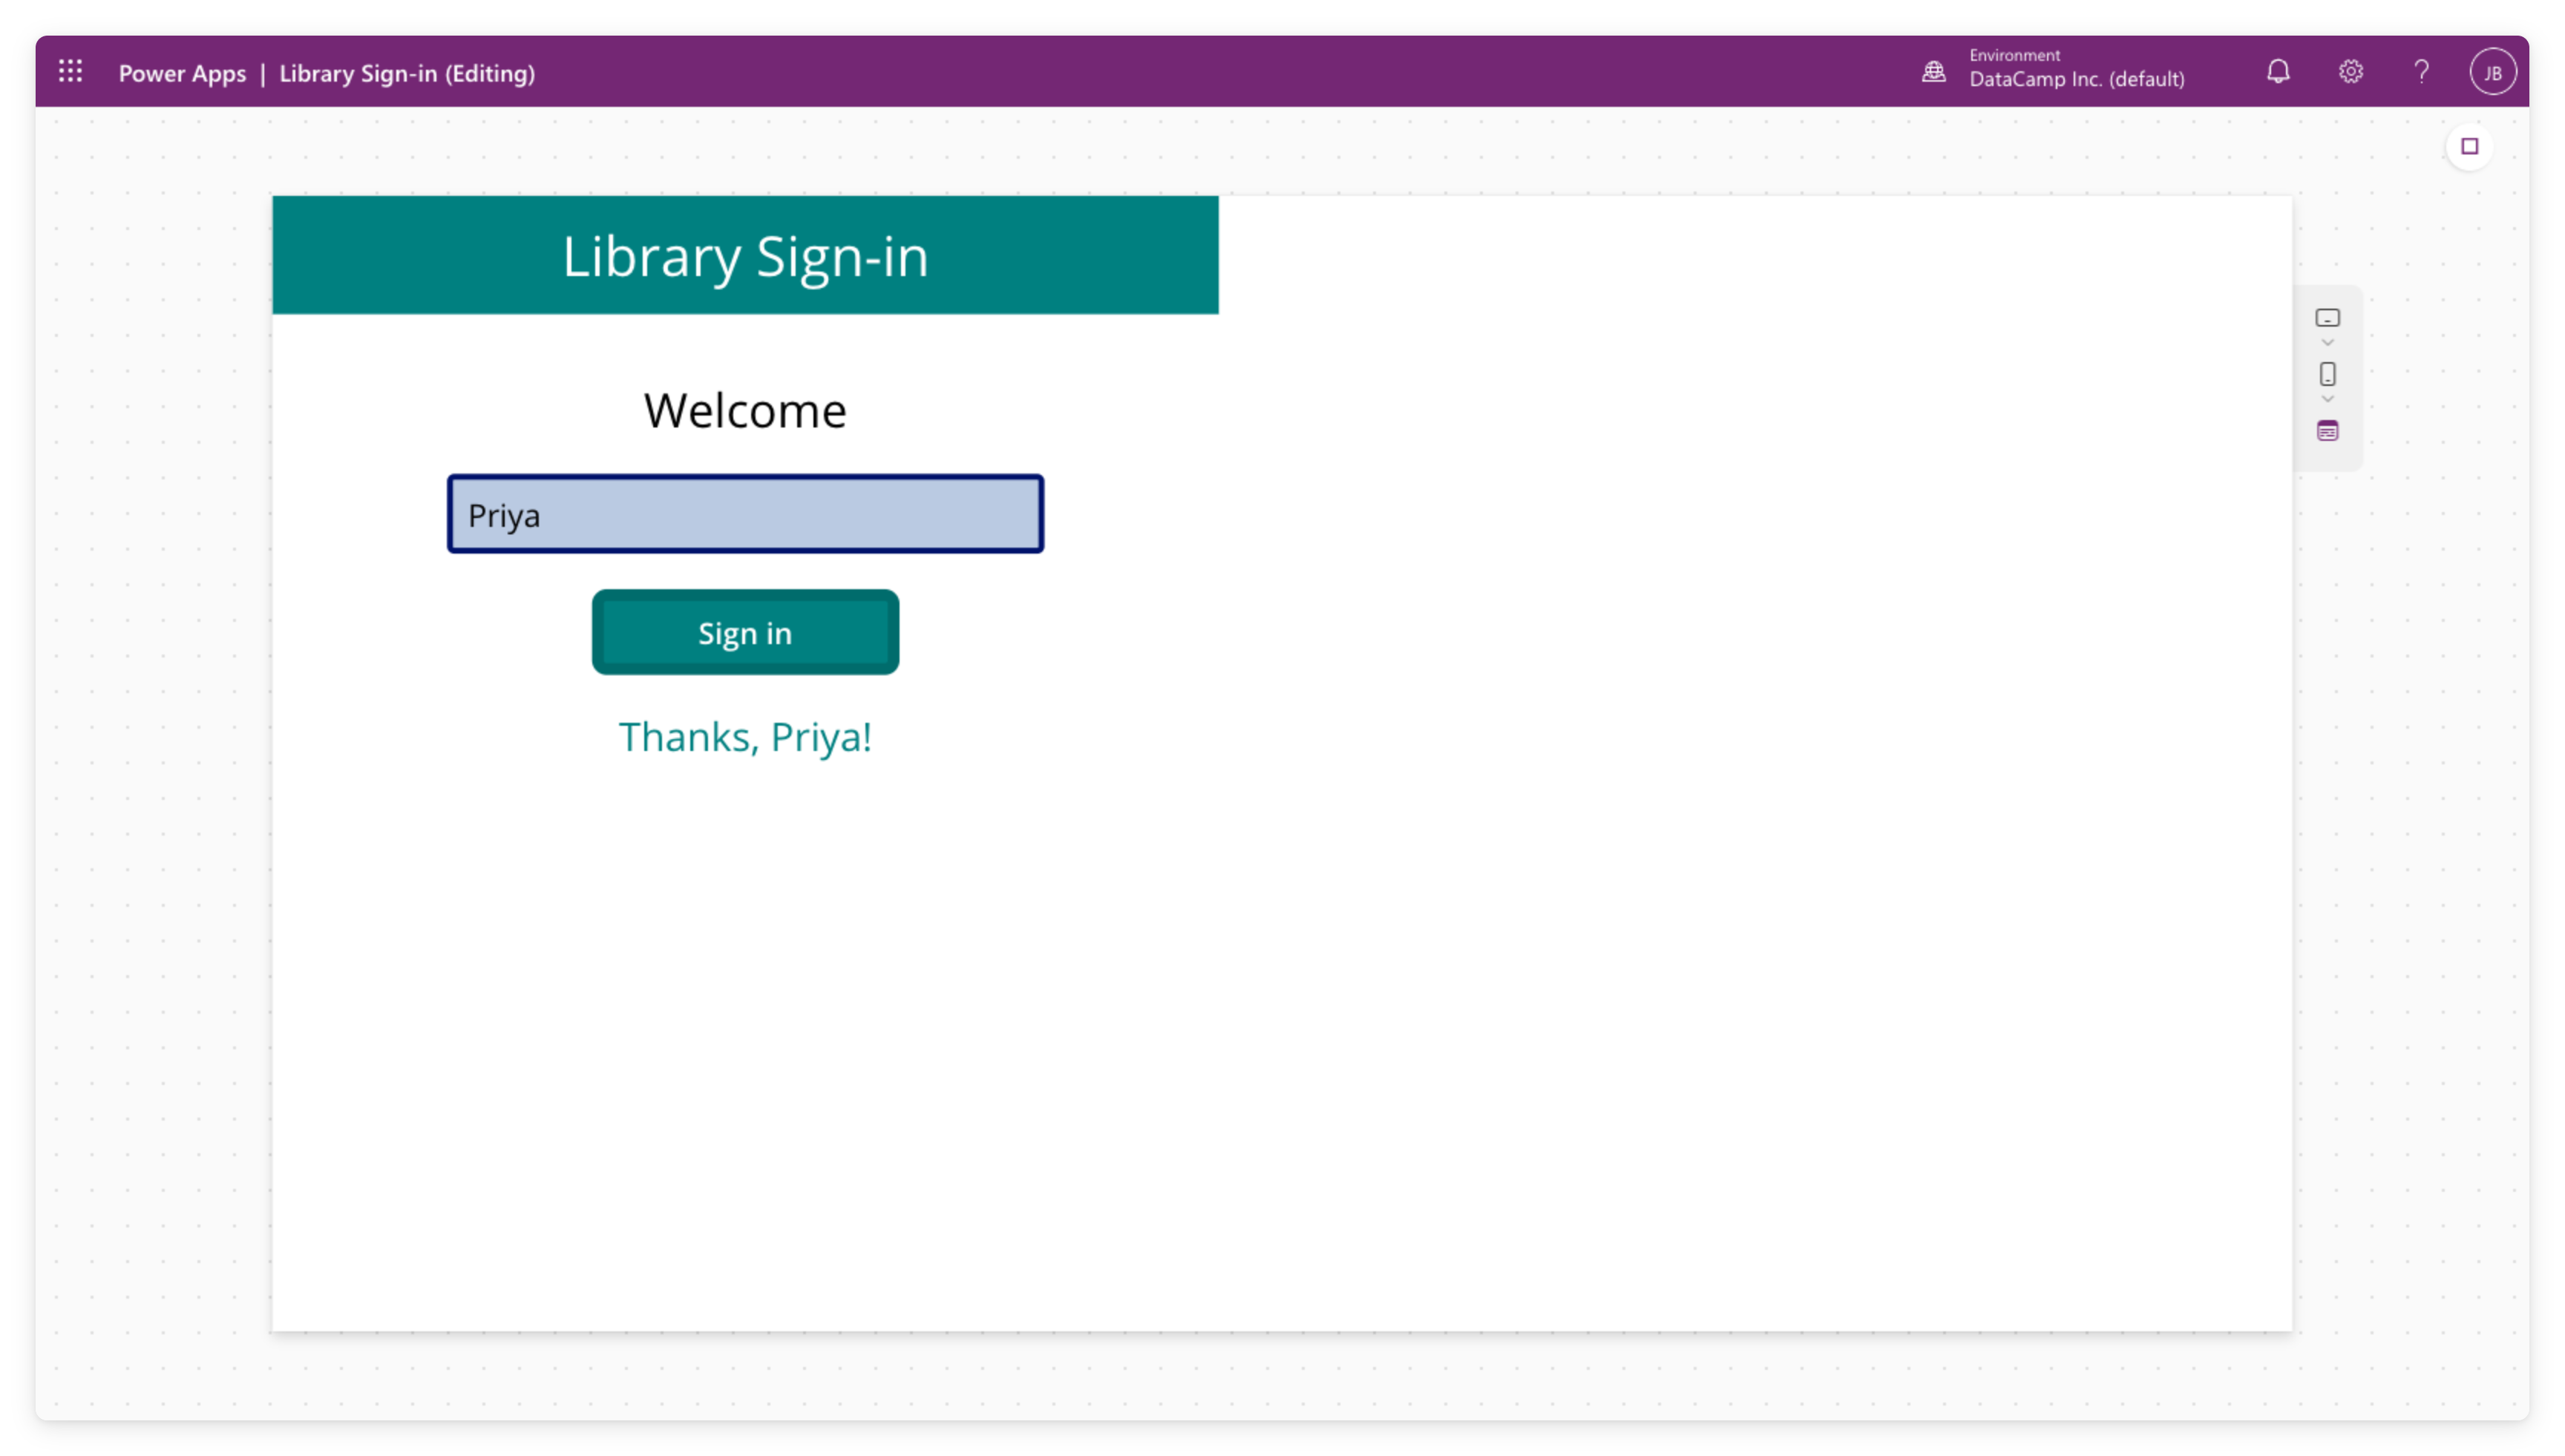
Power Apps Studio preview mode with the app running


  • Click the play button (top-right) to run the app
  • Click buttons, type into inputs, it behaves like the real app
  • Click to return to the editor
Introduction to Power Apps

Save versus publish


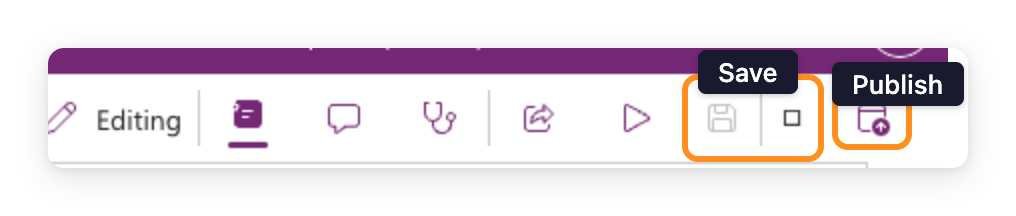
  • Save, preserves your work
  • Publish, makes the version live to anyone you share with
  • We'll publish properly in Chapter 4

$$

Power Apps Studio toolbar with Save and Publish icons highlighted in the upper-right, alongside Editing, Properties, Comments, App Checker, Share, and Preview buttons

Introduction to Power Apps

Containers come later

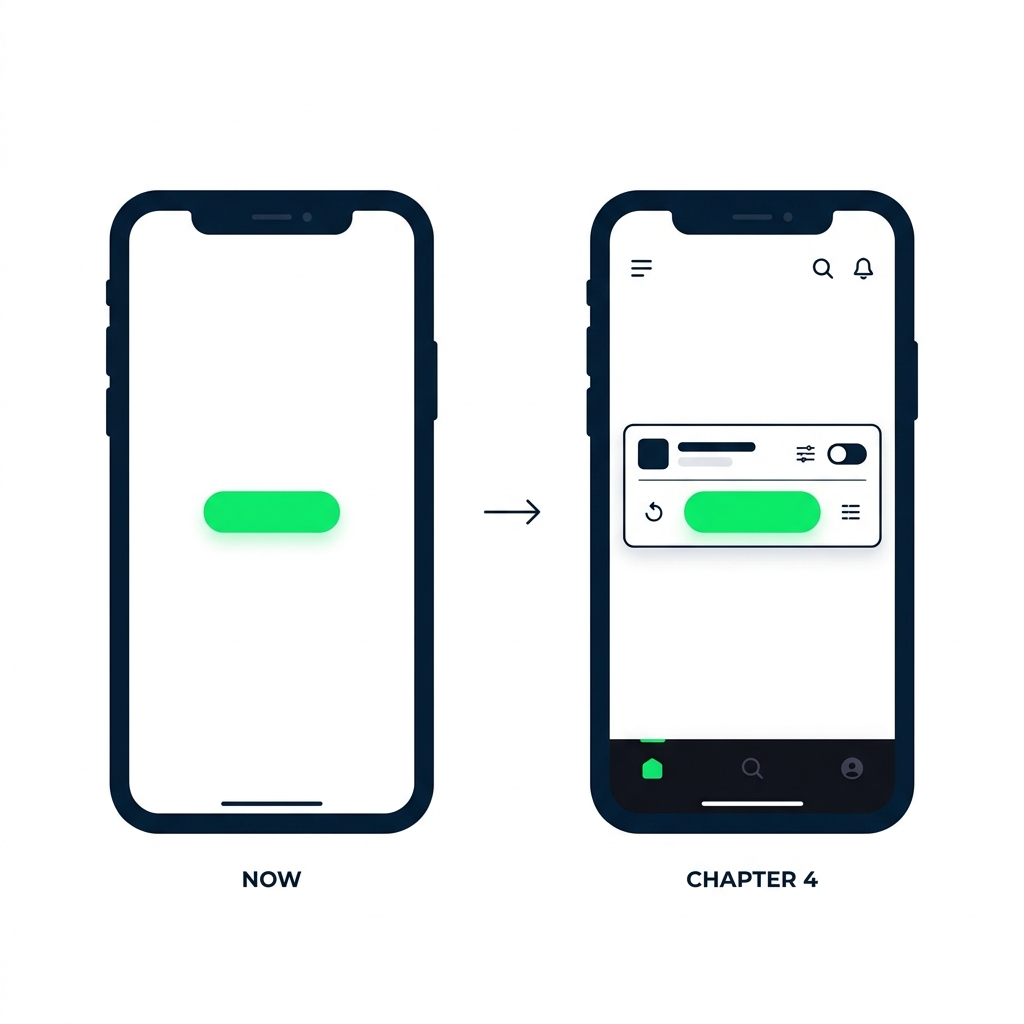
Two phone-app screens side by side. The left, labeled "Now: blank screen", shows a single button floating on an empty canvas. The right, labeled "Chapter 4: layouts", shows the same button inside a horizontal container with other controls aligned around it.


  • Up next: a blank screen so you can see each control
  • Chapter 4: layout containers so the app stays responsive
  • Don't worry about alignment yet
Introduction to Power Apps

What you'll build


  • Create a blank canvas app
  • Add two screens and your first controls
  • Preview everything with the play button

$$

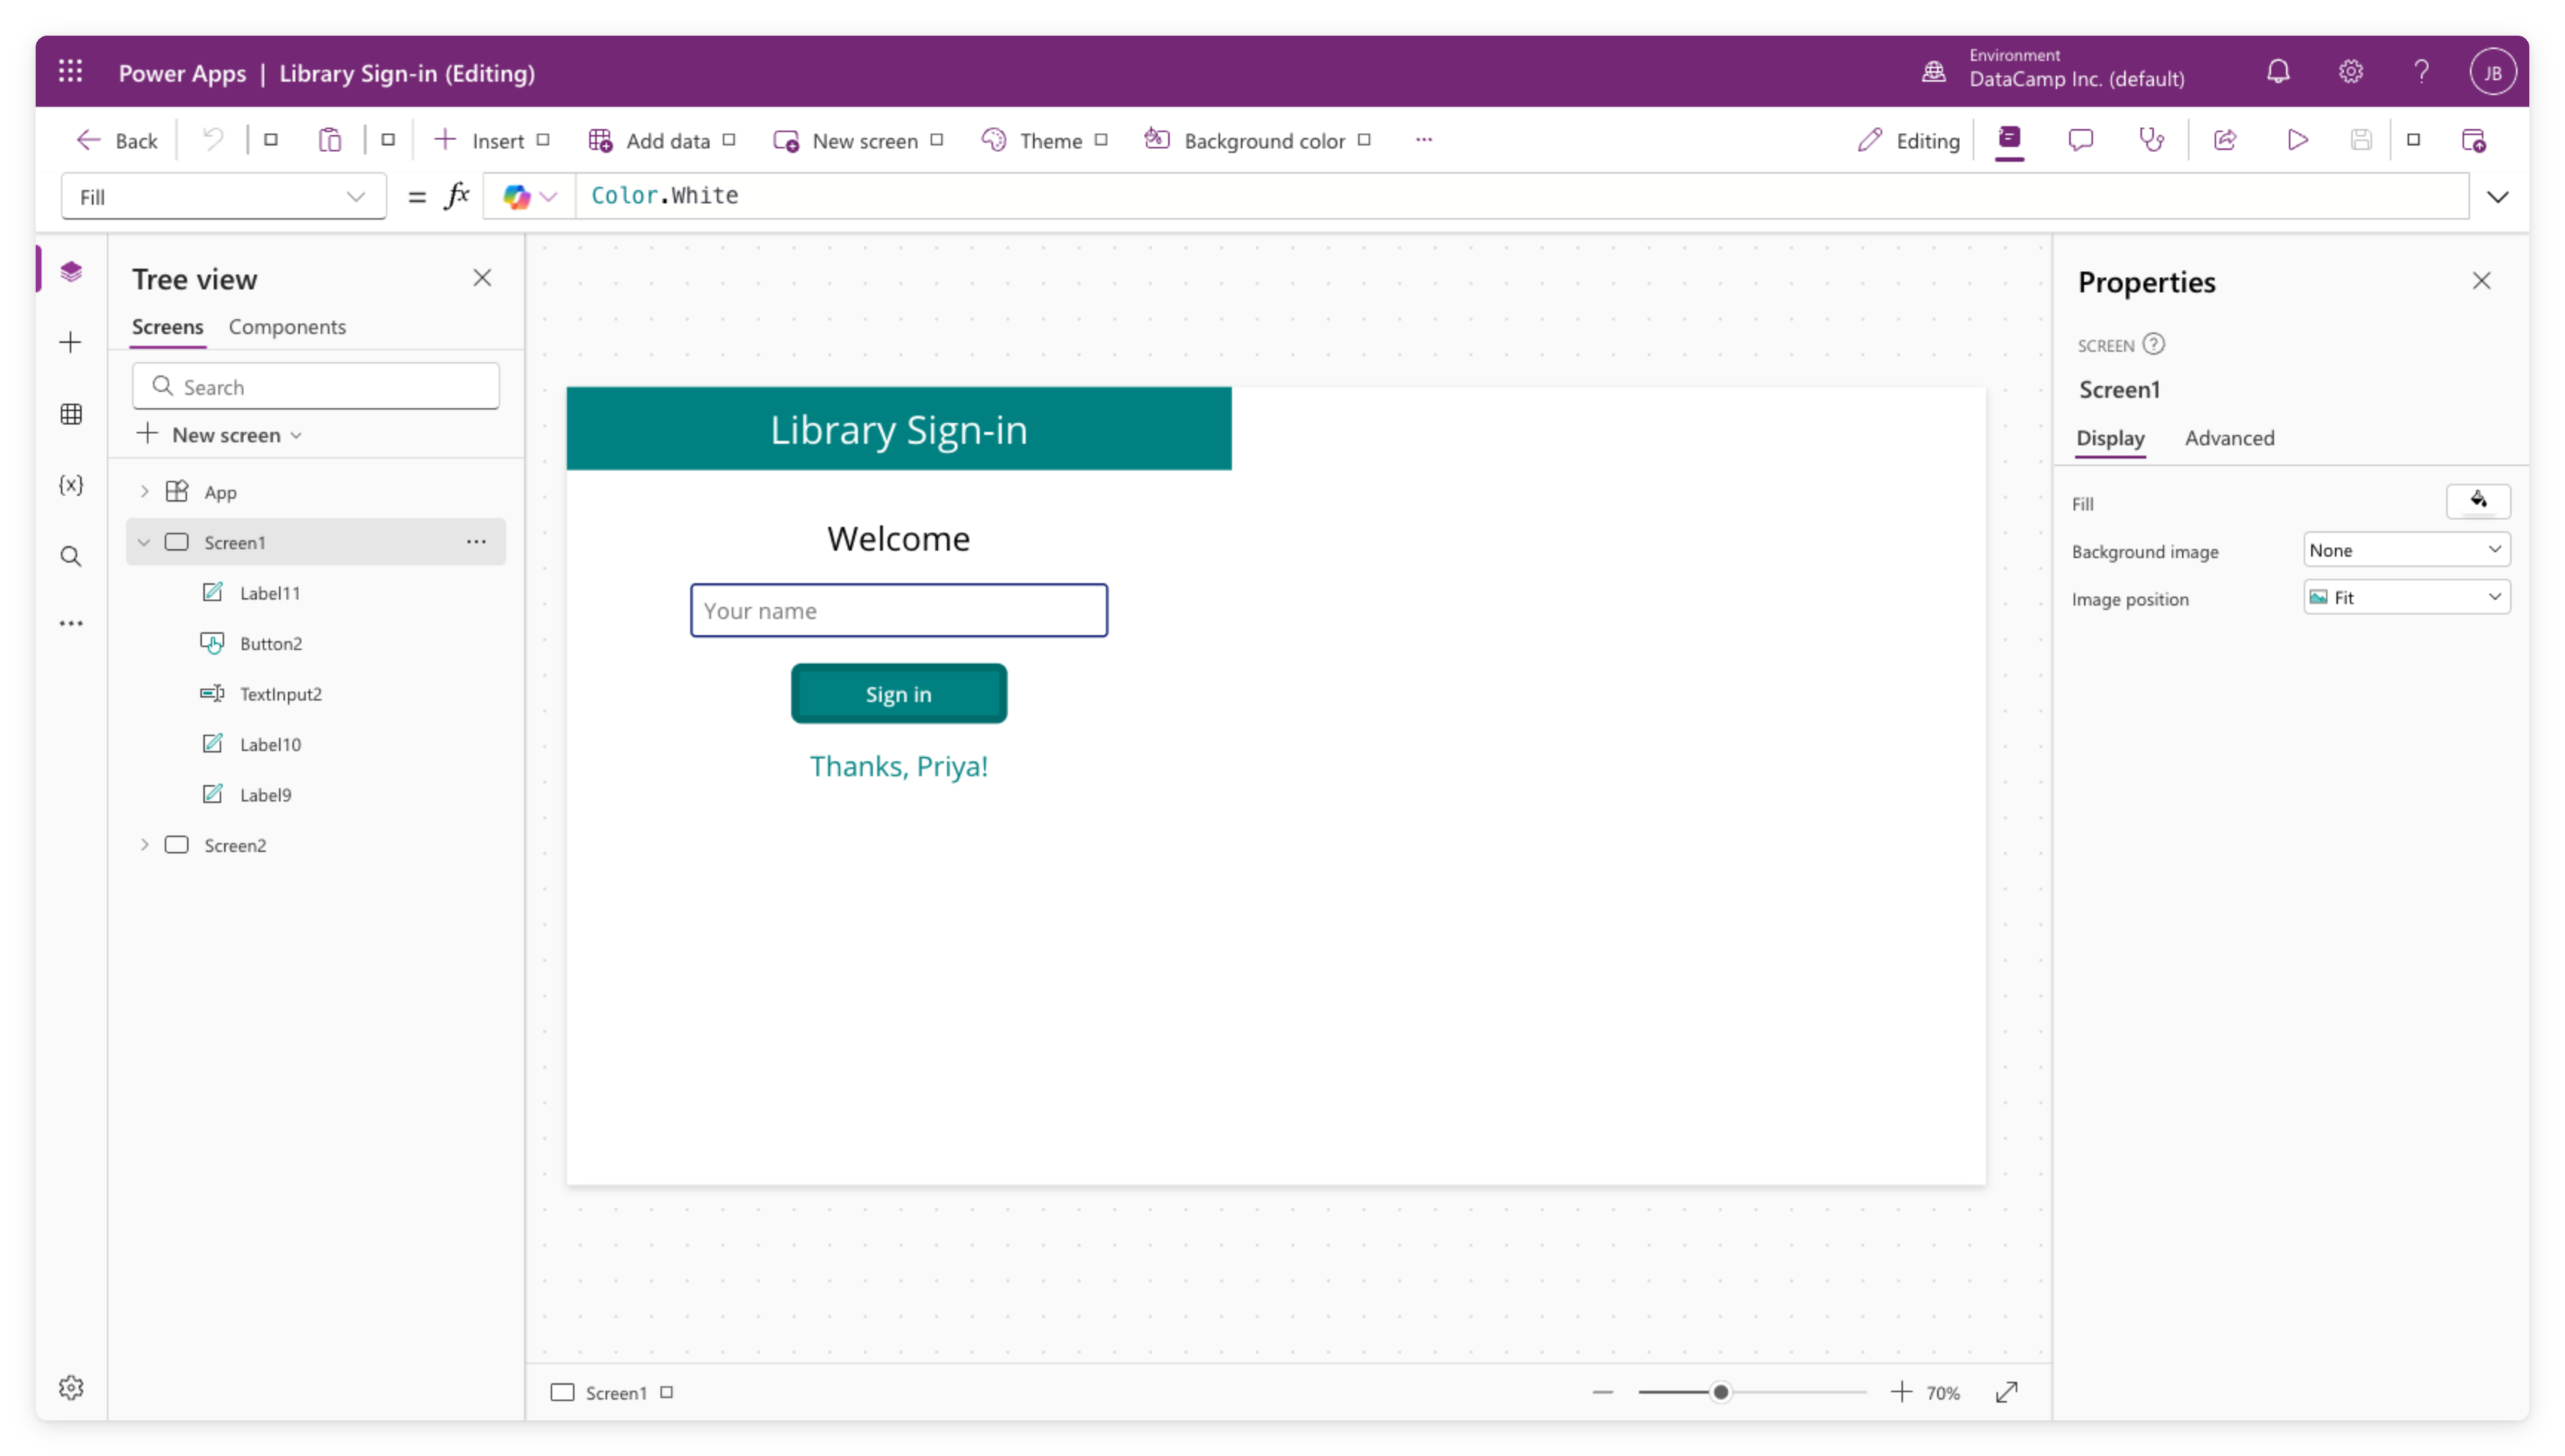
Real screenshot of Power Apps Studio showing the Library Sign-in app with Tree View on the left listing Screen1 (with Label, Button, TextInput controls) and Screen2, the canvas displaying the sign-in screen with teal header, Welcome text, name input, Sign in button, and Thanks Priya message, and the Properties panel on the right

Introduction to Power Apps

Let's practice!

Introduction to Power Apps

Preparing Video For Download...