Building a complete flow end-to-end with approvals

Introduction to Power Automate

Anushika Agarwal

Cloud Data Engineer

The Approvals connector

Real Power Automate Create an approval action card open in the designer, tightly cropped to the form fields with the Power Automate header and empty canvas dots trimmed off: Approval type Approve/Reject - First to respond, Title Vantara purchase request, Assigned to marco@vantara.example with a purple M avatar, Details Please review, Item link, and Item link description rows all clearly readable


  • Standard connector, no Premium license needed
  • Built into your Microsoft 365 licensing
  • Has no trigger: approvals are never the first step

$$

  • First use provisions Dataverse automatically (one-time, ~1 min)
Introduction to Power Automate

Approval actions


  • Create an approval → builds the request, then moves on immediately
  • Wait for an approval → pauses the flow until someone responds
  • Start and wait for an approval → combines both into one step
  • Start and wait for an approval of text → same, with editable suggested text the approver can adjust

$$

  • Use Create + Wait when you want to act between sending and pausing (post a Teams message, log the request); use Start and wait when you don't
Introduction to Power Automate

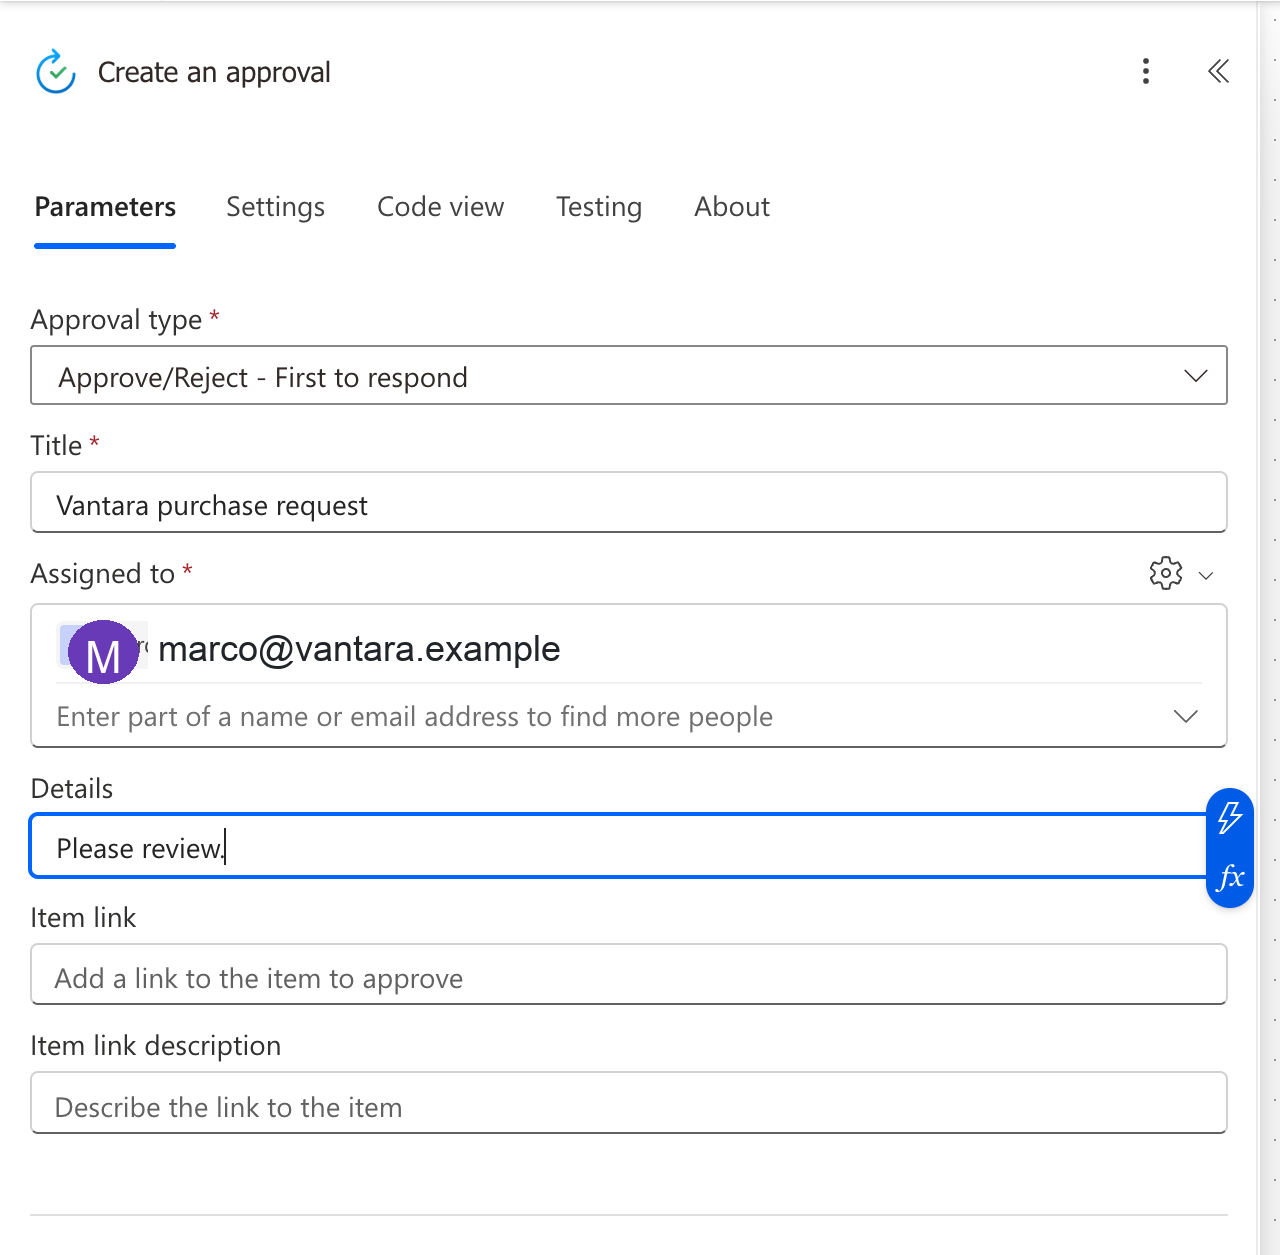
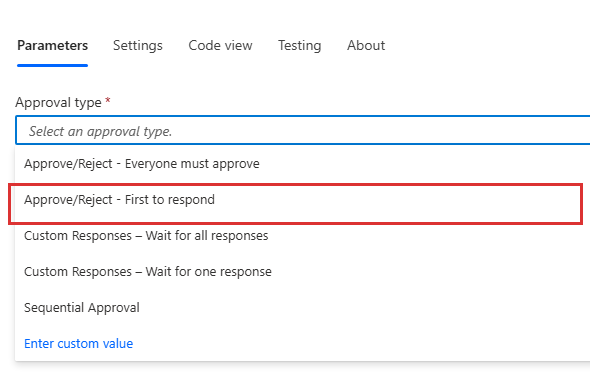
Approval type configuration

Approval type dropdown inside the Create an approval action showing all five options, with a tight red highlight box around the Approve/Reject - First to respond row as the most common pick


  • Approve/Reject → binary, the simplest case (First to respond or Everyone must approve)
  • First to respond → first reply decides
  • Everyone must approve → all approvers must agree, one rejection kills it
  • Custom Responses → define your own options; wait for one or all
  • Sequential Approval → approvers respond in a defined order
Introduction to Power Automate

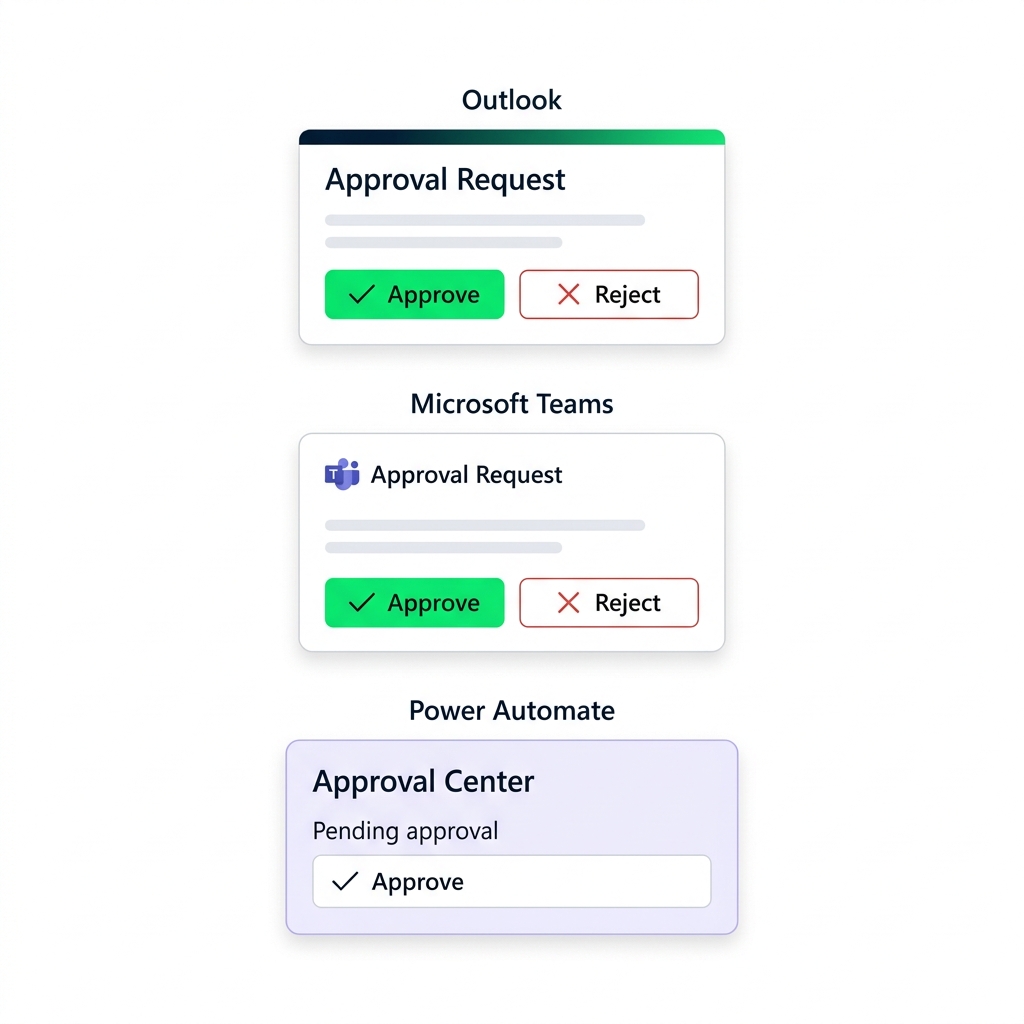
Where approvers respond

Conceptual illustration of an approval notification arriving in three channels, stacked: an Outlook email with Approve and Reject buttons, a Microsoft Teams adaptive card with the same request, and the Power Automate approval center


  • Outlook → desktop or browser
  • Microsoft Teams → adaptive card
  • Power Automate approval center → web or mobile app

$$

  • Respond from any channel: the approval updates everywhere
Introduction to Power Automate

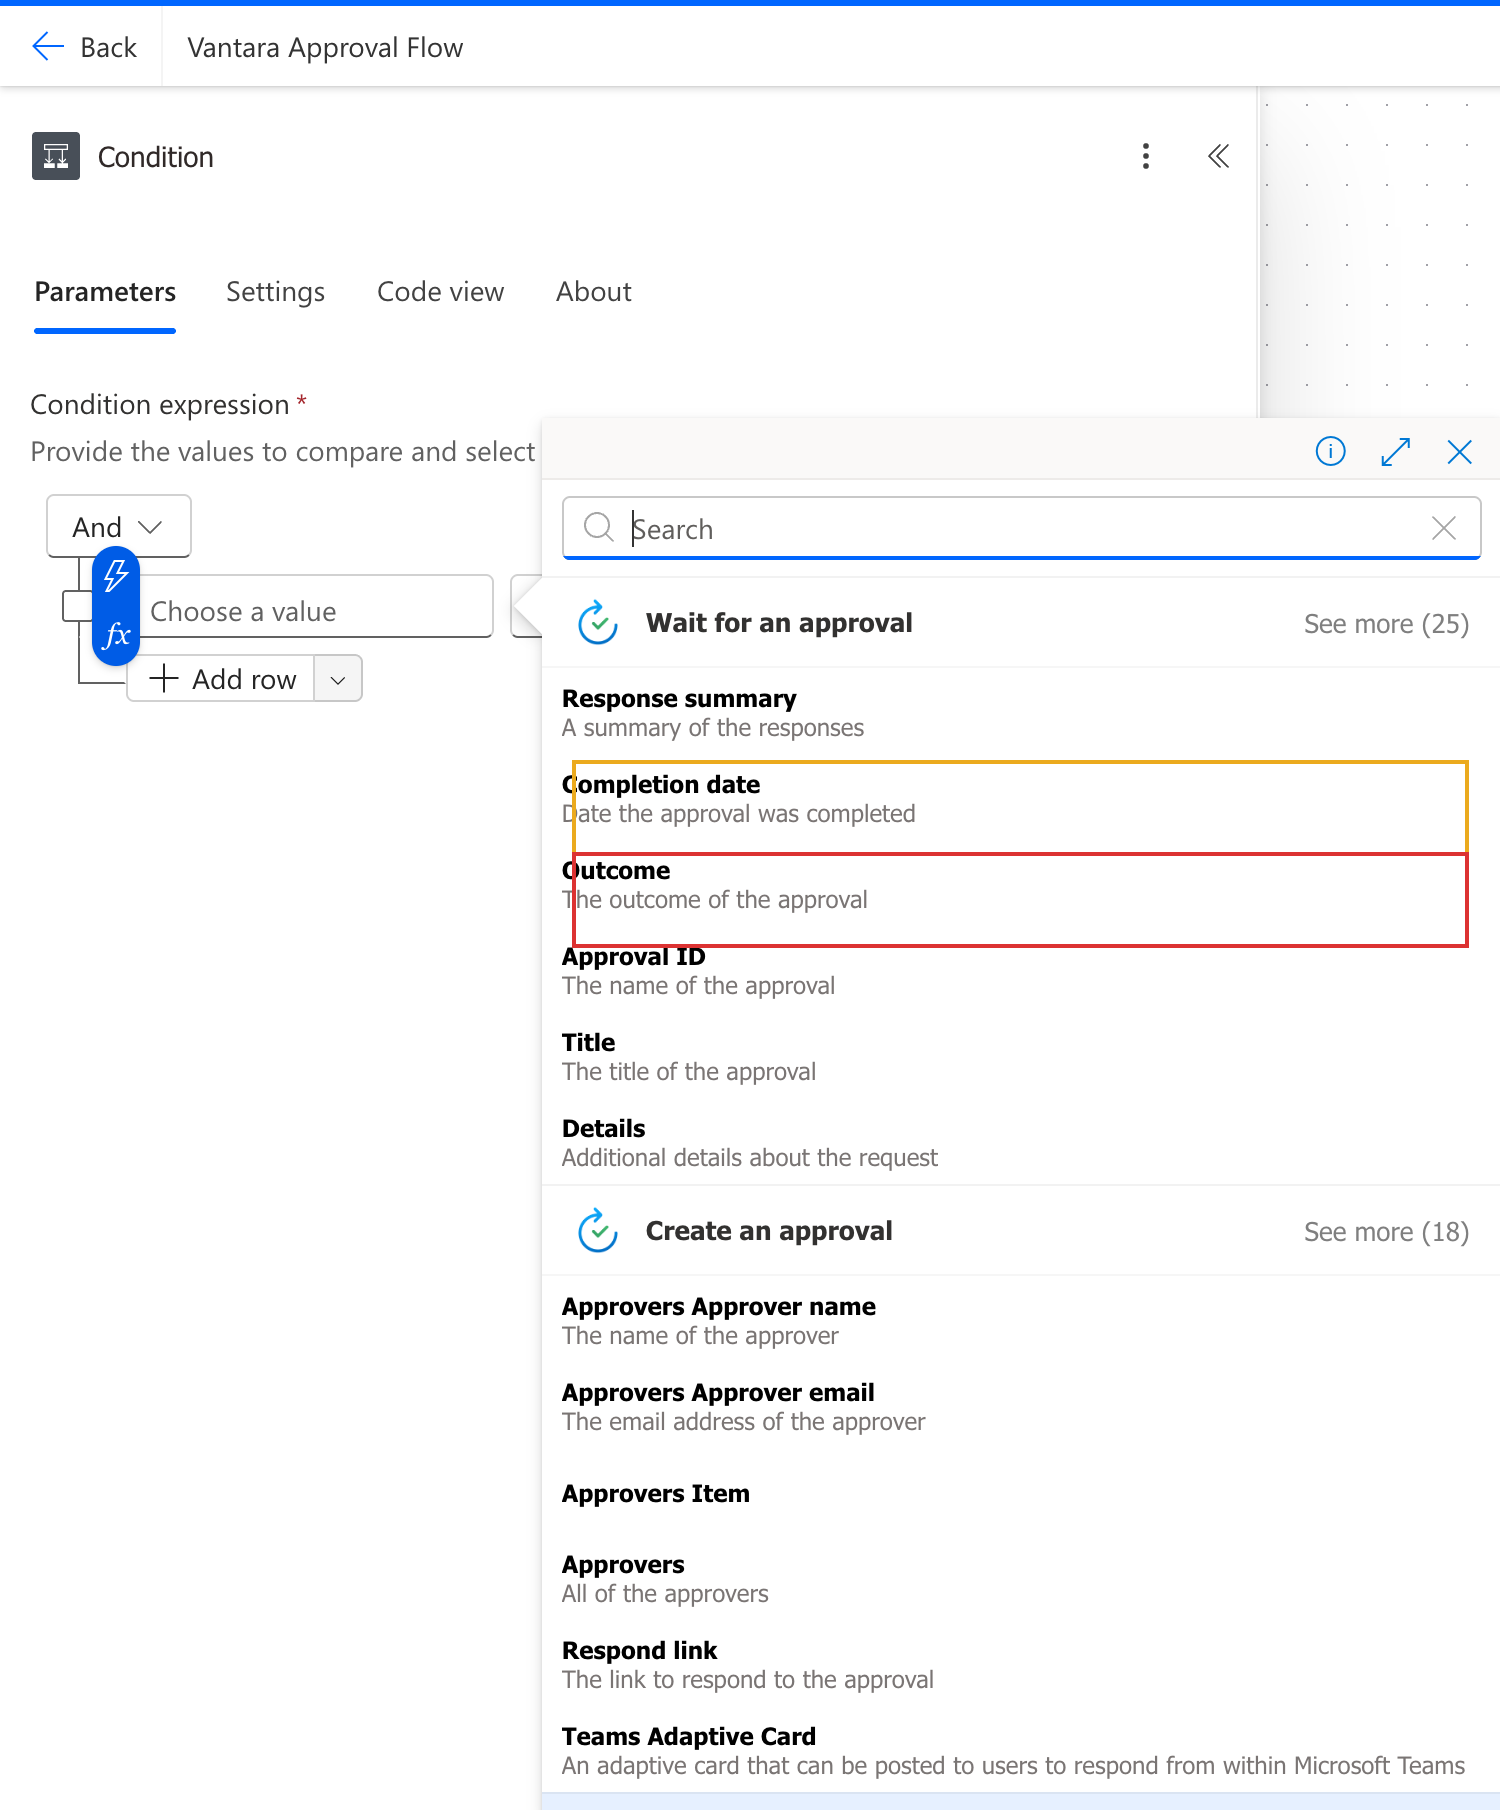
Approval metadata and the Outcome token


  • Outcome"Approve", "Reject", or your custom response
  • Dates → Request date, Response date, Completion date
  • Comments → the approver's notes (one record per approver)

$$

  • Heads up: Outcome is case-sensitive. "Approve""approve"

Dynamic content picker after a Wait for an approval action listing tokens including Response summary, Completion date, Outcome, Approval ID, Title, Details, with a tight yellow box around the Completion date row as one of the date tokens and a tight red box around the Outcome row as the routing token

Introduction to Power Automate

Let's practice!

Introduction to Power Automate

Preparing Video For Download...