R-CNN を用いた物体検出

PyTorch で学ぶ画像向け Deep Learning

Michal Oleszak

Machine Learning Engineer

領域ベース CNN ファミリ: R-CNN

R-CNN 系: R-CNN, Fast R-CNN, Faster R-CNN

R-CNN

  • モジュール1: 領域提案の生成
1 出典: Jason Brownlee. 2019. Deep Learning for Computer Vision.
PyTorch で学ぶ画像向け Deep Learning

領域ベース CNN ファミリ: R-CNN

R-CNN 系: R-CNN, Fast R-CNN, Faster R-CNN
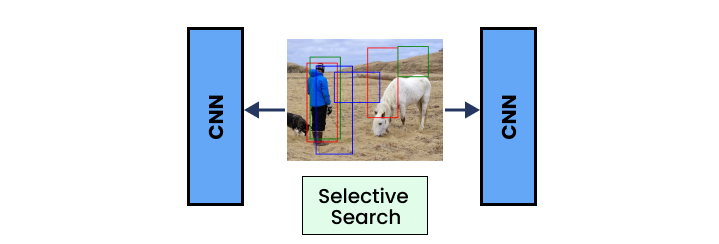
R-CNN

  • モジュール1: 領域提案の生成
  • モジュール2: 特徴抽出(畳み込み層)
1 出典: Jason Brownlee. 2019. Deep Learning for Computer Vision.
PyTorch で学ぶ画像向け Deep Learning

領域ベース CNN ファミリ: R-CNN

R-CNN 系: R-CNN, Fast R-CNN, Faster R-CNN
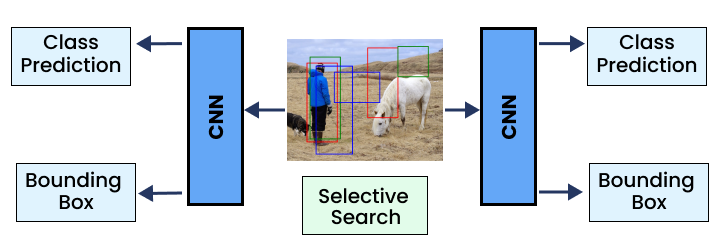
R-CNN

  • モジュール1: 領域提案の生成
  • モジュール2: 特徴抽出(畳み込み層)
  • モジュール3: クラスと境界ボックスの予測
1 出典: Jason Brownlee. 2019. Deep Learning for Computer Vision.
PyTorch で学ぶ画像向け Deep Learning

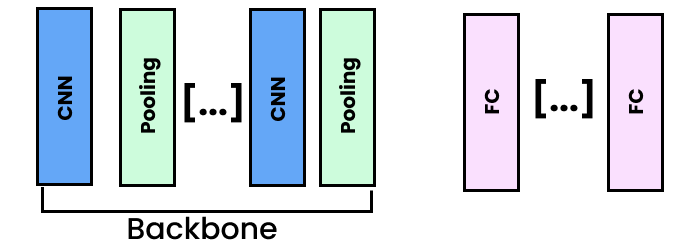
R-CNN: バックボーン

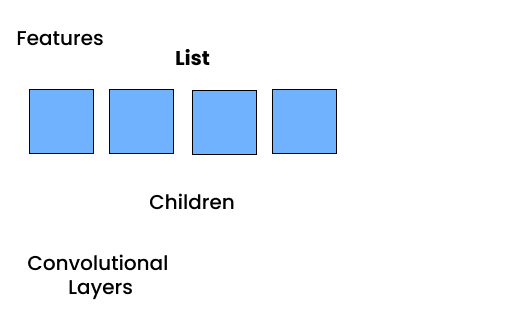
  • 畳み込み層: 事前学習モデル
    • バックボーン: 特徴抽出を担う中核の CNN アーキテクチャ

  バックボーン

  • 畳み込み & プーリング層
  • 領域提案と物体検出の特徴を抽出
PyTorch で学ぶ画像向け Deep Learning

R-CNN: PyTorch でのバックボーン

import torch.nn as nn
from torchvision.models import vgg16,
    VGG16_Weights


vgg = vgg16(weights=VGG16_Weights.DEFAULT)

vgg モデル

PyTorch で学ぶ画像向け Deep Learning

R-CNN: PyTorch でのバックボーン

import torch.nn as nn
from torchvision.models import vgg16,
    VGG16_Weights


vgg = vgg16(weights=VGG16_Weights.DEFAULT)

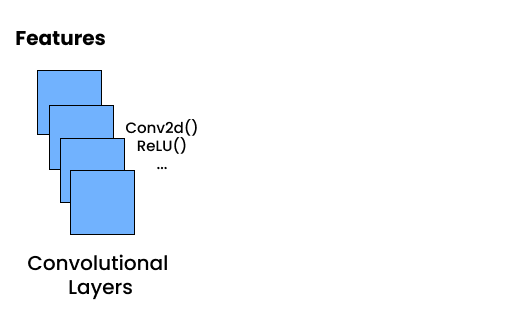
vgg モデルの features

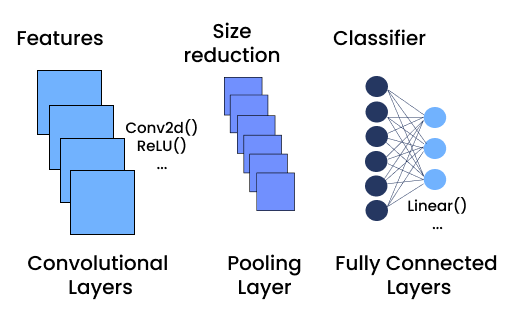
  • .features: 畳み込み層のみ
PyTorch で学ぶ画像向け Deep Learning

R-CNN: PyTorch でのバックボーン

import torch.nn as nn
from torchvision.models import vgg16,
    VGG16_Weights


vgg = vgg16(weights=VGG16_Weights.DEFAULT)

vgg モデル

  • .features: 畳み込み層のみ
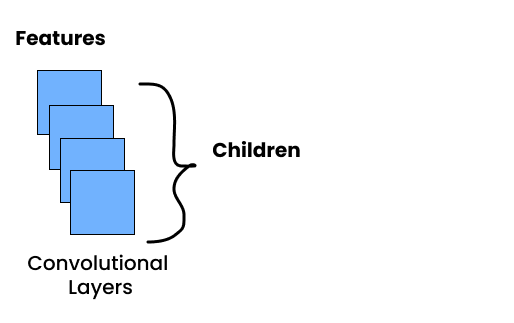
  • .children(): ブロック内の全レイヤー
PyTorch で学ぶ画像向け Deep Learning

R-CNN: PyTorch でのバックボーン

import torch.nn as nn
from torchvision.models import vgg16,
    VGG16_Weights


vgg = vgg16(weights=VGG16_Weights.DEFAULT)
backbone = nn.Sequential( *list(vgg.features.children()) )
  • nn.Sequential(*list()): サブレイヤーをリストから順次ブロック化
    • *: リスト要素をアンパック

vgg モデル

  • .features: 畳み込み層のみ
  • .children(): ブロック内の全レイヤー
PyTorch で学ぶ画像向け Deep Learning

R-CNN: 分類器レイヤー

  • バックボーンの出力サイズを取得
input_dimension = nn.Sequential(*list(
    vgg_backbone.classifier.children())
)[0].in_features
  • 新しい分類器を作成
classifier = nn.Sequential(
    nn.Linear(input_dimension, 512),
    nn.ReLU(),
    nn.Linear(512, num_classes),
)
PyTorch で学ぶ画像向け Deep Learning

R-CNN: ボックス回帰レイヤー

  • バックボーンの上に置く
  • 4 つの出力はボックスの 4 座標
box_regressor = nn.Sequential(
    nn.Linear(input_dimension, 32),
    nn.ReLU(),
    nn.Linear(32, 4),
)
PyTorch で学ぶ画像向け Deep Learning

統合: 物体検出モデル

class ObjectDetectorCNN(nn.Module):
    def __init__(self):
        super(ObjectDetectorCNN, self).__init__()

vgg = vgg16(weights=VGG16_Weights.DEFAULT) self.backbone = nn.Sequential(*list(vgg.features.children()))
input_features = nn.Sequential(*list(vgg.classifier.children()))[0].in_features
self.classifier = nn.Sequential( nn.Linear(input_features, 512), nn.ReLU(), nn.Linear(512, 2), )
self.box_regressor = nn.Sequential( nn.Linear(input_features, 32), nn.ReLU(), nn.Linear(32, 4), )
PyTorch で学ぶ画像向け Deep Learning

統合: 物体検出モデル

class ObjectDetector(nn.Module):
    (...)

    def forward(self, x):

features = self.backbone(x)
bboxes = self.regressor(features) classes = self.classifier(features) return bboxes, classes
PyTorch で学ぶ画像向け Deep Learning

物体認識の実行

  1. 画像を読み込み・変換
  2. バッチ次元を追加するため unsqueeze()
  3. 画像テンソルをモデルへ入力
  4. 出力に Non-Max Suppression(nms())を適用
  5. 画像上に draw_bounding_boxes()
PyTorch で学ぶ画像向け Deep Learning

¡Vamos a practicar!

PyTorch で学ぶ画像向け Deep Learning

Preparing Video For Download...