Pythonで学ぶ次元削減
Jeroen Boeye
Head of Machine Learning, Faktion
pipe = Pipeline([
        ('scaler', StandardScaler()),
        ('reducer', PCA(n_components=0.9))])

# Fit the pipe to the data
pipe.fit(poke_df)

print(len(pipe['reducer'].components_))
pipe = Pipeline([ ('scaler', StandardScaler()), ('reducer', PCA(n_components=0.9))])
# Fit the pipe to the data pipe.fit(poke_df) print(len(pipe['reducer'].components_))
5
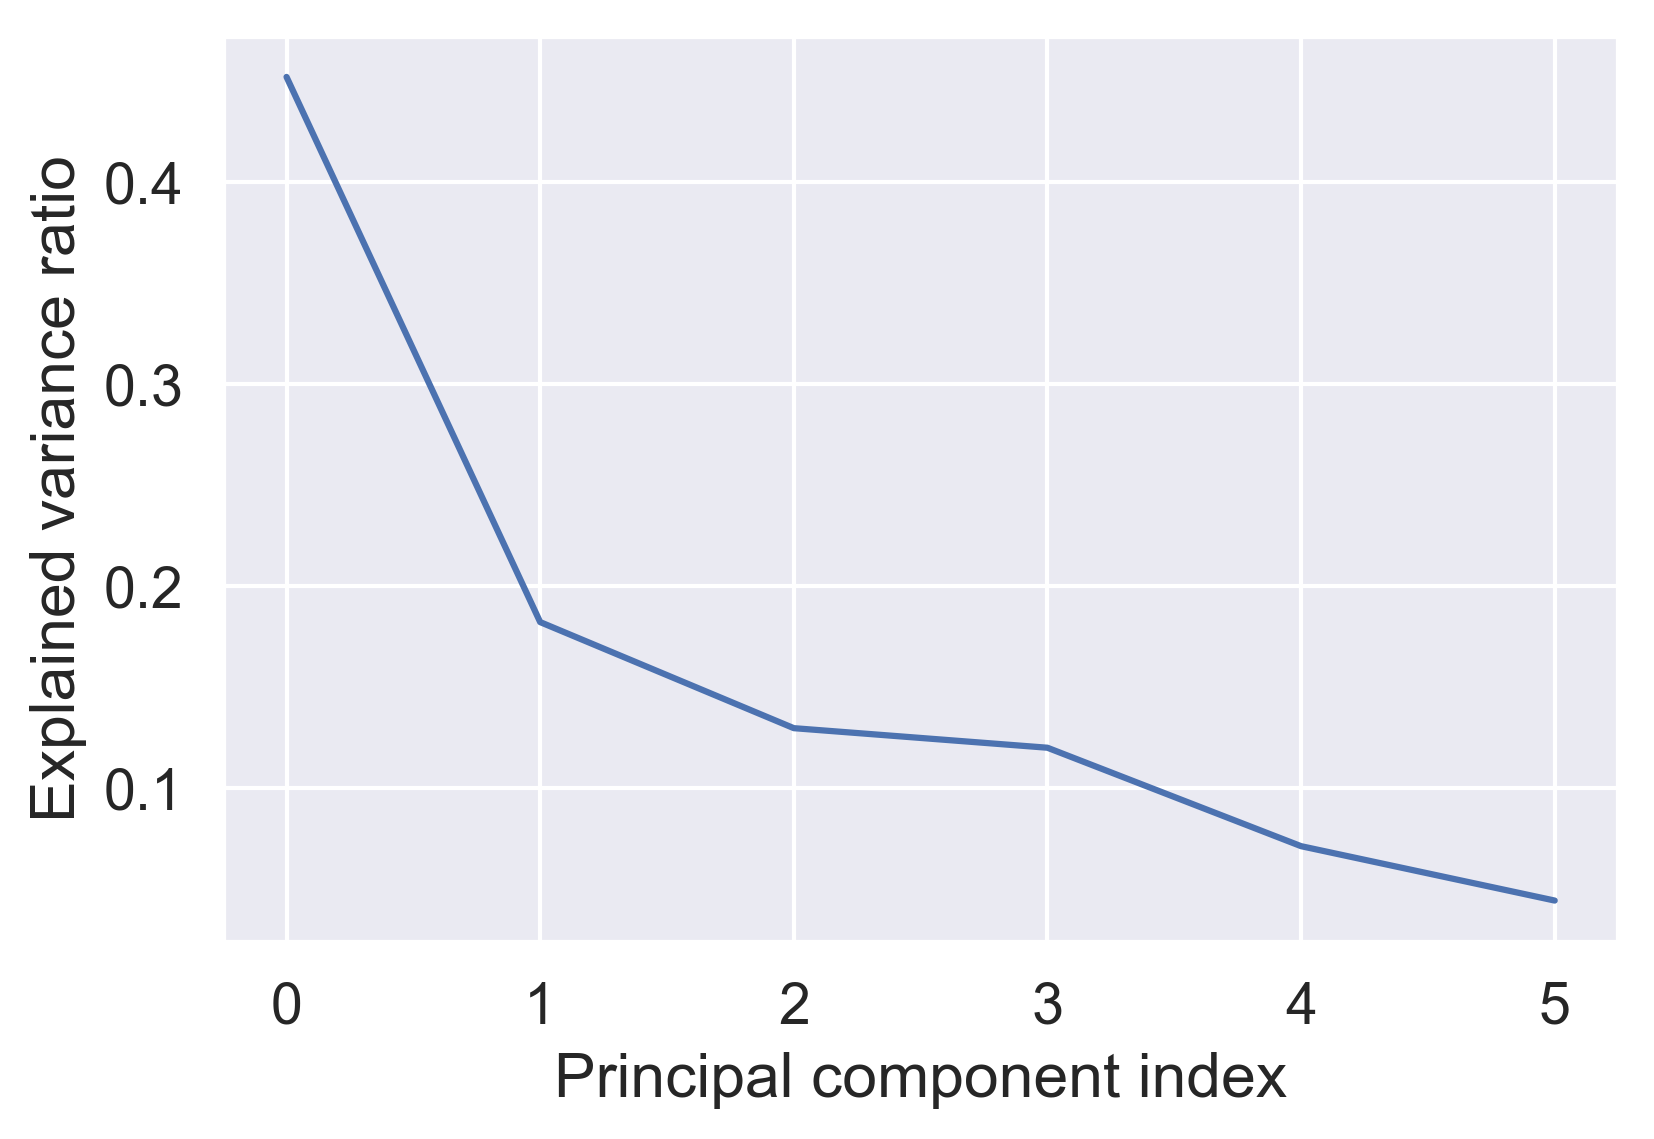
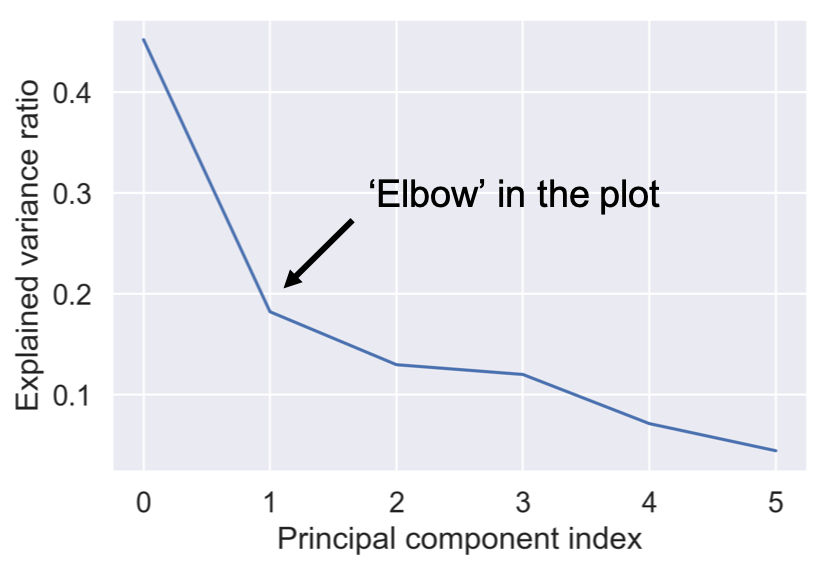
pipe.fit(poke_df)

var = pipe['reducer'].explained_variance_ratio_

plt.plot(var)

plt.xlabel('Principal component index')
plt.ylabel('Explained variance ratio')
plt.show()
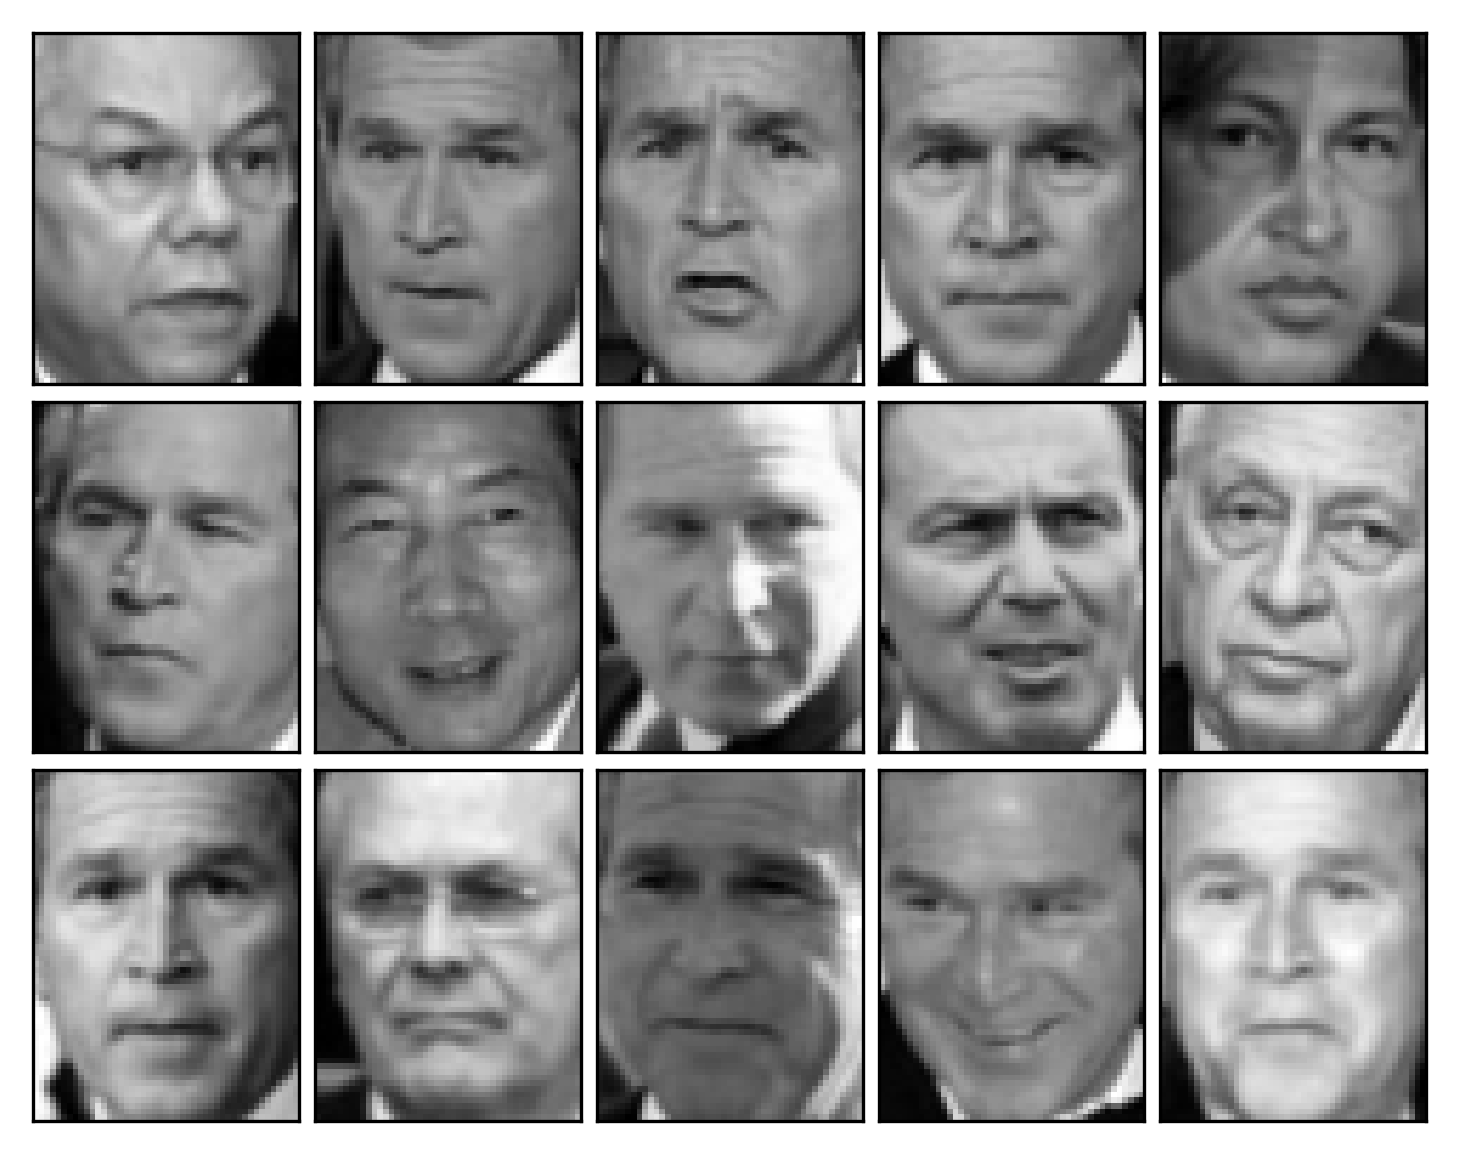
print(X_test.shape)
(15, 2914)
62 x 47 ピクセル = 2914 濃淡値
print(X_train.shape)
(1333, 2914)
pipe = Pipeline([
        ('scaler', StandardScaler()),
        ('reducer', PCA(n_components=290))])

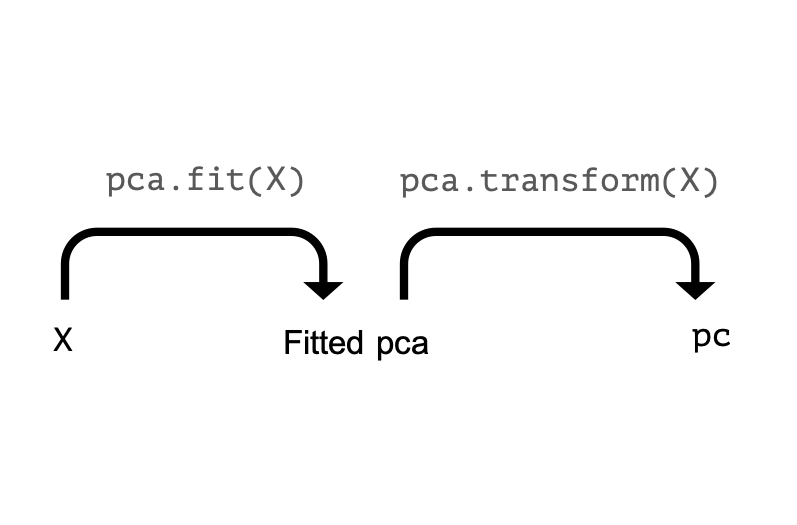
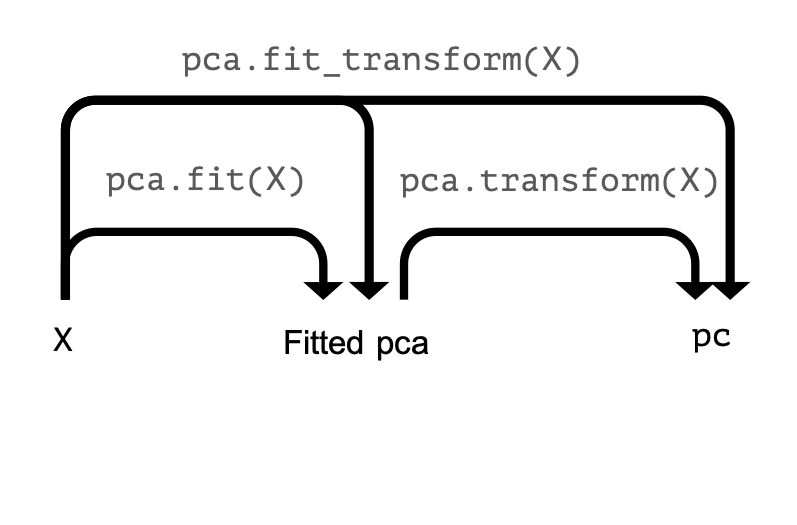
pipe.fit(X_train)

pc = pipe.fit_transform(X_test)

print(pc.shape)
pipe = Pipeline([ ('scaler', StandardScaler()), ('reducer', PCA(n_components=290))])
pipe.fit(X_train)
pc = pipe.fit_transform(X_test) print(pc.shape)
(15, 290)
pc = pipe.transform(X_test)

print(pc.shape)
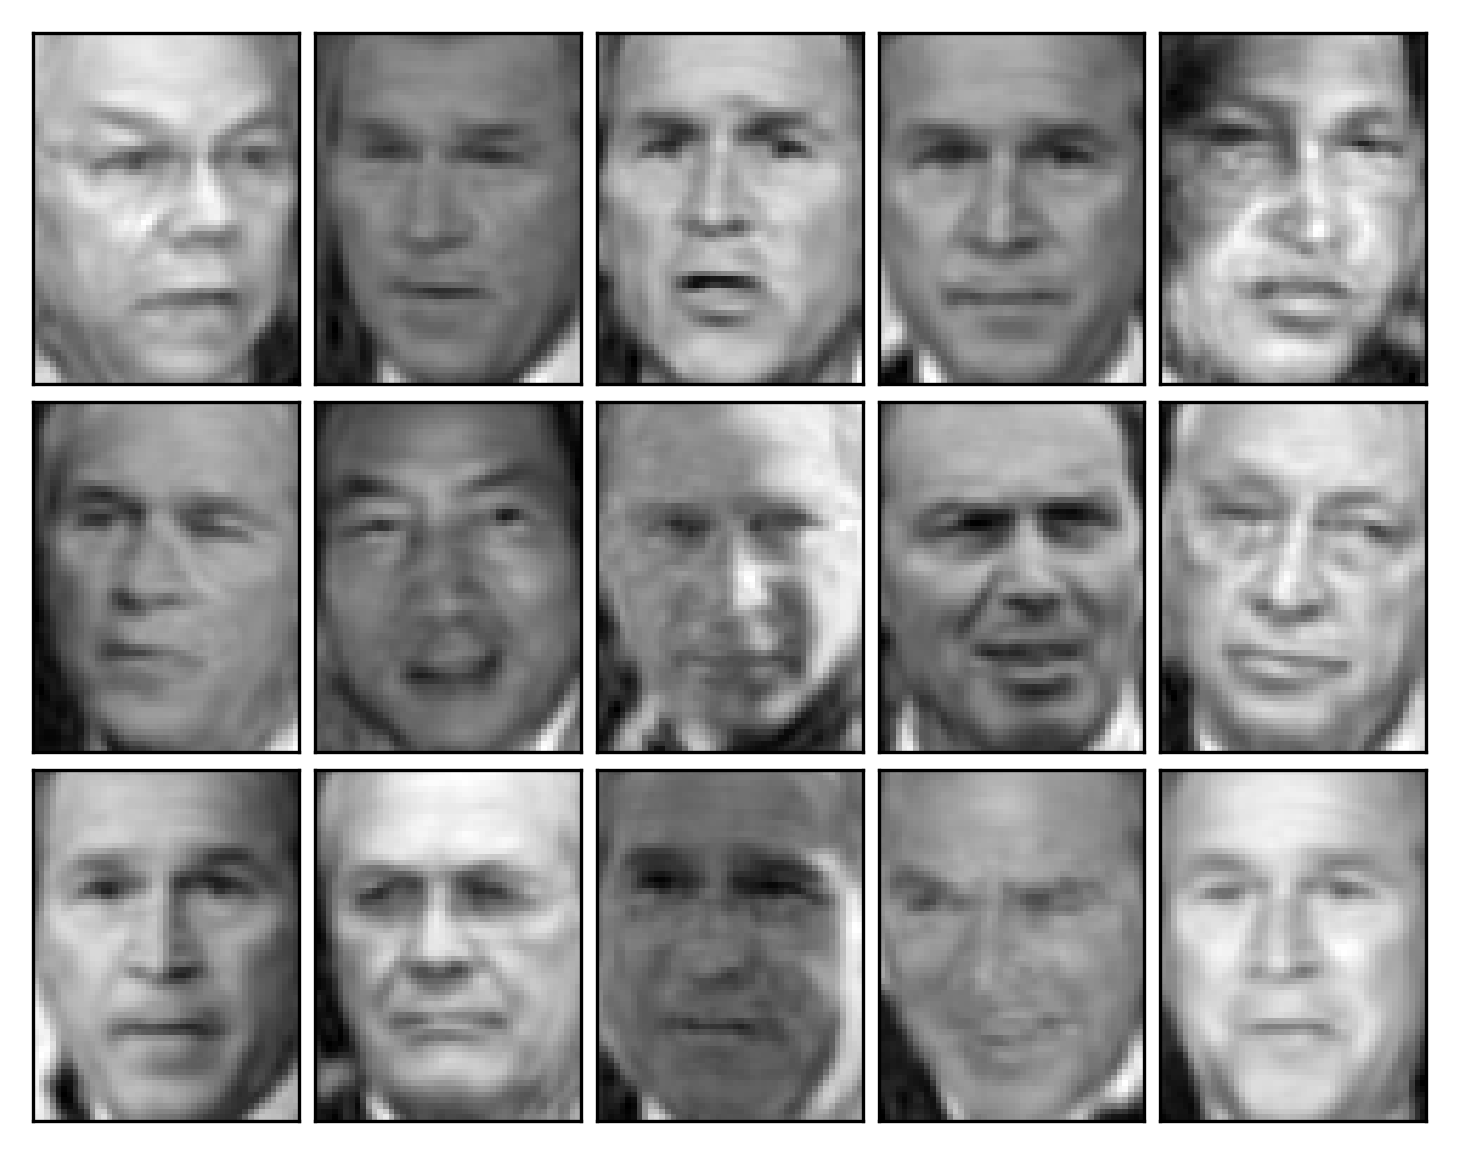
X_rebuilt = pipe.inverse_transform(pc)

print(X_rebuilt.shape)
img_plotter(X_rebuilt)