輝度値

Python による生体医療画像解析

Stephen Bailey

Instructor

ピクセルとボクセル

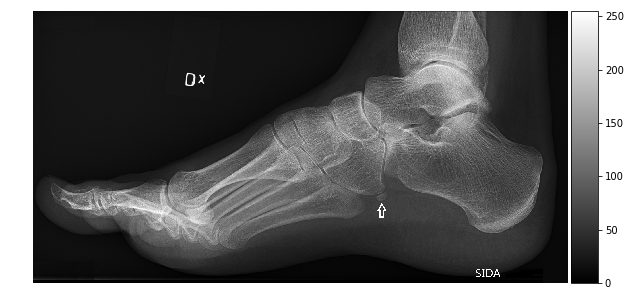
  • ピクセルは2次元の画像要素
  • ボクセルは3次元の体積要素
  • 2つの属性:輝度と位置

足のX線画像

Python による生体医療画像解析

データ型と画像サイズ

配列のデータ型が輝度値の範囲を決定する

型 範囲 値の数
uint8 0, 255 256
int8 - 128, 127 256
uint16 0, 2$^{16}$ 2$^{16}$
int16 -2$^{15}$, 2$^{15}$ 2$^{16}$
float16 ~-2$^{16}$, ~2$^{16}$ >>2$^{16}$
import imageio.v2 as imageio

im=imageio.imread('foot-xray.jpg')

im.dtype
    dtype('uint8')

im.size
153600
im_int64 = im.astype(np.uint64)
im_int64.size
1228800
Python による生体医療画像解析

ヒストグラム

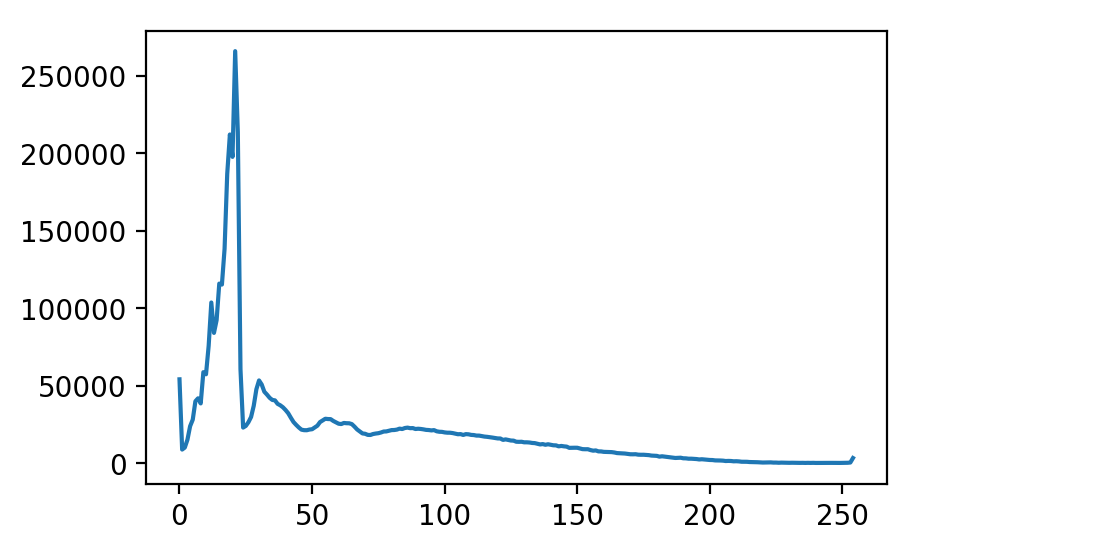
  • ヒストグラム:各輝度値のピクセル数をカウント。
  • scipy.ndimage で実装
    • 高次元配列に対応
    • マスクデータに対応
  • 高度な機能は scikit-image で利用可能。
plt.plot(hist)
plt.show()
import scipy.ndimage as ndi

hist=ndi.histogram(im, min=0, max=255, bins=256)
hist.shape
(256,)

ヒストグラム

Python による生体医療画像解析

ヒストグラム平均化

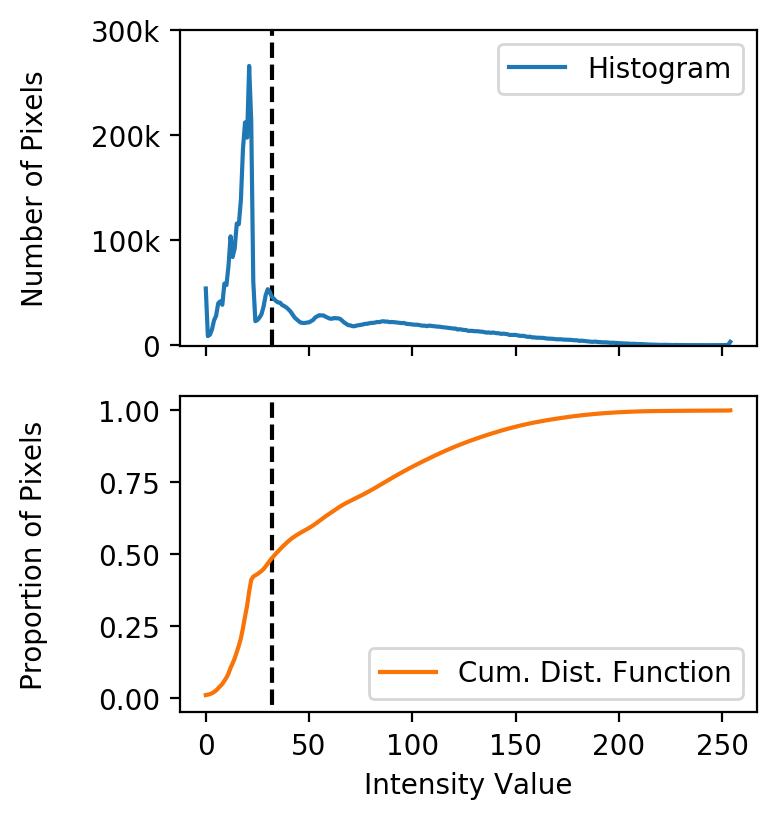
  • 分布は低輝度(背景値)に偏りやすい。

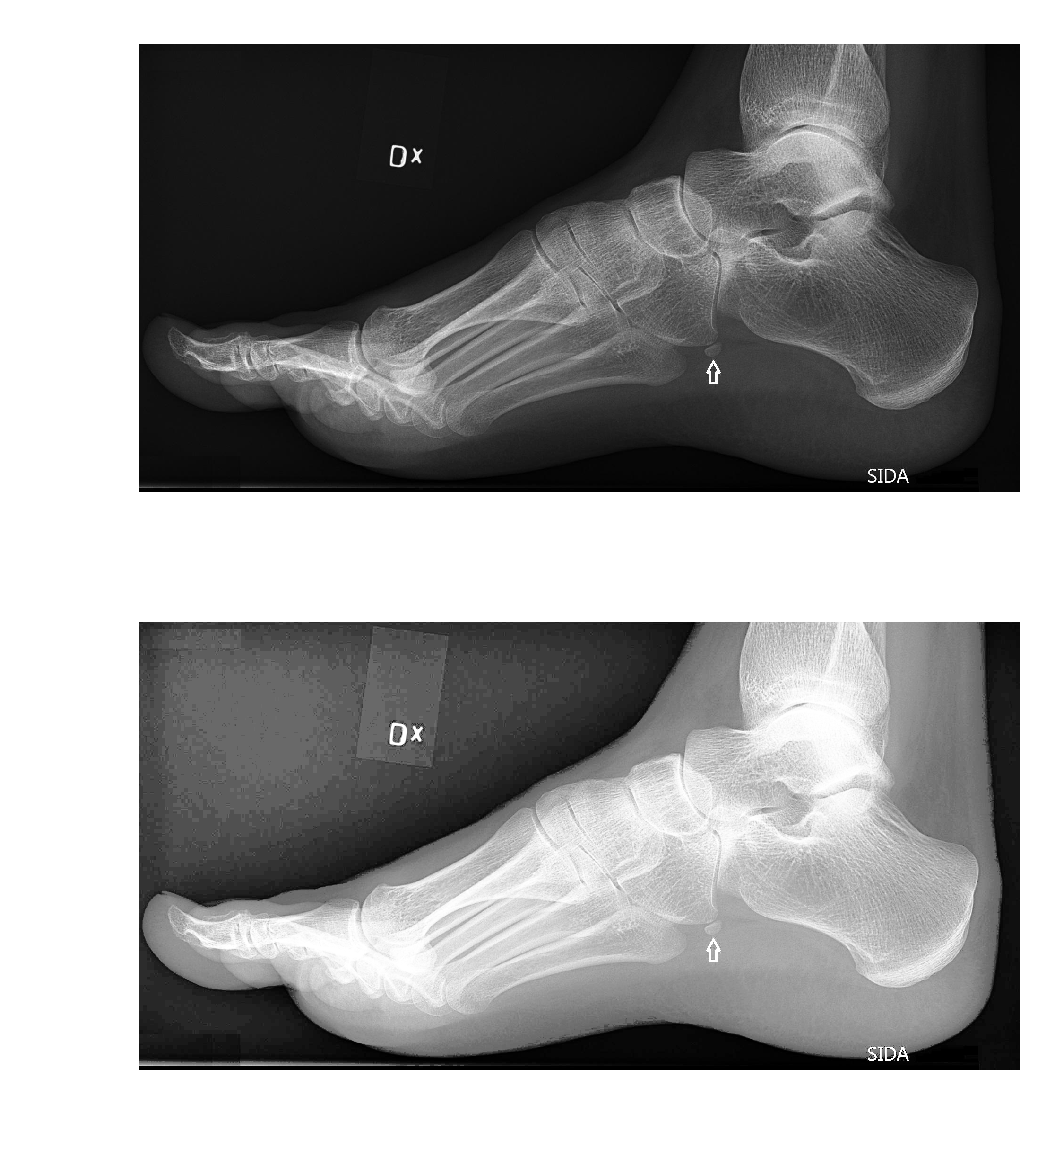
  • 平均化:輝度範囲全体を最適に活用するよう値を再分配。

  • 累積分布関数(CDF):範囲内のピクセルの割合を示す。

ヒストグラムとCDF

Python による生体医療画像解析

ヒストグラム平均化

import scipy.ndimage as ndi
hist = ndi.histogram(im, min=0, 
                         max=255,
                        bins=256)

cdf = hist.cumsum() / hist.sum() cdf.shape
(256,)
im_equalized = cdf[im] * 255

fig, axes = plt.subplots(2, 1) axes[0].imshow(im) axes[1].imshow(im_equalized) plt.show()

平均化後の画像

Python による生体医療画像解析

練習しましょう!

Python による生体医療画像解析

Preparing Video For Download...