हेडर और साइडबार

shinydashboard के साथ डैशबोर्ड बनाना

Png Kee Seng

Researcher

हेडर
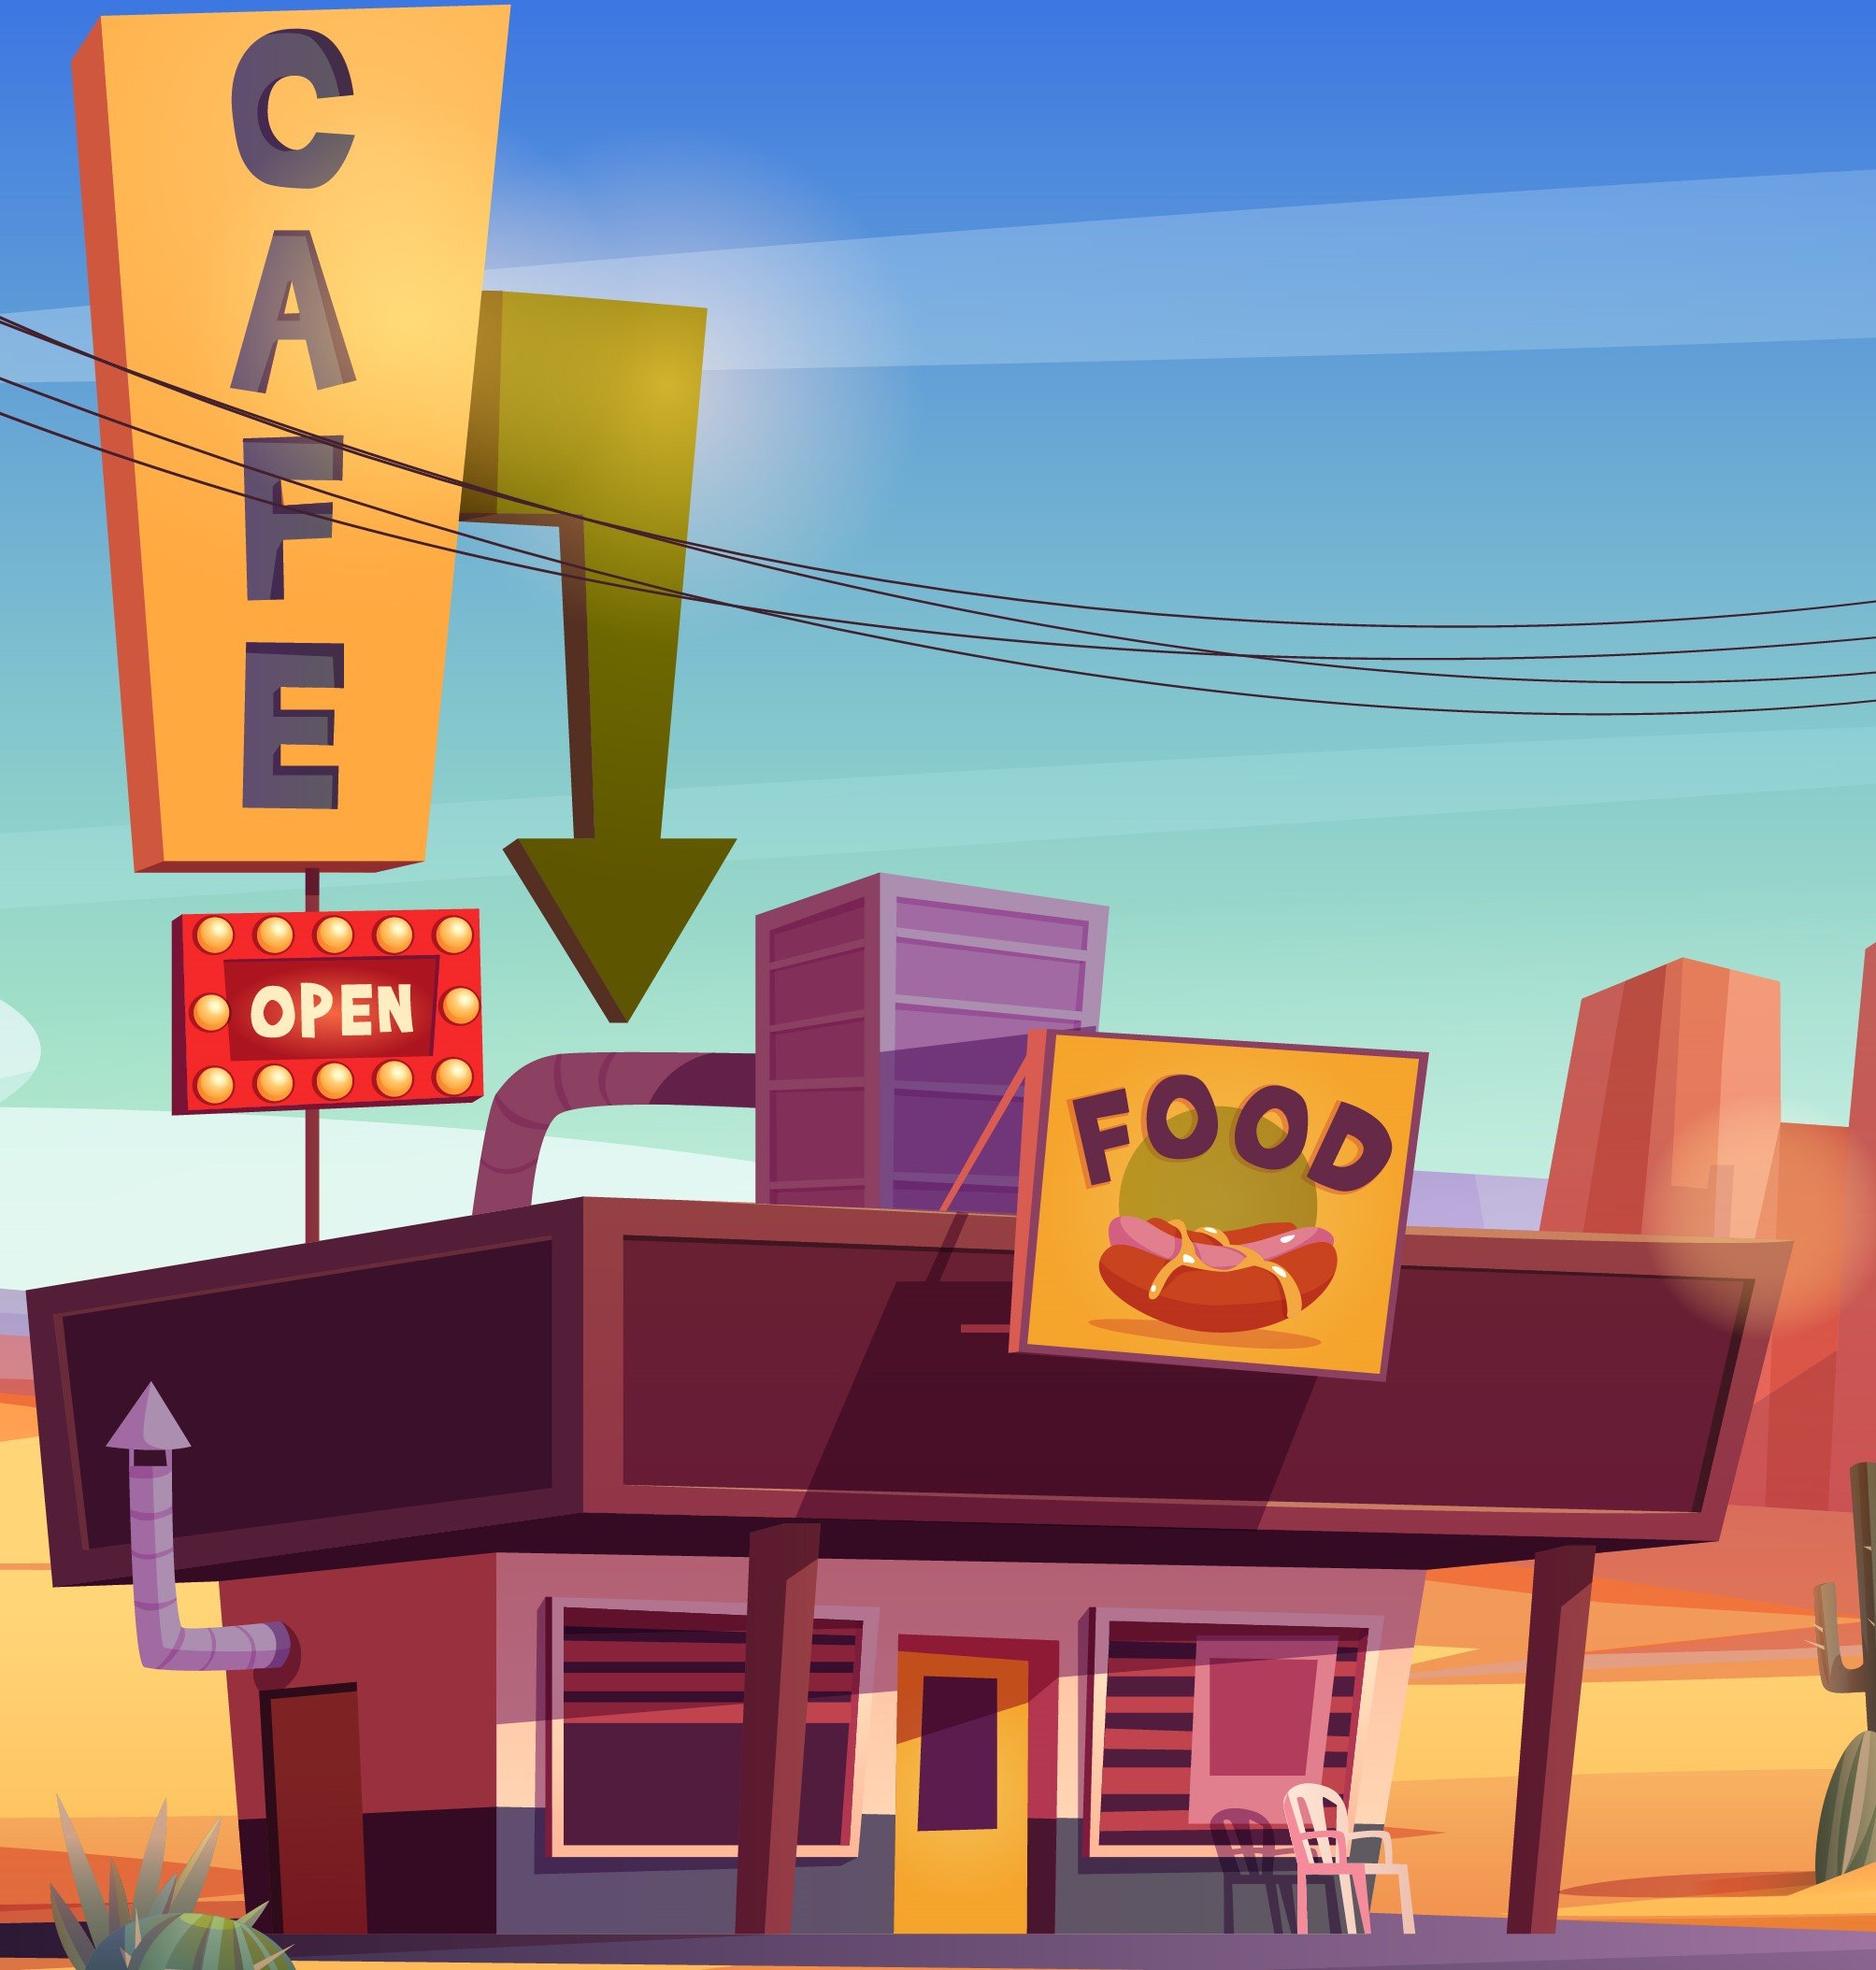
  • हेडर रेस्तरां के साइनबोर्ड जैसा होता है
  • इसमें डैशबोर्ड का शीर्षक हो सकता है
  • इसमें ड्रॉपडाउन मेनू हो सकते हैं
    • जैसे, संदेश, नोटिफिकेशन, टास्क

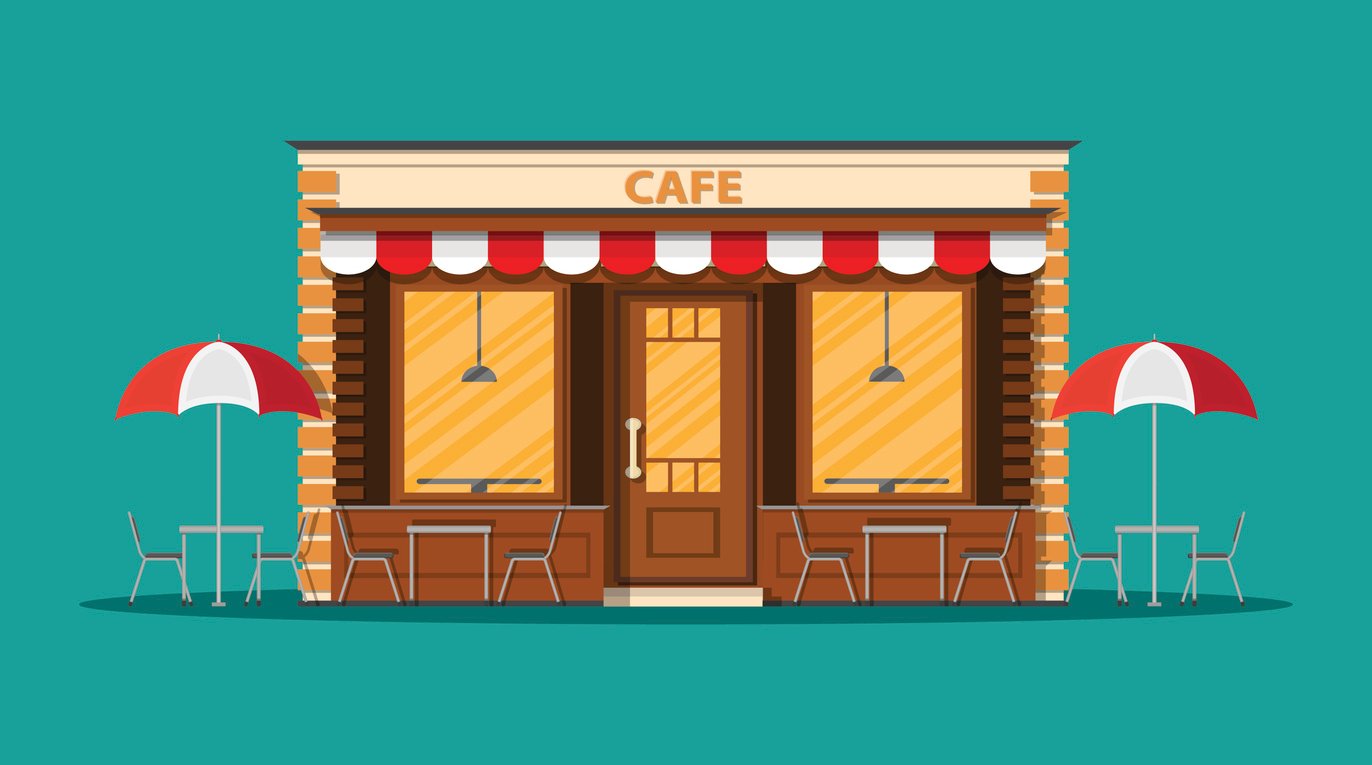
एक साधारण स्टोर-फ्रंट का उदाहरण।

हेडर रेस्तरां के साइनबोर्ड जैसा है। इसमें उपयोगी या सौंदर्य तत्व भी हो सकते हैं। यह जटिल फ्रंट-एंड का उदाहरण है।

1 Image by upklyak on Freepik
shinydashboard के साथ डैशबोर्ड बनाना

shinydashboard शीर्षक

  • हेडर dashboardHeader() से परिभाषित होता है
  • अगर शीर्षक बहुत लंबा हो तो?
    • titleWidth आर्ग्युमेंट सेट करें
    • डिफॉल्ट 230 पिक्सेल है
header <- dashboardHeader(title = "Soccer tournament")
header <- dashboardHeader(title = "Analysis for global soccer tournament")
                            titleWidth = 400)
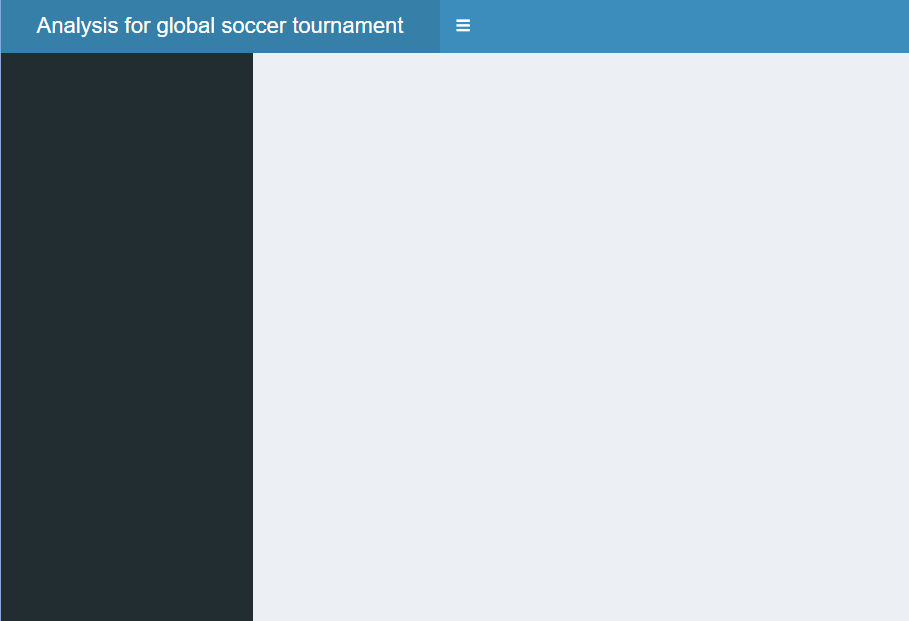
लंबे शीर्षकों के लिए हेडर की चौड़ाई समायोजित की जा सकती है।

shinydashboard के साथ डैशबोर्ड बनाना

संदेश वाला ड्रॉपडाउन मेनू जोड़ना

  • हेडर में ड्रॉपडाउन मेनू जोड़े जा सकते हैं
  • ड्रॉपडाउन मेनू के तीन प्रकार
    • Messages
    • Notifications
    • Tasks
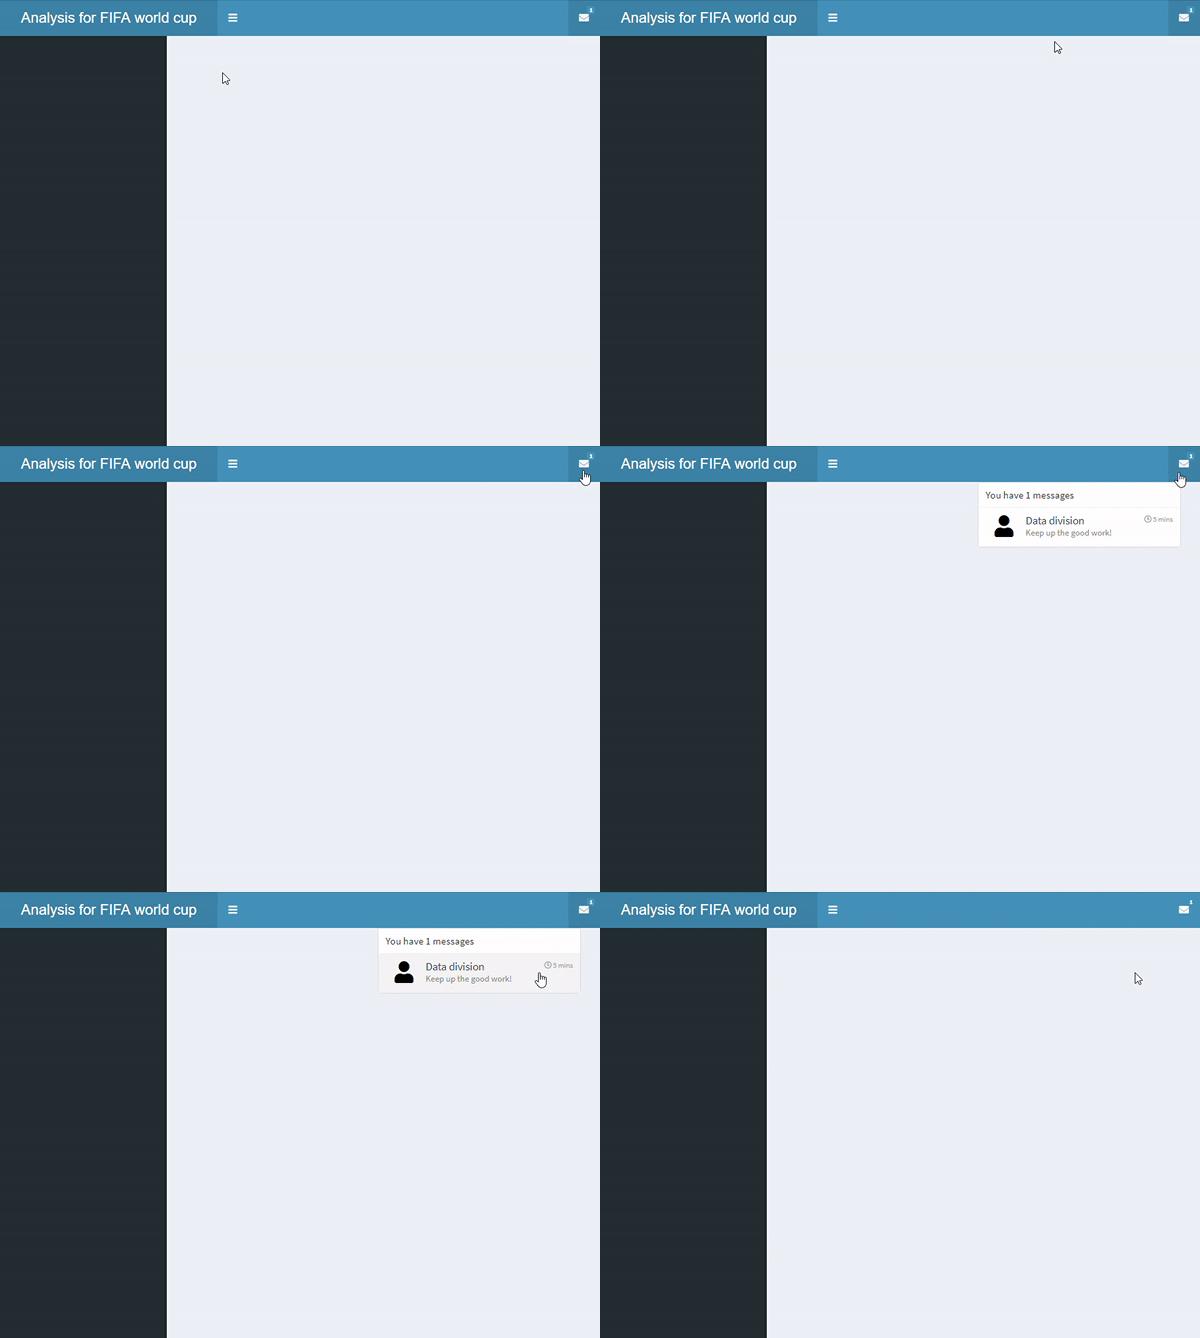
  • dropdownMenu() जोड़ें जिसका type "messages" हो
    • एक messageItem() जोड़ें
    • डिफॉल्ट आइकन icon("user") होता है
    • time भी सेट कर सकते हैं
header <- dashboardHeader(
  title = "Analysis for FIFA world cup",
  titleWidth = 300,
  dropdownMenu(type = "messages",

messageItem("Data division", "Keep up the good work!",
time = "5 mins"
)))

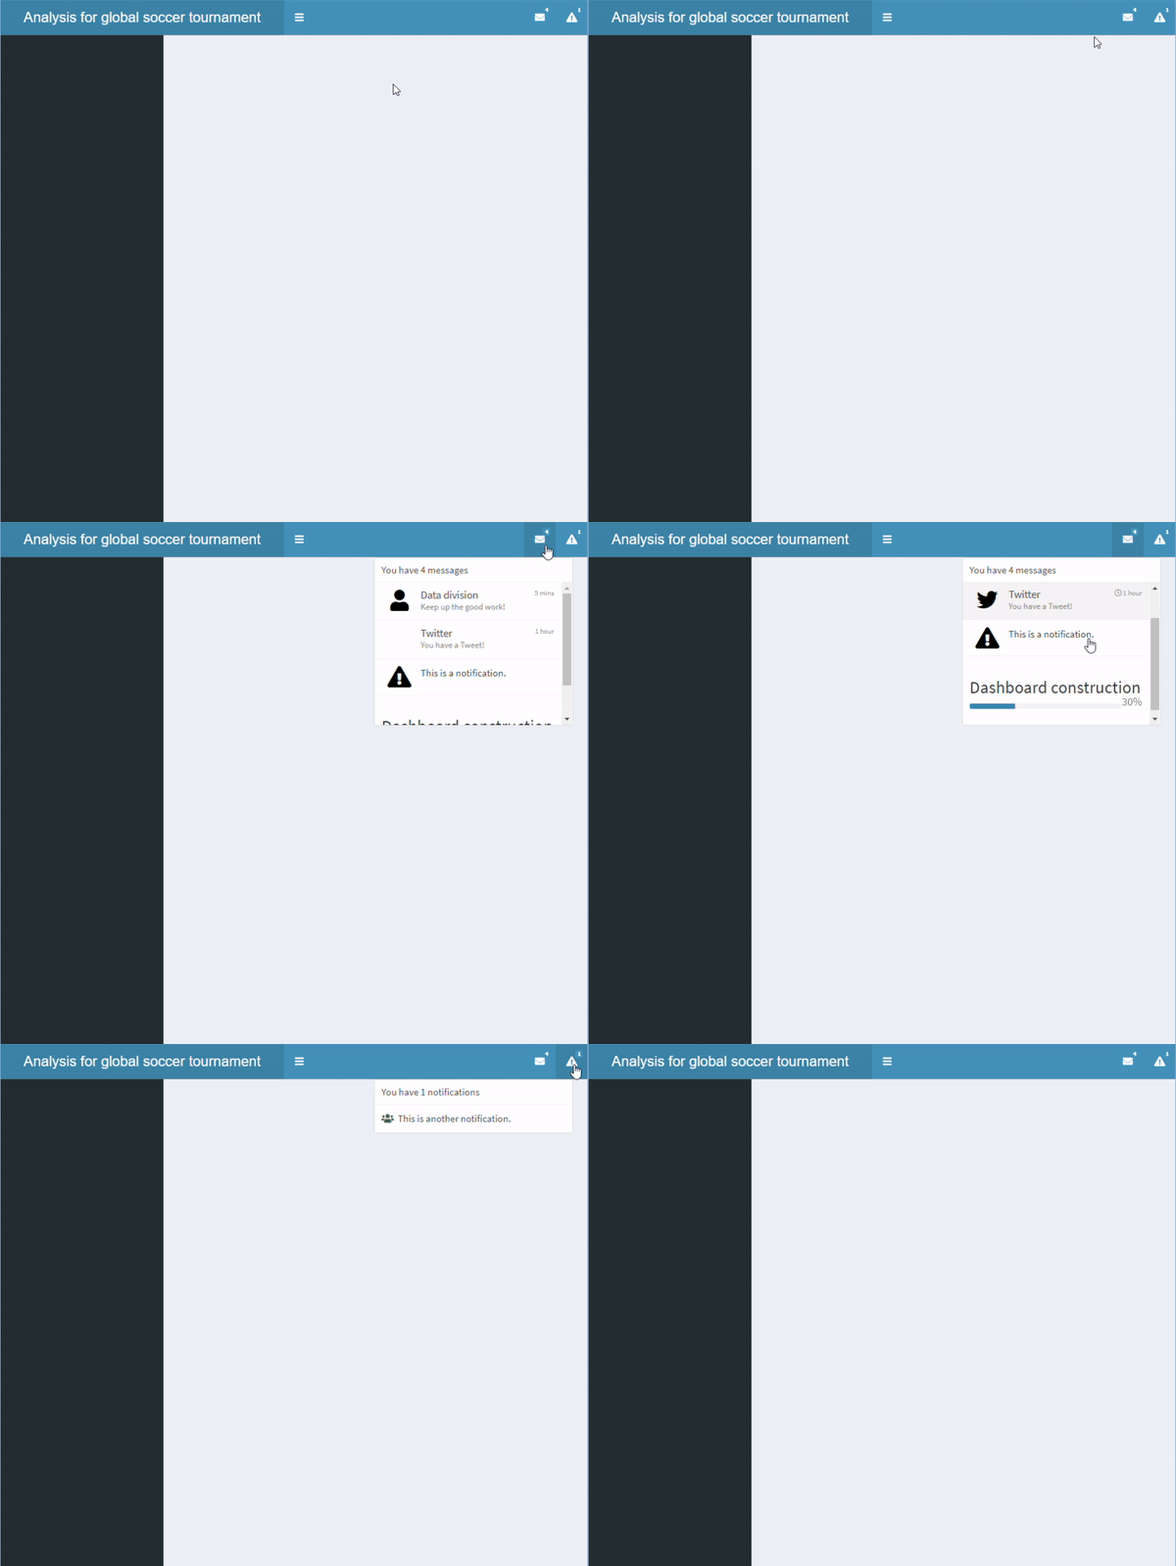
एक संदेश आइटम वाला ड्रॉपडाउन मेनू।

shinydashboard के साथ डैशबोर्ड बनाना

कई संदेशों वाला ड्रॉपडाउन मेनू जोड़ना

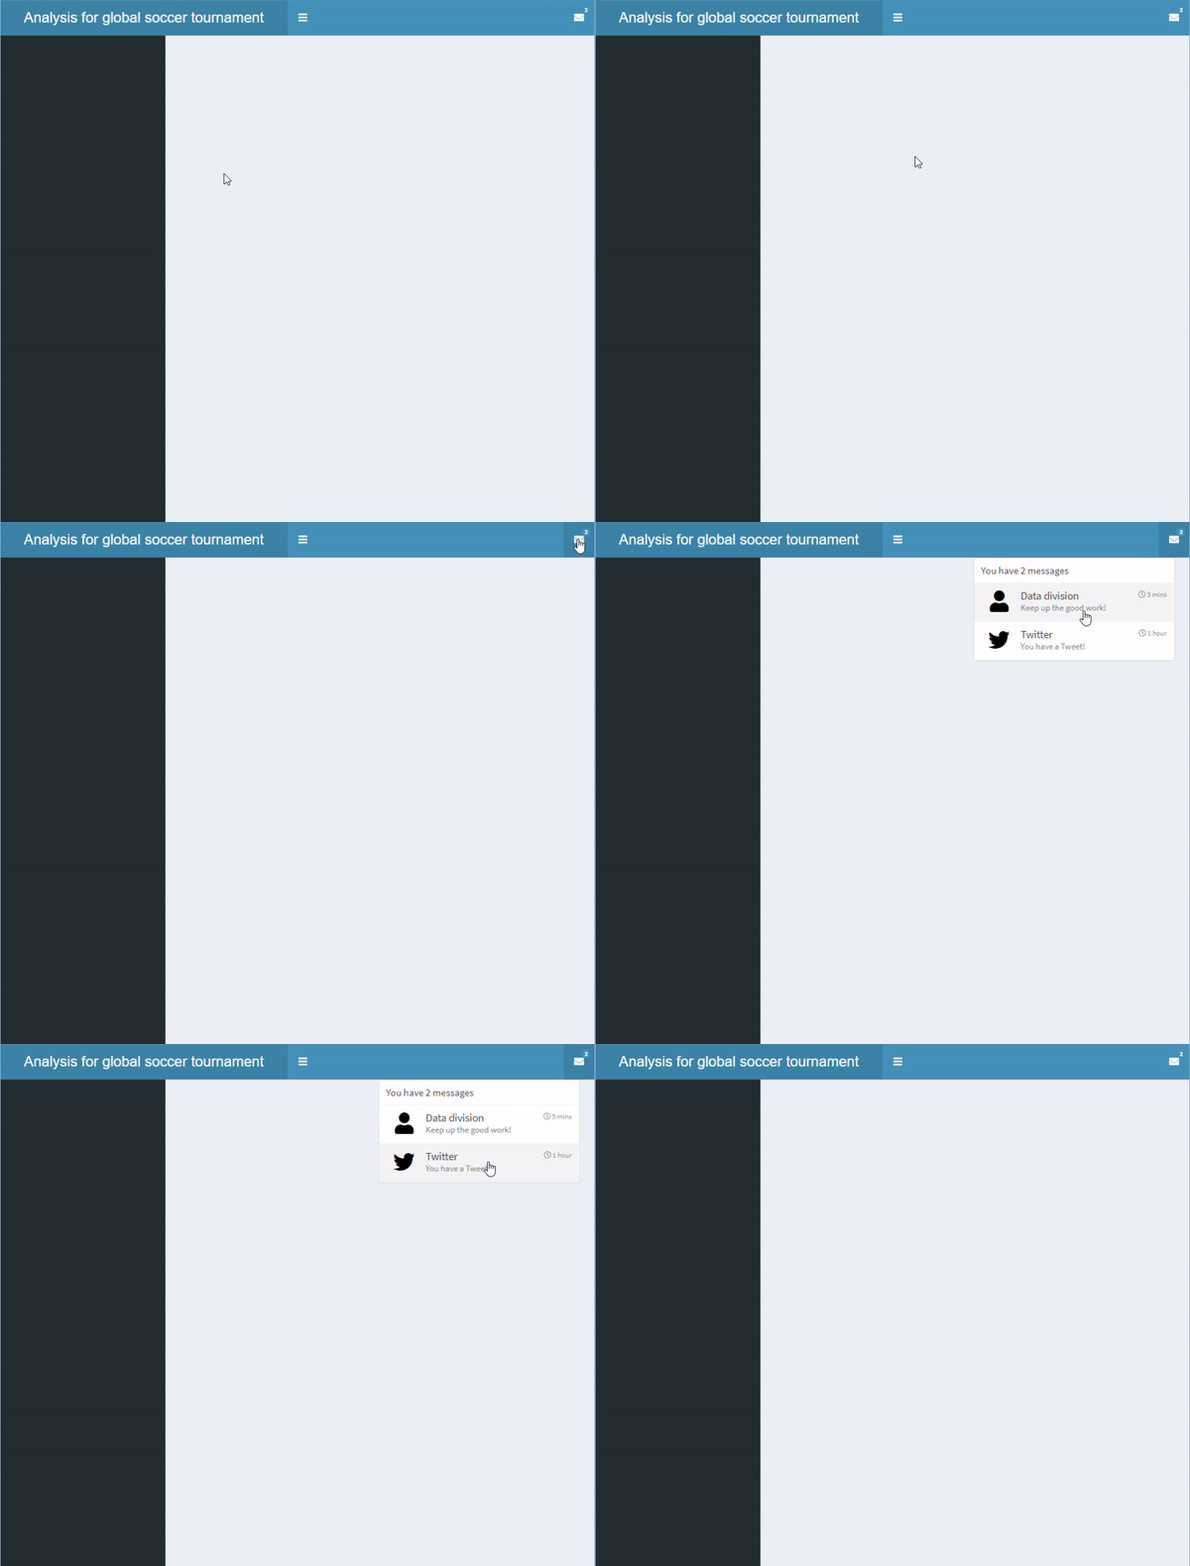
  • dropdownMenu() के भीतर एक और messageItem() जोड़ें, नाम "Twitter"

दो संदेश आइटम वाला ड्रॉपडाउन मेनू।

header <- dashboardHeader(
  title = "Analysis for global soccer tournament",
  titleWidth = 400,
  dropdownMenu(type = "messages",
    messageItem("Data division",
      "Keep up the good work!",
      time = "5 mins"
    ),

messageItem("Twitter", "You have a Tweet!", time = "1 hour", icon=icon("twitter")) ) )
shinydashboard के साथ डैशबोर्ड बनाना

कई आइटम वाला ड्रॉपडाउन मेनू जोड़ना

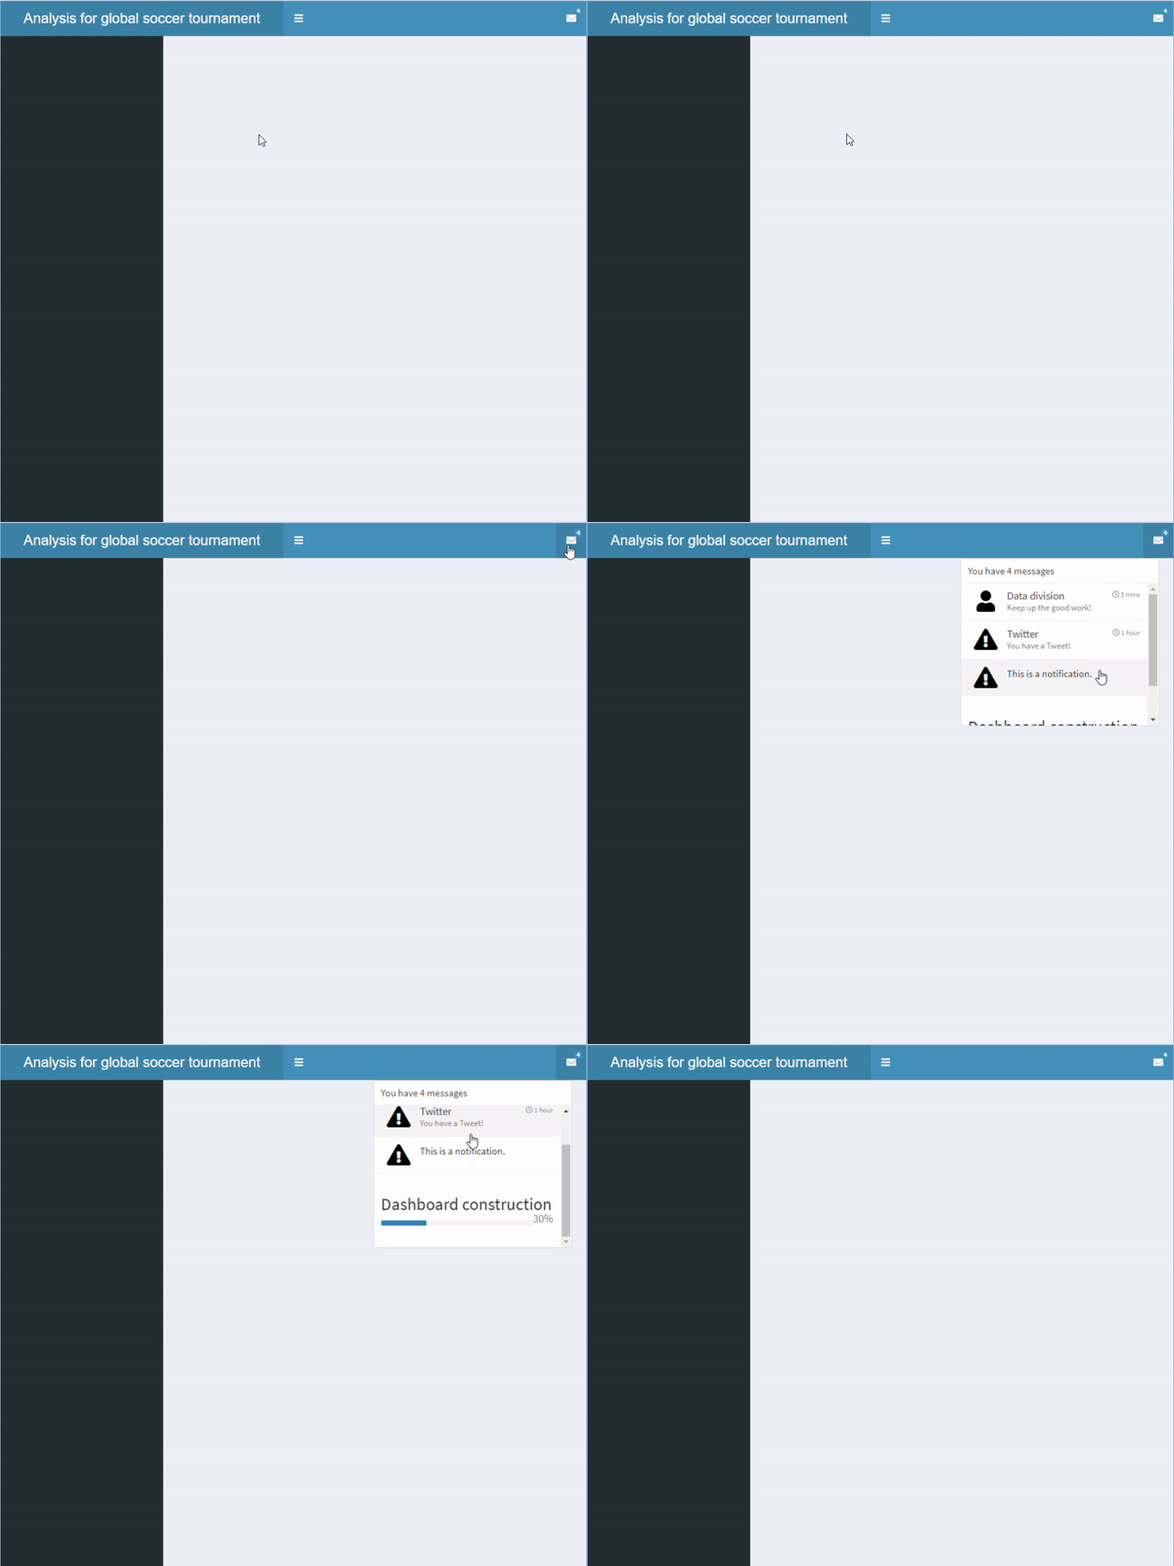
  • अन्य प्रकार के आइटम भी जोड़ सकते हैं
    • messageItem()
    • notificationItem()
    • taskItem()
  • इनका रूप अलग होता है
    • messageItem(): डिफॉल्ट आइकन icon("user")
    • notificationItem(): डिफॉल्ट आइकन icon("exclamation-triangle")
    • taskItem(): इसमें प्रोग्रेस बार होता है
header <- dashboardHeader(
  title = "Analysis for global soccer tournament",
  titleWidth = 400,
  dropdownMenu(type = "messages",

messageItem("Data division", "Keep up the good work!", time = "5 mins"), messageItem("Twitter", "You have a Tweet!", time = "1 hour", icon=icon("twitter")),
notificationItem("This is a notification." ),
taskItem(value = 30, color = "blue", "Dashboard construction") ))
shinydashboard के साथ डैशबोर्ड बनाना

कई आइटम वाला ड्रॉपडाउन मेनू जोड़ना

कई आइटम वाला ड्रॉपडाउन मेनू

shinydashboard के साथ डैशबोर्ड बनाना

और ड्रॉपडाउन मेनू जोड़ना

  • एक और ड्रॉपडाउन मेनू भी जोड़ सकते हैं

एक से अधिक ड्रॉपडाउन मेनू वाला हेडर।

header <- dashboardHeader(
  title = "Analysis for global soccer tournament",
  titleWidth = 400,

dropdownMenu(type = "messages", messageItem("Data division", "Keep up the good work!", time = "5 mins"), messageItem("Twitter", "You have a Tweet!", time = "1 hour", icon=icon("twitter")), notificationItem("This is a notification."), taskItem(value = 30, color = "blue", "Dashboard construction")),
dropdownMenu(type = "notifications", notificationItem(icon = icon("users"), "This is another notification." )))
shinydashboard के साथ डैशबोर्ड बनाना

साइडबार

  • साइडबार dashboardSidebar() से परिभाषित होता है
  • width सेट करके साइडबार की चौड़ाई बदली जा सकती है
  • sidebarMenu() से एक shinydashboard में कई पेज रख सकते हैं
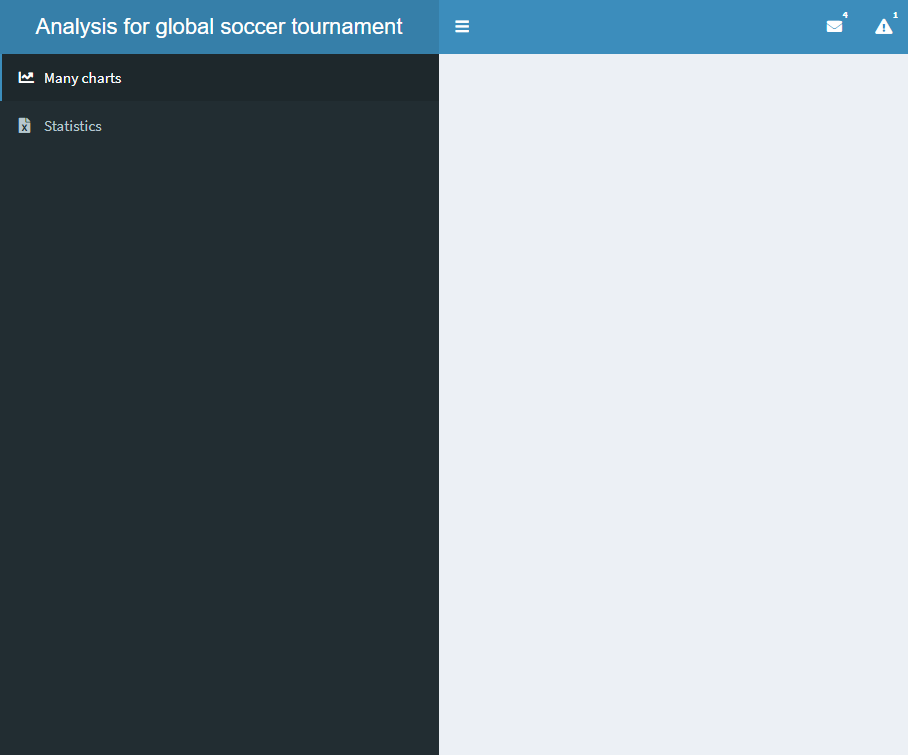
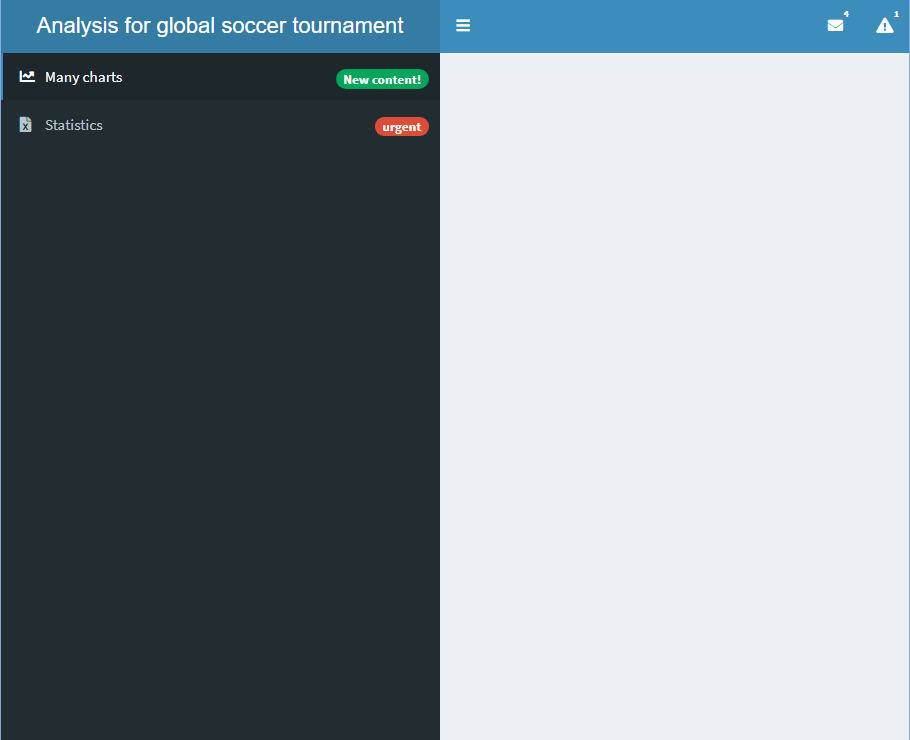
दो बटन वाला साइडबार

sidebar <- dashboardSidebar()
sidebar <- dashboardSidebar(width=400)
sidebar <- dashboardSidebar(width=400,
  sidebarMenu(
    id = "pages",
    menuItem("Many charts", tabName = "charts", 
        icon = icon("chart-line")),
    menuItem("Statistics", icon = icon("file-excel"), 
        tabName = "stats")
  )
)
sidebar <- dashboardSidebar(disable = TRUE)
shinydashboard के साथ डैशबोर्ड बनाना

बैज जोड़ना

  • एक बैज भी जोड़ा जा सकता है
    • badgeLabel और badgeColor सेट करें

अतिरिक्त बैज वाला साइडबार

sidebar <- dashboardSidebar(width=400,
  sidebarMenu(
    id = "pages",
    menuItem("Many charts", tabName = "charts", 
             icon = icon("chart-line"),

badgeLabel = "New content!", badgeColor = "green"),
menuItem("Statistics", icon = icon("file-excel"), tabName = "stats",
badgeLabel = "urgent", badgeColor = "red")
) )
shinydashboard के साथ डैशबोर्ड बनाना

सबटैब जोड़ना

  • menuSubItem() जोड़कर सबटैब जोड़े जा सकते हैं
  • ध्यान दें: सबटैब वाले टैब में बैज नहीं जोड़ सकते
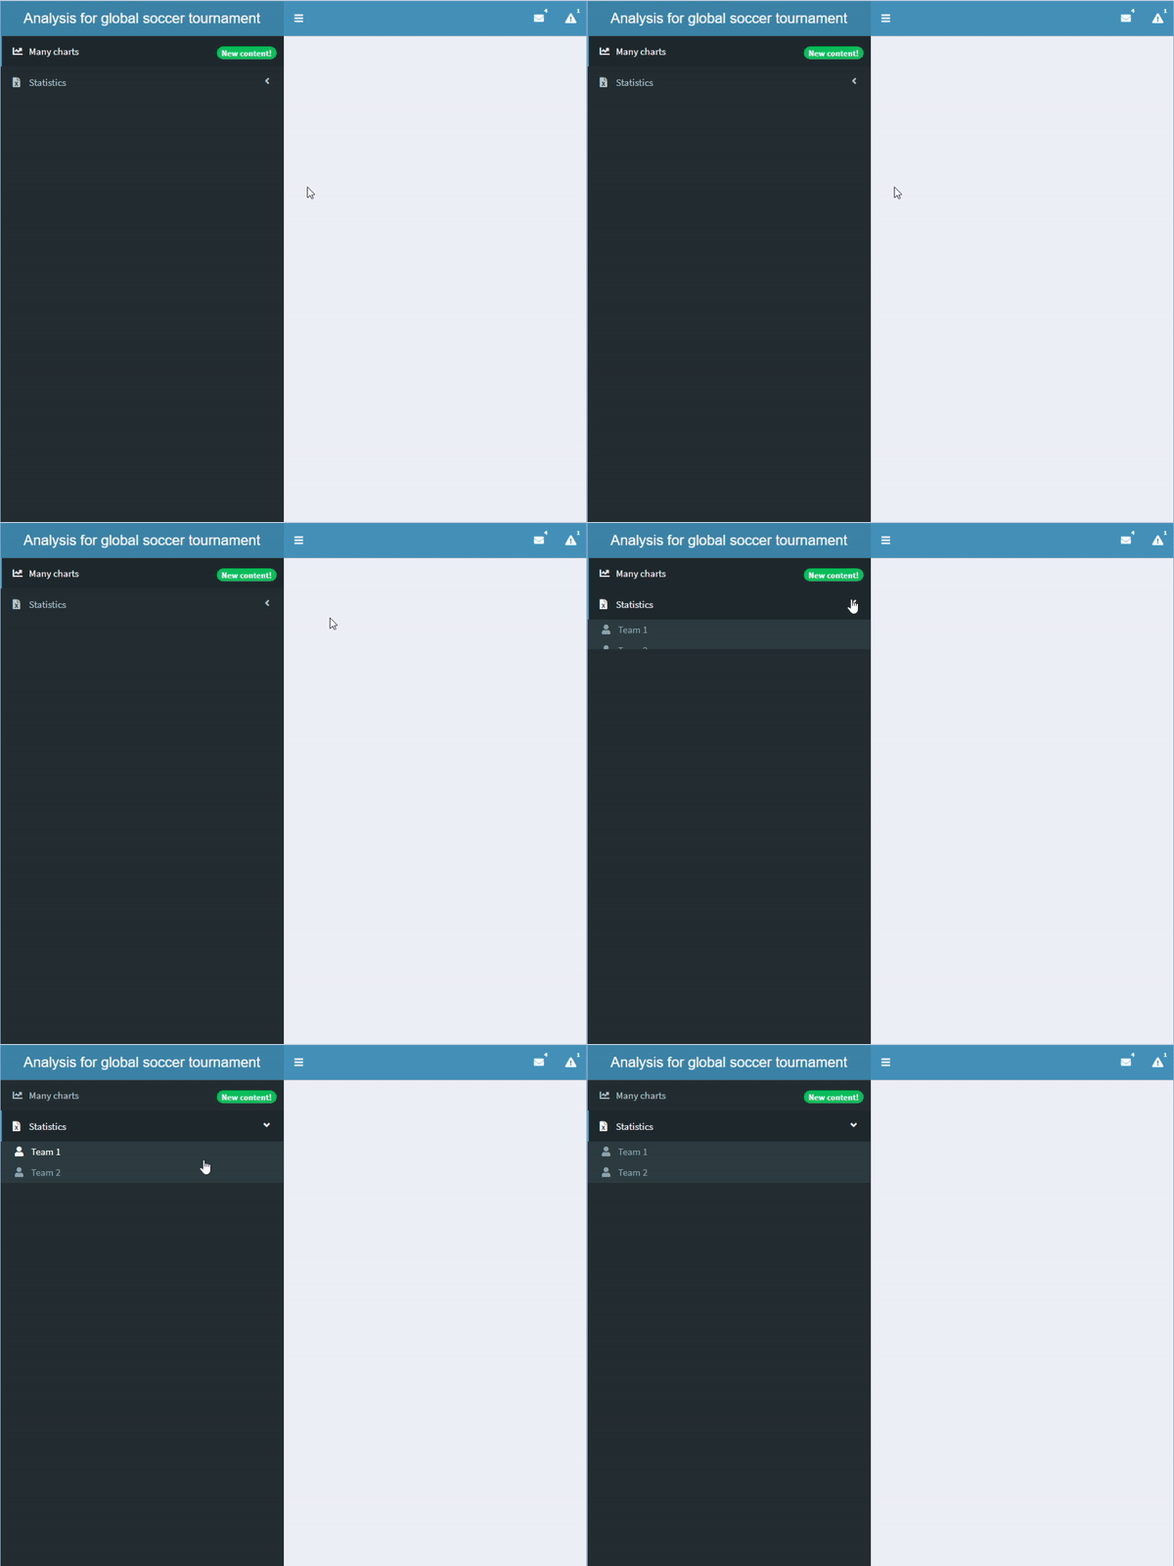
सबटैब वाला साइडबार

sidebar <- dashboardSidebar(width=400,
  sidebarMenu(
    id = "pages",
    menuItem("Many charts", tabName = "charts", 
             icon = icon("chart-line"),
             badgeLabel = "New content!", 
             badgeColor = "green"),
    menuItem("Statistics", icon = icon("file-excel"), 
            tabName = "stats", 
            menuSubItem("Team 1", tabName = "team1", 
                     icon=icon("user")),
            menuSubItem("Team 2", tabName = "team2", 
                     icon=icon("user")))
  )
)
shinydashboard के साथ डैशबोर्ड बनाना

साइडबार में इनपुट और आउटपुट जोड़ना

  • साइडबार में इनपुट और आउटपुट जोड़े जा सकते हैं
  • server में भी इन्हें परिभाषित करना होगा

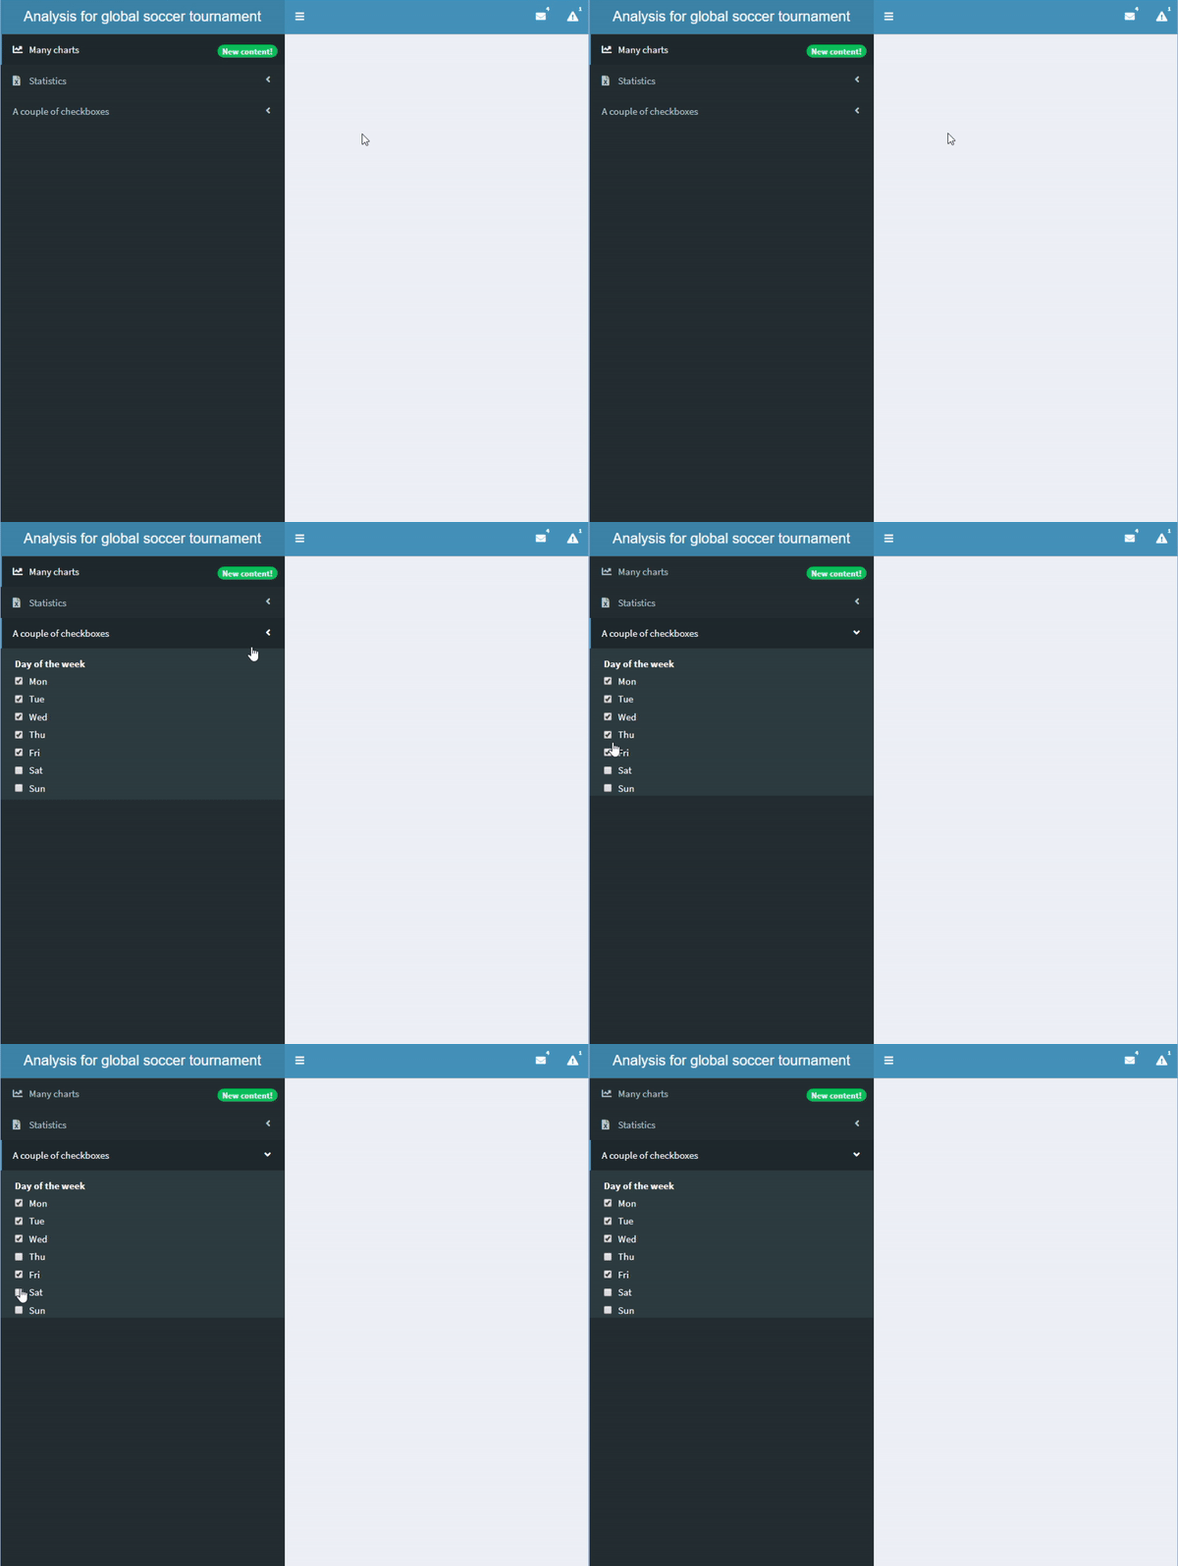
checkboxGroupInput() वाला साइडबार।

sidebar <- dashboardSidebar(width=400,
  sidebarMenu(
    id = "pages",
    menuItem("Many charts", tabName = "charts", 
             icon = icon("chart-line"),
             badgeLabel = "New content!", 
             badgeColor = "green"),
    menuItem("Statistics", icon = icon("file-excel"), 
            tabName = "stats", 
            menuSubItem("Team 1", tabName = "team1", 
            icon=icon("user")),
            menuSubItem("Team 2", tabName = "team2", 
            icon=icon("user"))),

menuItem("A couple of checkboxes", checkboxGroupInput("checkboxes", "Day of the week", choices = c("Mon","Tue","Wed","Thu","Fri","Sat","Sun"), selected = c("Mon","Tue","Wed","Thu","Fri"))) ) )
shinydashboard के साथ डैशबोर्ड बनाना

अभ्यास करते हैं!

shinydashboard के साथ डैशबोर्ड बनाना

Preparing Video For Download...