การตรวจจับ Drift แบบหลายตัวแปร

การติดตามตรวจสอบ Machine Learning ด้วย Python

Hakim Elakhrass

CEO and co-founder

การตรวจจับ Drift แบบหลายตัวแปรคืออะไร?
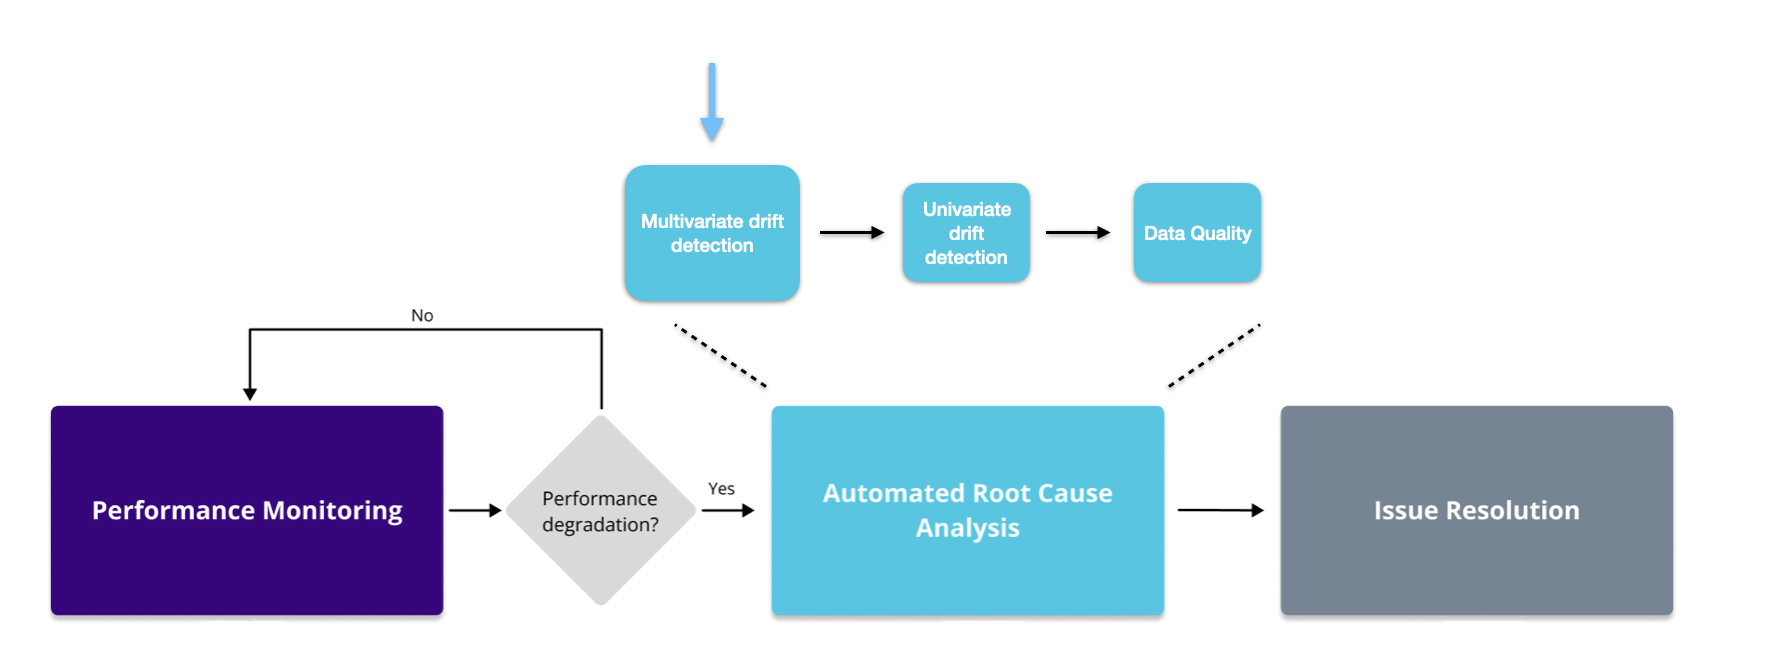
  • ขั้นตอนแรกของการวิเคราะห์ต้นเหตุ
  • ผลลัพธ์เป็นตัวเลขค่าเดียวสำหรับทุกฟีเจอร์
  • ตรวจจับการเปลี่ยนแปลงของข้อมูลที่ละเอียดอ่อน

ภาพแสดงขั้นตอนการมอนิเตอร์และตำแหน่งของการตรวจจับ Drift แบบหลายตัวแปร

การติดตามตรวจสอบ Machine Learning ด้วย Python

หลักการทำงาน

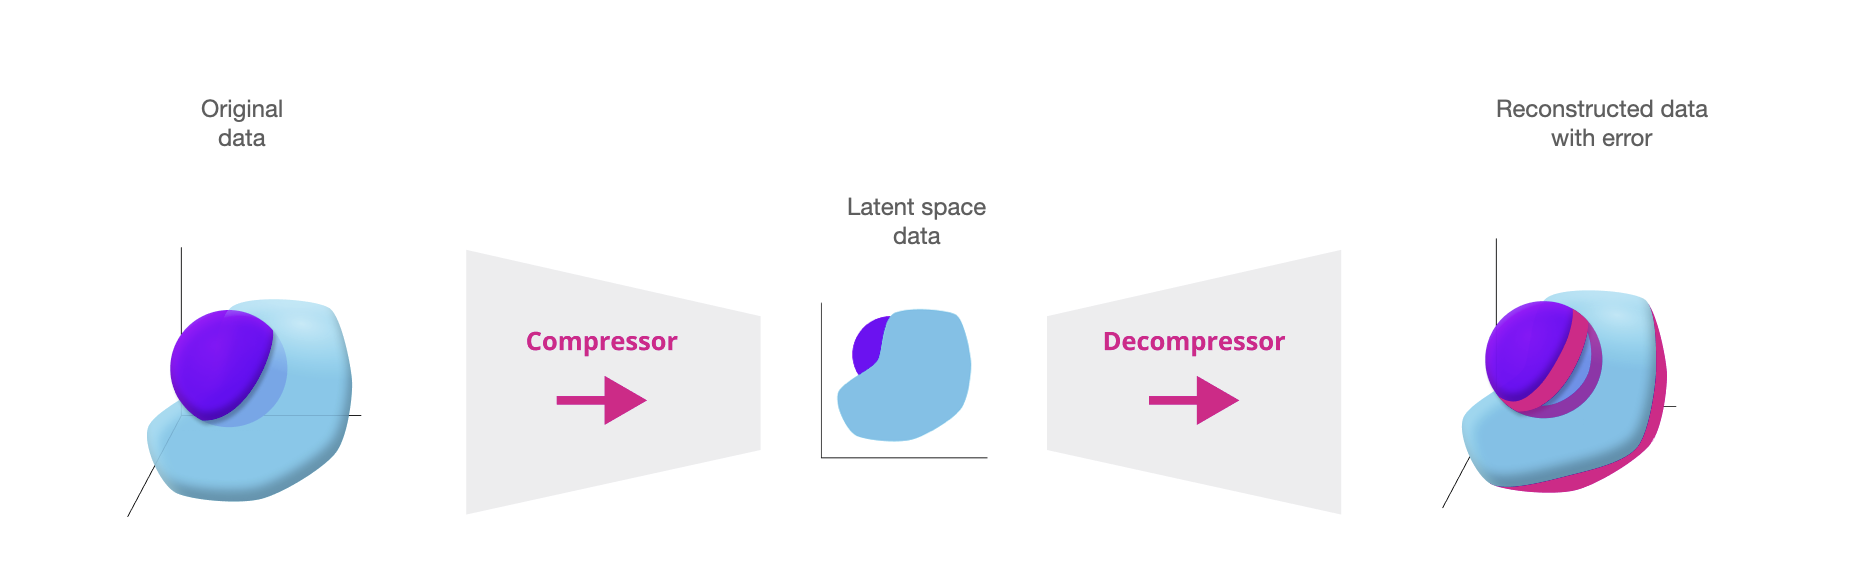
  1. บีบอัดข้อมูลด้วยอัลกอริทึม PCA
  2. คลายการบีบอัดข้อมูลกลับสู่รูปแบบเดิมด้วย Inverse PCA
  3. วัดค่า Reconstruction Error ที่เพิ่มขึ้นบ่งชี้ถึง Data Drift

ภาพแสดงการทำงานของการตรวจจับ Drift แบบหลายตัวแปร

การติดตามตรวจสอบ Machine Learning ด้วย Python

การเขียนโค้ด

# Initialize multivariate drift detection calculator
mv_calc = nannyml.DataReconstructionDriftCalculator(
    column_names=features_column_names,
    timestamp_column_name='timestamp',
    chunk_period='m'
    )
# Fit and calculate the results
mv_calc.fit(reference)
mv_results = mv_calc.calculate(analysis)
การติดตามตรวจสอบ Machine Learning ด้วย Python

การพล็อตผลลัพธ์

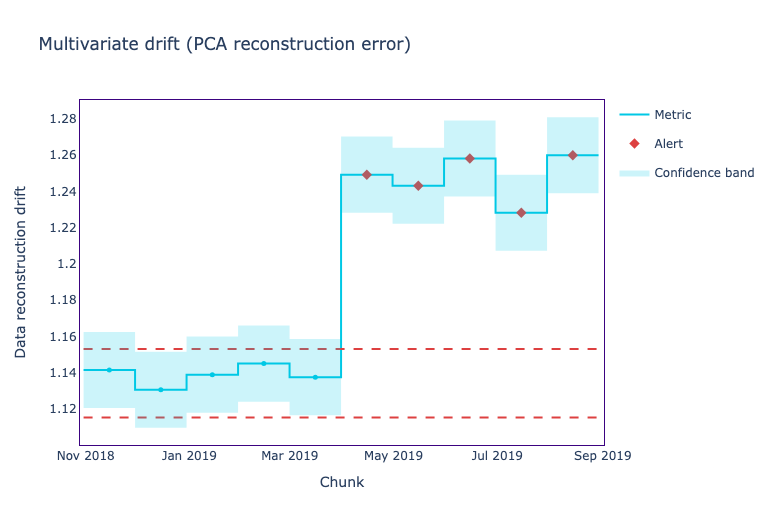
mv_figure = mv_results.filter(period='analysis').plot()
mv_figure.show()

ภาพแสดงกราฟ Reconstruction Error ตามช่วงเวลา

การติดตามตรวจสอบ Machine Learning ด้วย Python

Multivariate Drift เทียบกับ Realized Performance
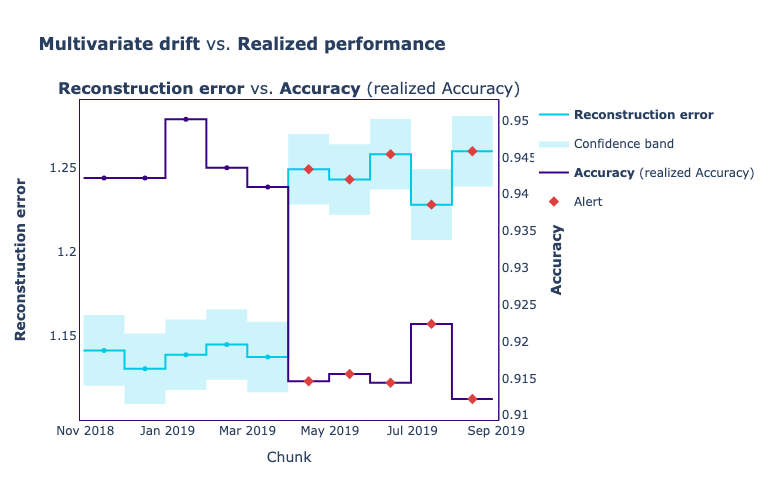
figure = mv_results.filter(period='analysis').compare(perf_results).plot()
figure.show()

ภาพแสดงกราฟเปรียบเทียบ Realized Performance และ Reconstruction Error

การติดตามตรวจสอบ Machine Learning ด้วย Python

มาฝึกกันเถอะ!

การติดตามตรวจสอบ Machine Learning ด้วย Python

Preparing Video For Download...