วิธีสร้างโมเดล GARCH ใน Python

GARCH Models ใน Python

Chelsea Yang

Data Science Instructor

แพ็กเกจ "arch" ใน Python

from arch import arch_model

1 Kevin Sheppard. (2019, March 28). bashtage/arch: Release 4.8.1 (Version 4.8.1). Zenodo. http://doi.org/10.5281/zenodo.2613877
GARCH Models ใน Python

ขั้นตอนการทำงาน

สร้างโมเดล GARCH ใน 3 ขั้นตอน:

  1. กำหนดสเปกโมเดล
  2. ฝึกโมเดล
  3. พยากรณ์
GARCH Models ใน Python

การกำหนดสเปกโมเดล

สมมติฐานของโมเดล:

  • การแจกแจง: "normal" (ค่าเริ่มต้น), "t", "skewt"
  • โมเดลค่าเฉลี่ย: "constant" (ค่าเริ่มต้น), "zero", "AR"
  • โมเดลความผันผวน: "GARCH" (ค่าเริ่มต้น), "ARCH", "EGARCH"


basic_gm = arch_model(sp_data['Return'], p = 1, q = 1, 
                      mean = 'constant', vol = 'GARCH', dist = 'normal')
GARCH Models ใน Python

การฝึกโมเดล

แสดงผลการฝึกโมเดลทุก n รอบ:

gm_result = gm_model.fit(update_freq = 4)
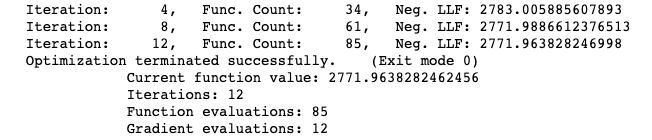
กระบวนการฝึกโมเดล

ปิดการแสดงผล:

gm_result = gm_model.fit(disp = 'off')
GARCH Models ใน Python

ผลลัพธ์การฝึก: พารามิเตอร์

ประมาณค่าด้วย "วิธีความน่าจะเป็นสูงสุด"

print(gm_result.params)
mu          0.077239
omega       0.039587
alpha[1]    0.167963
beta[1]     0.786467
Name: params, dtype: float64
GARCH Models ใน Python

ผลลัพธ์การฝึก: สรุป

print(gm_result.summary())
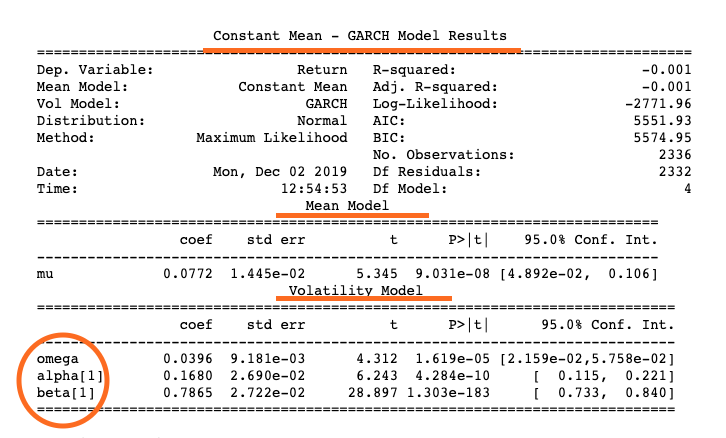
สรุปผลการฝึกโมเดล

GARCH Models ใน Python

ผลลัพธ์การฝึก: กราฟ

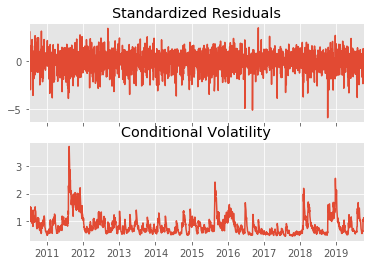
gm_result.plot()

กราฟผลการประมาณค่าของโมเดล

GARCH Models ใน Python

การพยากรณ์ด้วยโมเดล

# Make 5-period ahead forecast
gm_forecast = gm_result.forecast(horizon = 5)
# Print out the last row of variance forecast
print(gm_forecast.variance[-1:])
                 h.1       h.2       h.3       h.4       h.5
Date                                                        
2019-10-10  0.994079  0.988366  0.982913  0.977708  0.972741

h.1 ในแถว "2019-10-10": การพยากรณ์ล่วงหน้า 1 ช่วงเวลา โดยใช้ข้อมูลถึงวันที่นั้นรวม

GARCH Models ใน Python

มาฝึกกันเถอะ!

GARCH Models ใน Python

Preparing Video For Download...