ส่วนหัวและแถบด้านข้าง

การสร้างแดชบอร์ดด้วย shinydashboard

Png Kee Seng

Researcher

ส่วนหัว
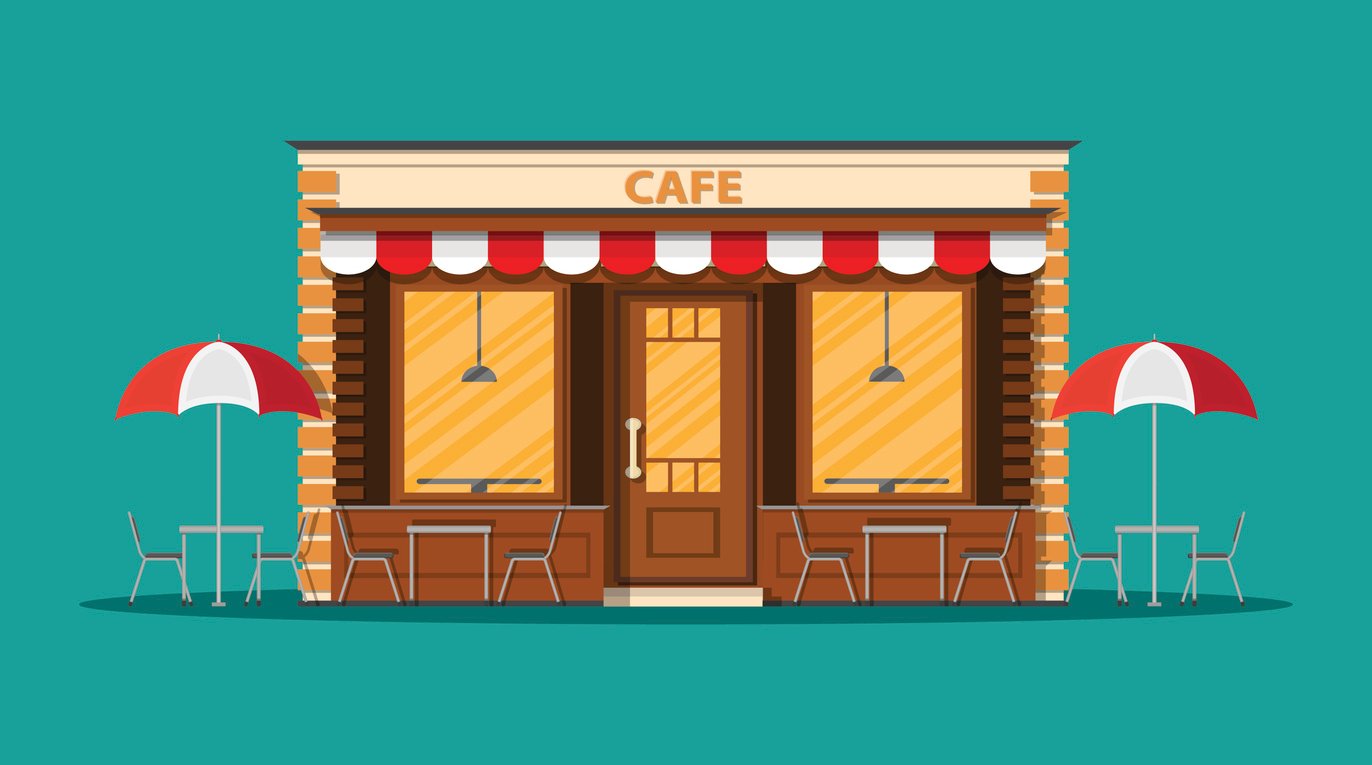
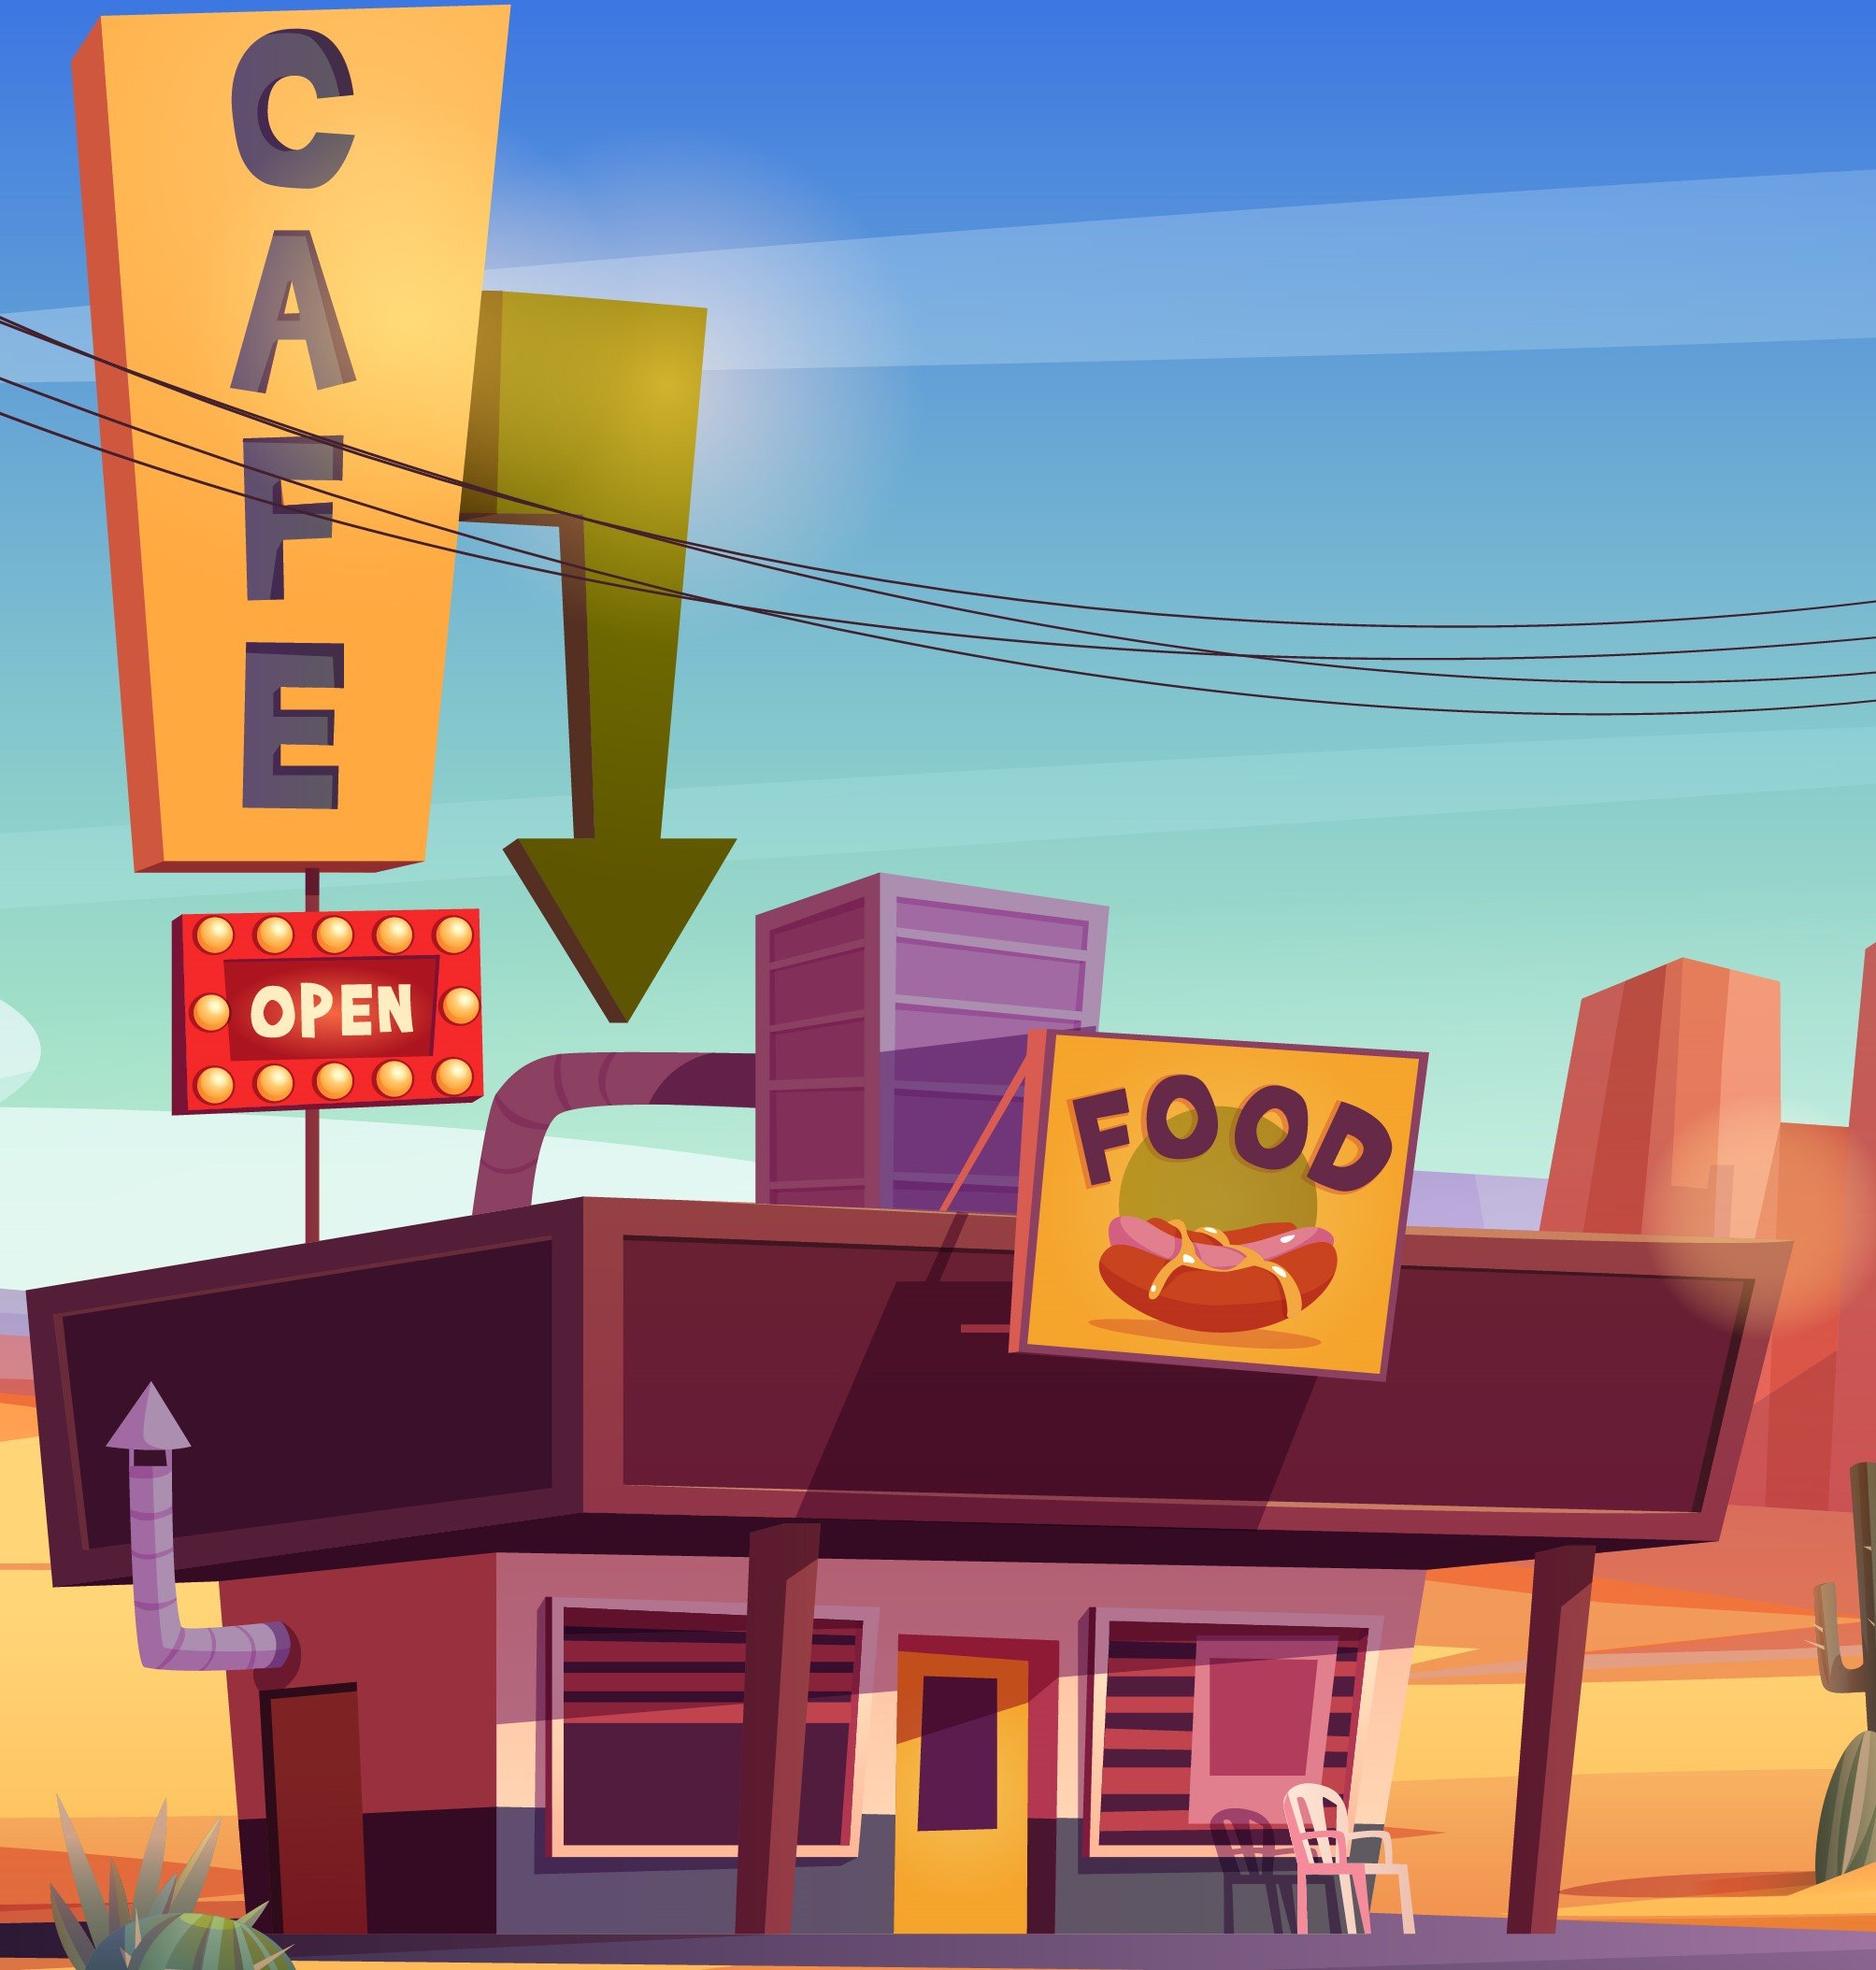
  • ส่วนหัวเปรียบเหมือนป้ายหน้าร้านอาหาร
  • ใส่ชื่อ dashboard ได้
  • ใส่เมนูดรอปดาวน์ได้
    • เช่น ข้อความ การแจ้งเตือน งาน

ตัวอย่างหน้าร้านแบบเรียบง่าย

ส่วนหัวเปรียบเหมือนป้ายร้านอาหาร ซึ่งอาจมีองค์ประกอบอื่นทั้งด้านการใช้งานและความสวยงาม นี่คือตัวอย่างของส่วนหน้าที่ซับซ้อน

1 Image by upklyak on Freepik
การสร้างแดชบอร์ดด้วย shinydashboard

ชื่อใน shinydashboard

  • ส่วนหัวกำหนดด้วย dashboardHeader()
  • หากชื่อยาวเกินไป
    • ตั้งค่าอาร์กิวเมนต์ titleWidth
    • ค่าเริ่มต้นคือ 230 พิกเซล
header <- dashboardHeader(title = "Soccer tournament")
header <- dashboardHeader(title = "Analysis for global soccer tournament")
                            titleWidth = 400)
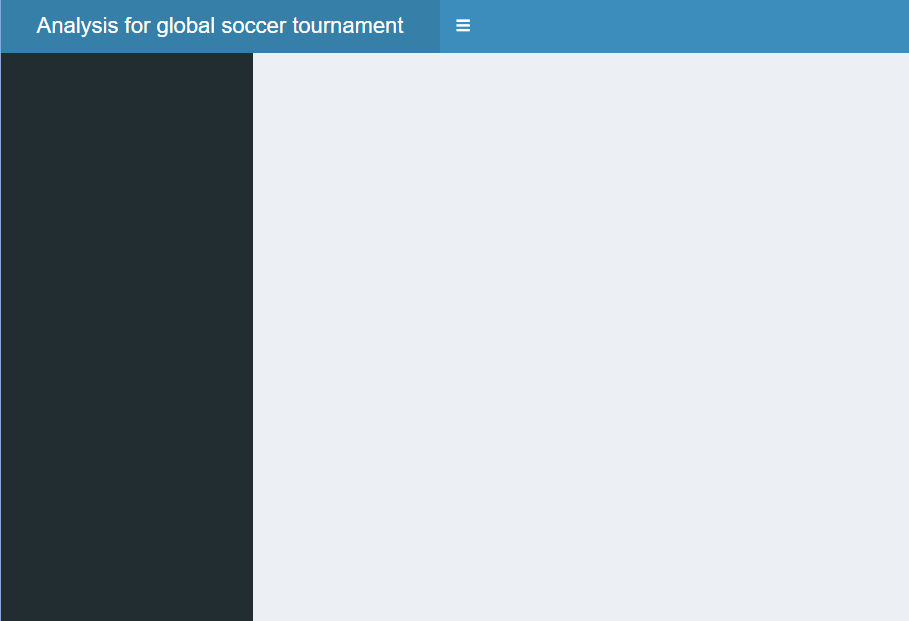
ความกว้างของส่วนหัวปรับได้เพื่อรองรับชื่อที่ยาว

การสร้างแดชบอร์ดด้วย shinydashboard

การเพิ่มเมนูดรอปดาวน์พร้อมข้อความ

  • เพิ่มเมนูดรอปดาวน์ในส่วนหัวได้
  • เมนูดรอปดาวน์มี 3 ประเภท
    • ข้อความ
    • การแจ้งเตือน
    • งาน
  • เพิ่ม dropdownMenu() ประเภท "messages"
    • เพิ่ม messageItem()
    • ไอคอนเริ่มต้นคือ icon("user")
    • กำหนด time ได้ด้วย
header <- dashboardHeader(
  title = "Analysis for FIFA world cup",
  titleWidth = 300,
  dropdownMenu(type = "messages",

messageItem("Data division", "Keep up the good work!",
time = "5 mins"
)))

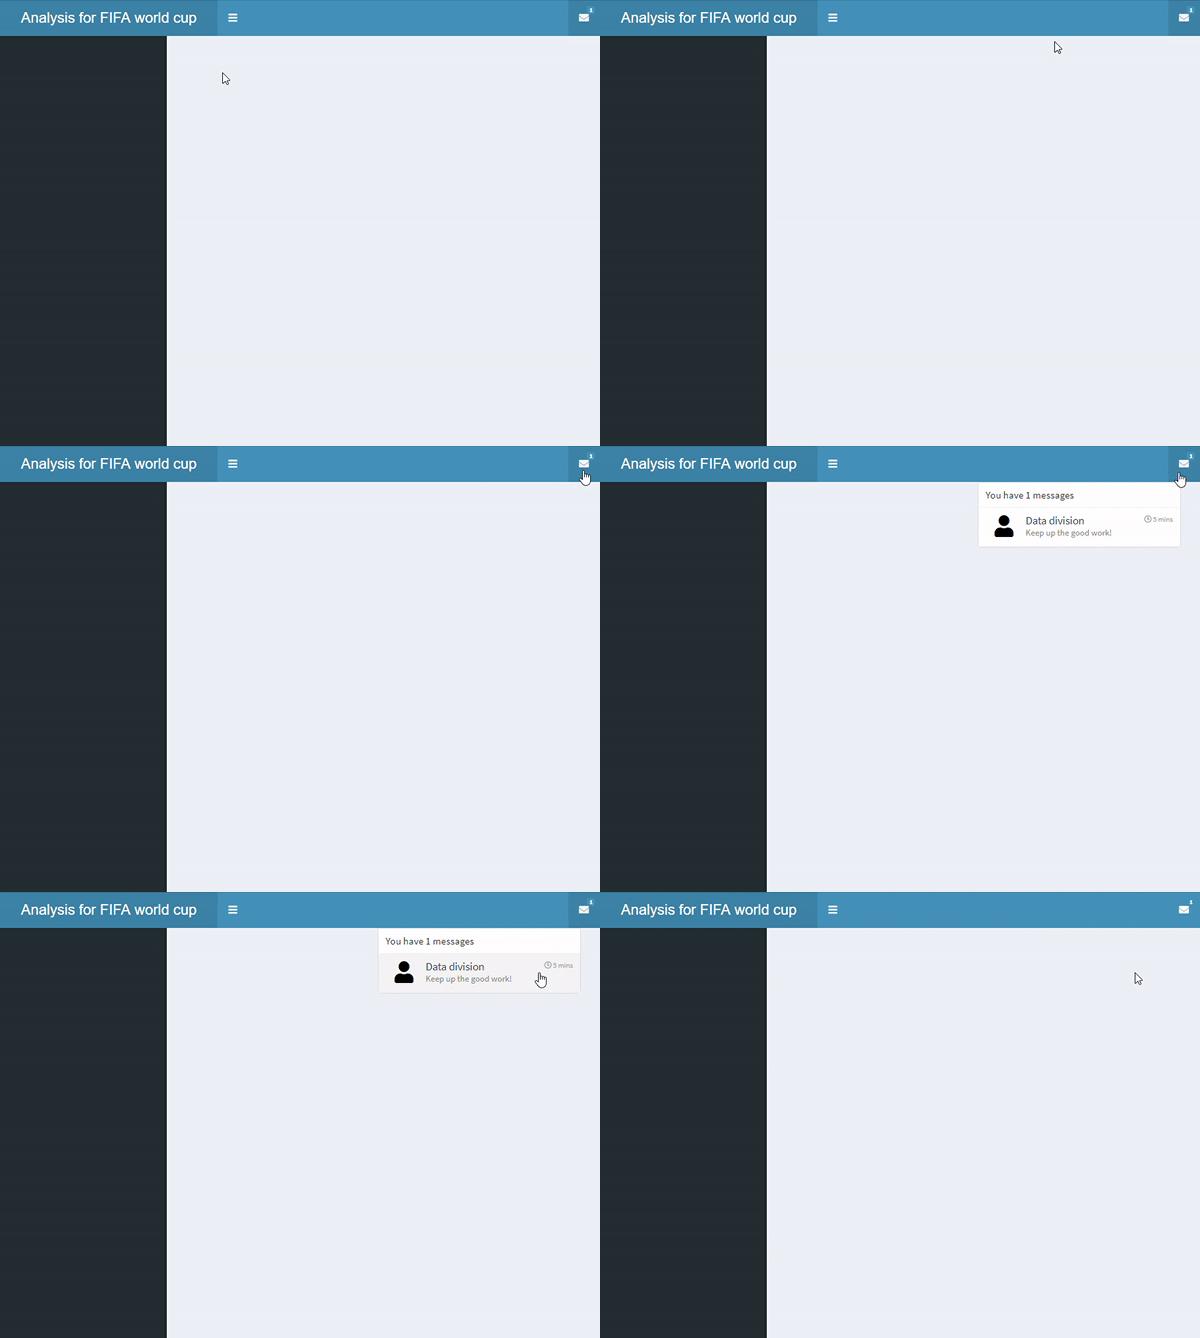
เมนูดรอปดาวน์ที่มีรายการข้อความหนึ่งรายการ

การสร้างแดชบอร์ดด้วย shinydashboard

การเพิ่มเมนูดรอปดาวน์พร้อมหลายข้อความ

  • เพิ่ม messageItem() อีกรายการใน dropdownMenu() ชื่อ "Twitter"

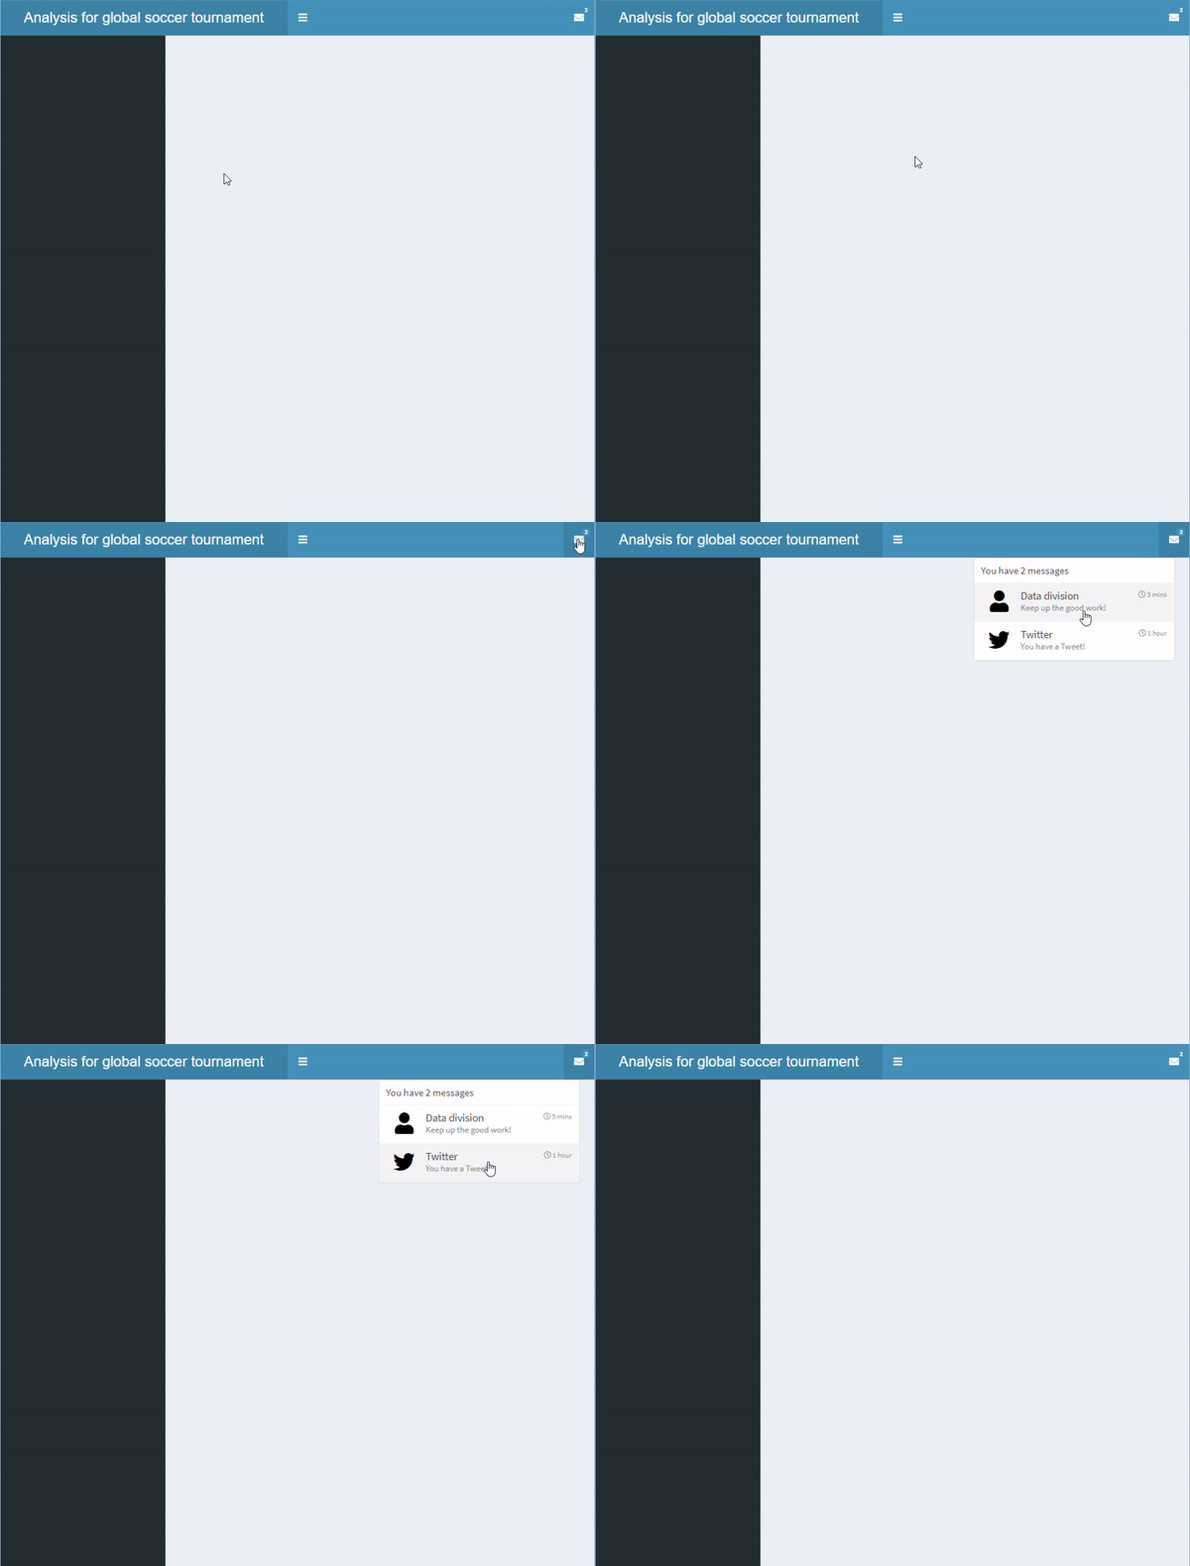
เมนูดรอปดาวน์ที่มีรายการข้อความสองรายการ

header <- dashboardHeader(
  title = "Analysis for global soccer tournament",
  titleWidth = 400,
  dropdownMenu(type = "messages",
    messageItem("Data division",
      "Keep up the good work!",
      time = "5 mins"
    ),

messageItem("Twitter", "You have a Tweet!", time = "1 hour", icon=icon("twitter") ) ) )
การสร้างแดชบอร์ดด้วย shinydashboard

การเพิ่มเมนูดรอปดาวน์พร้อมหลายรายการ

  • เพิ่มรายการประเภทอื่นได้ด้วย
    • messageItem()
    • notificationItem()
    • taskItem()
  • แต่ละประเภทมีรูปแบบแตกต่างกัน
    • messageItem(): ไอคอนเริ่มต้นคือ icon("user")
    • notificationItem(): ไอคอนเริ่มต้นคือ icon("exclamation-triangle")
    • taskItem(): มีแถบแสดงความคืบหน้า
header <- dashboardHeader(
  title = "Analysis for global soccer tournament",
  titleWidth = 400,
  dropdownMenu(type = "messages",

messageItem("Data division", "Keep up the good work!", time = "5 mins"), messageItem("Twitter", "You have a Tweet!", time = "1 hour", icon=icon("twitter")),
notificationItem("This is a notification." ),
taskItem(value = 30, color = "blue", "Dashboard construction") ))
การสร้างแดชบอร์ดด้วย shinydashboard

การเพิ่มเมนูดรอปดาวน์พร้อมหลายรายการ

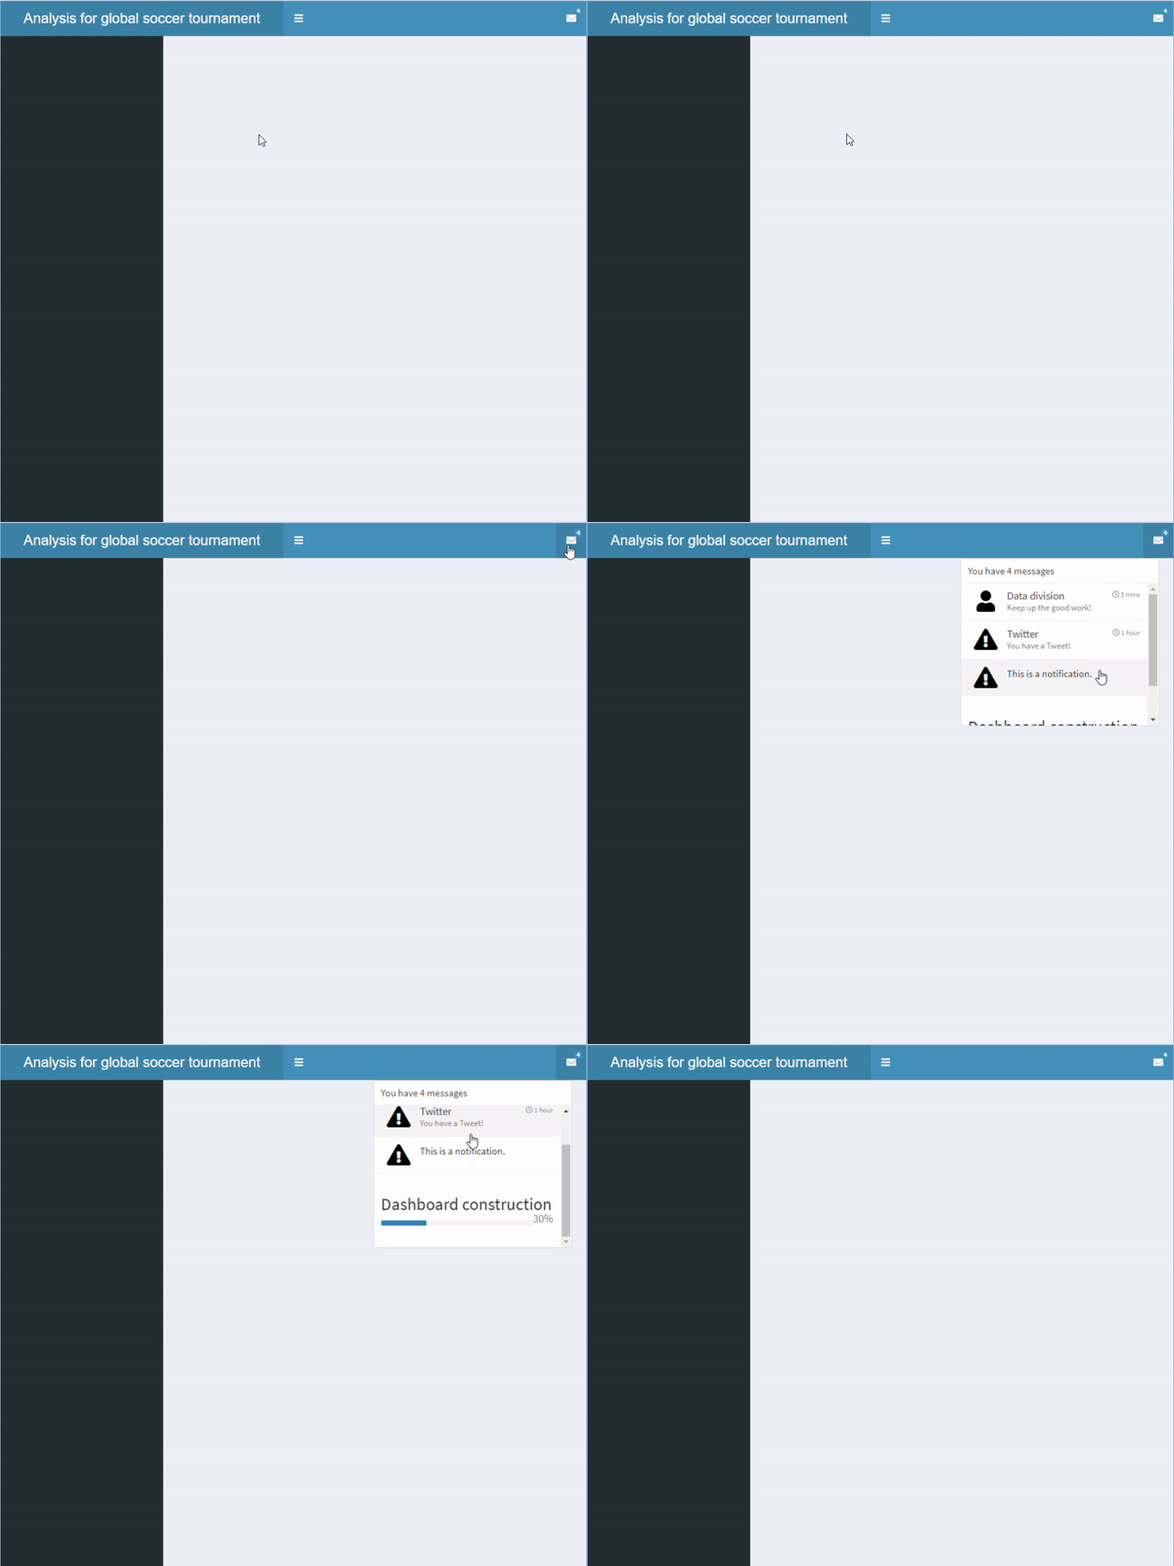
เมนูดรอปดาวน์ที่มีหลายรายการ

การสร้างแดชบอร์ดด้วย shinydashboard

การเพิ่มเมนูดรอปดาวน์หลายรายการ

  • เพิ่มเมนูดรอปดาวน์มากกว่าหนึ่งรายการได้
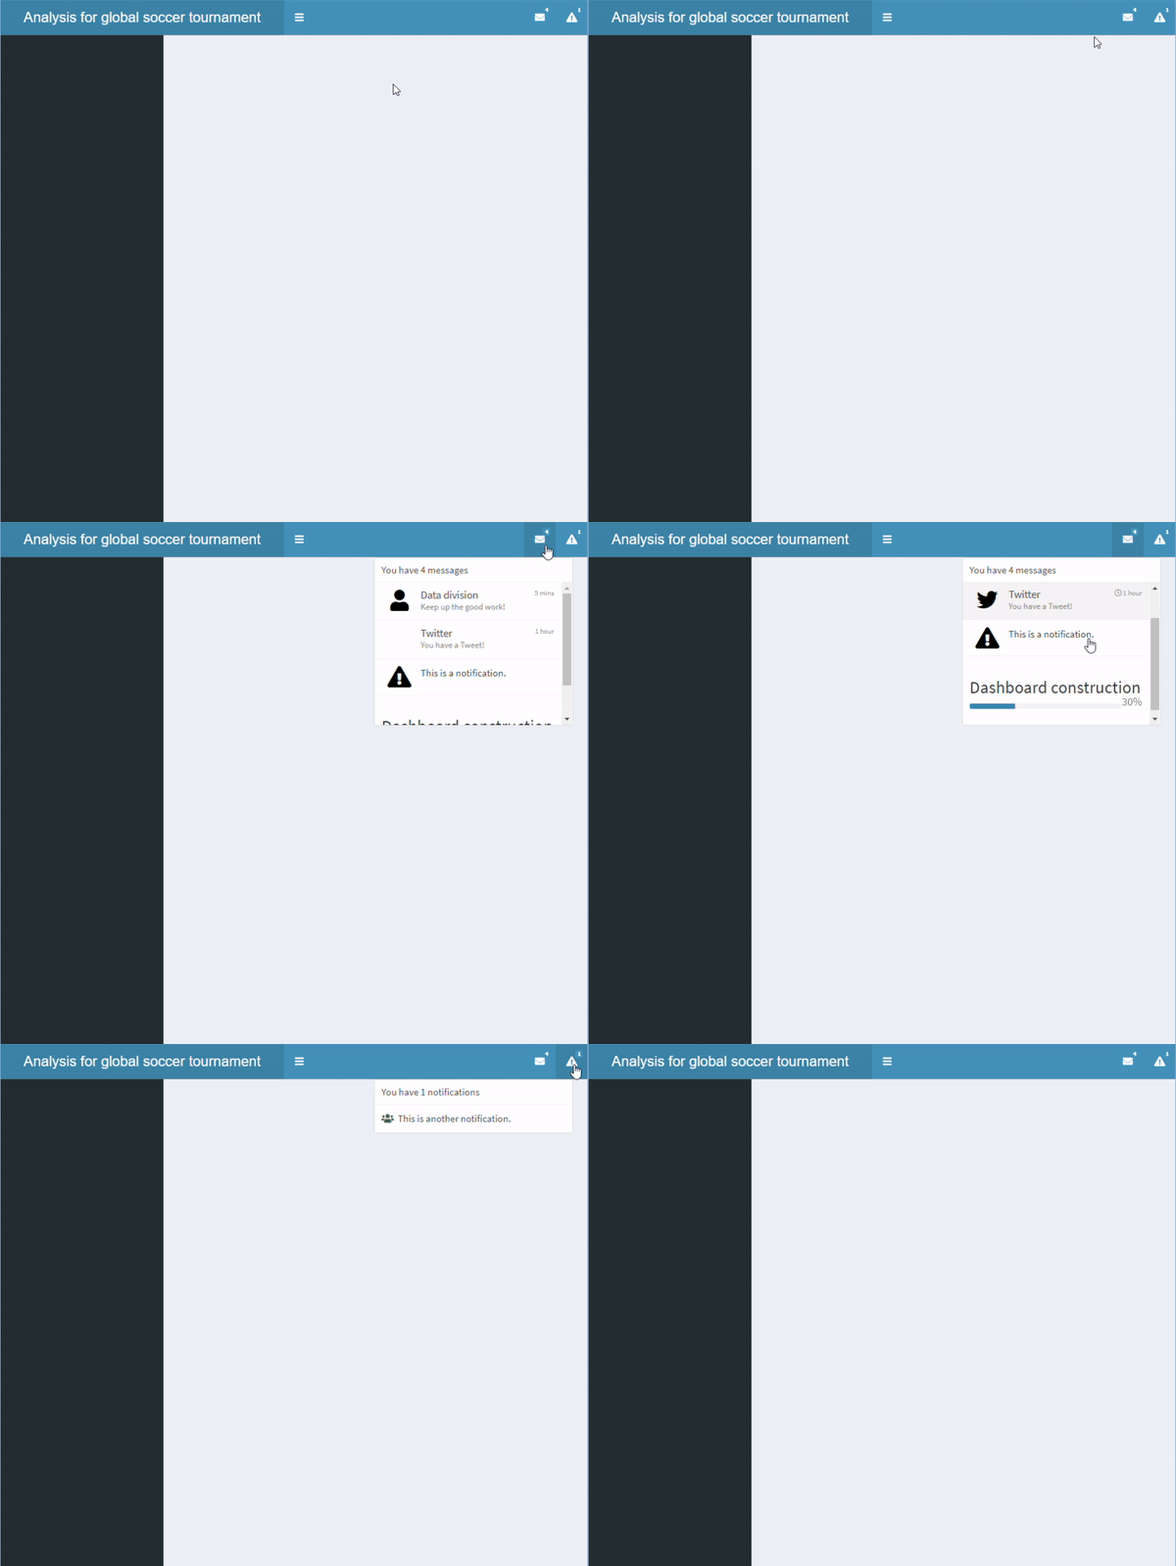
ส่วนหัวที่มีเมนูดรอปดาวน์มากกว่าหนึ่งรายการ

header <- dashboardHeader(
  title = "Analysis for global soccer tournament",
  titleWidth = 400,

dropdownMenu(type = "messages", messageItem("Data division", "Keep up the good work!", time = "5 mins"), messageItem("Twitter", "You have a Tweet!", time = "1 hour", icon=icon("twitter")), notificationItem("This is a notification."), taskItem(value = 30, color = "blue", "Dashboard construction")),
dropdownMenu(type = "notifications", notificationItem(icon = icon("users"), "This is another notification." )))
การสร้างแดชบอร์ดด้วย shinydashboard

แถบด้านข้าง

  • แถบด้านข้างกำหนดด้วย dashboardSidebar()
  • ปรับความกว้างได้โดยตั้งค่า width
  • sidebarMenu() ช่วยให้จัดหลายหน้าใน shinydashboard ได้
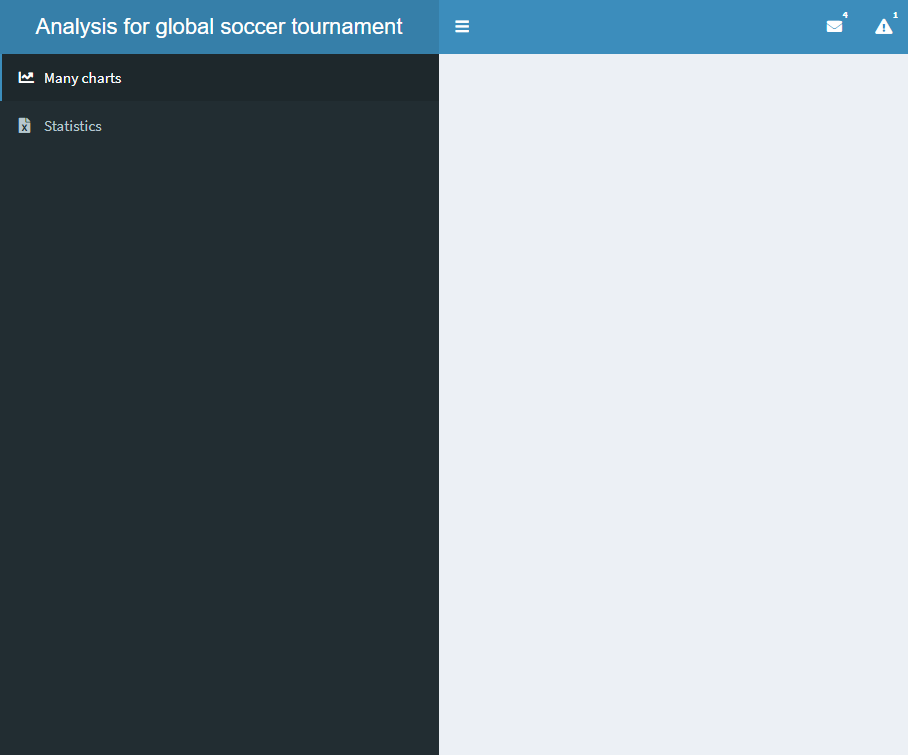
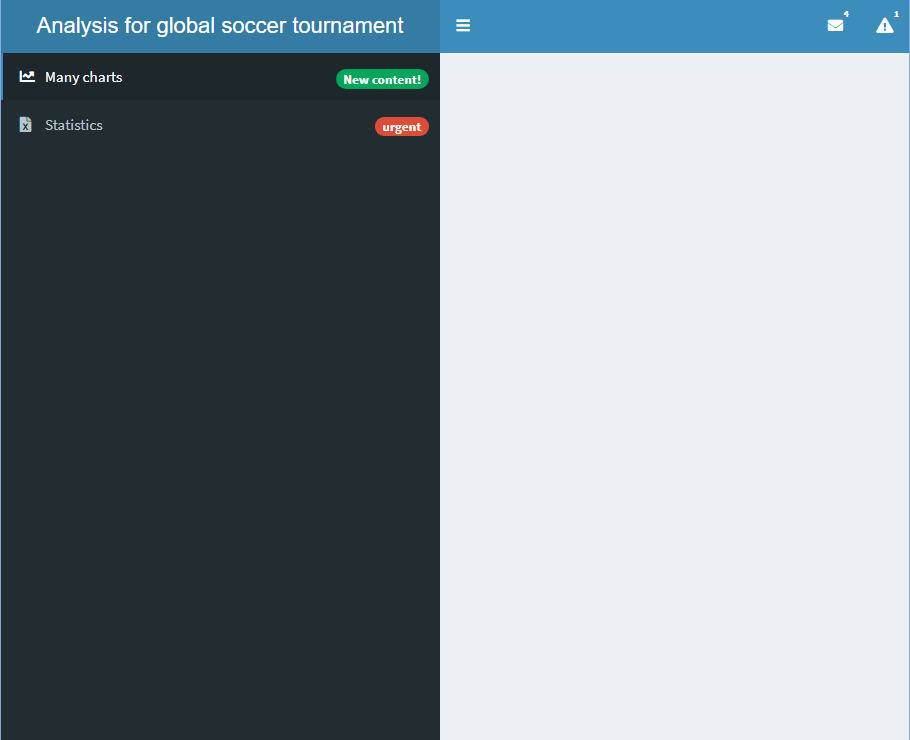
แถบด้านข้างที่มีสองปุ่ม

sidebar <- dashboardSidebar()
sidebar <- dashboardSidebar(width=400)
sidebar <- dashboardSidebar(width=400,
  sidebarMenu(
    id = "pages",
    menuItem("Many charts", tabName = "charts", 
        icon = icon("chart-line")),
    menuItem("Statistics", icon = icon("file-excel"), 
        tabName = "stats")
  )
)
sidebar <- dashboardSidebar(disable = TRUE)
การสร้างแดชบอร์ดด้วย shinydashboard

การเพิ่ม badge

  • เพิ่มป้ายกำกับ (badge) ได้ด้วย
    • ตั้งค่า badgeLabel และ badgeColor

แถบด้านข้างที่มี badge เพิ่มเติม

sidebar <- dashboardSidebar(width=400,
  sidebarMenu(
    id = "pages",
    menuItem("Many charts", tabName = "charts", 
             icon = icon("chart-line"),

badgeLabel = "New content!", badgeColor = "green"),
menuItem("Statistics", icon = icon("file-excel"), tabName = "stats",
badgeLabel = "urgent", badgeColor = "red")
) )
การสร้างแดชบอร์ดด้วย shinydashboard

การเพิ่มแท็บย่อย

  • เพิ่มแท็บย่อยได้โดยใช้ menuSubItem()
  • แท็บที่มีแท็บย่อยจะไม่สามารถเพิ่ม badge ได้
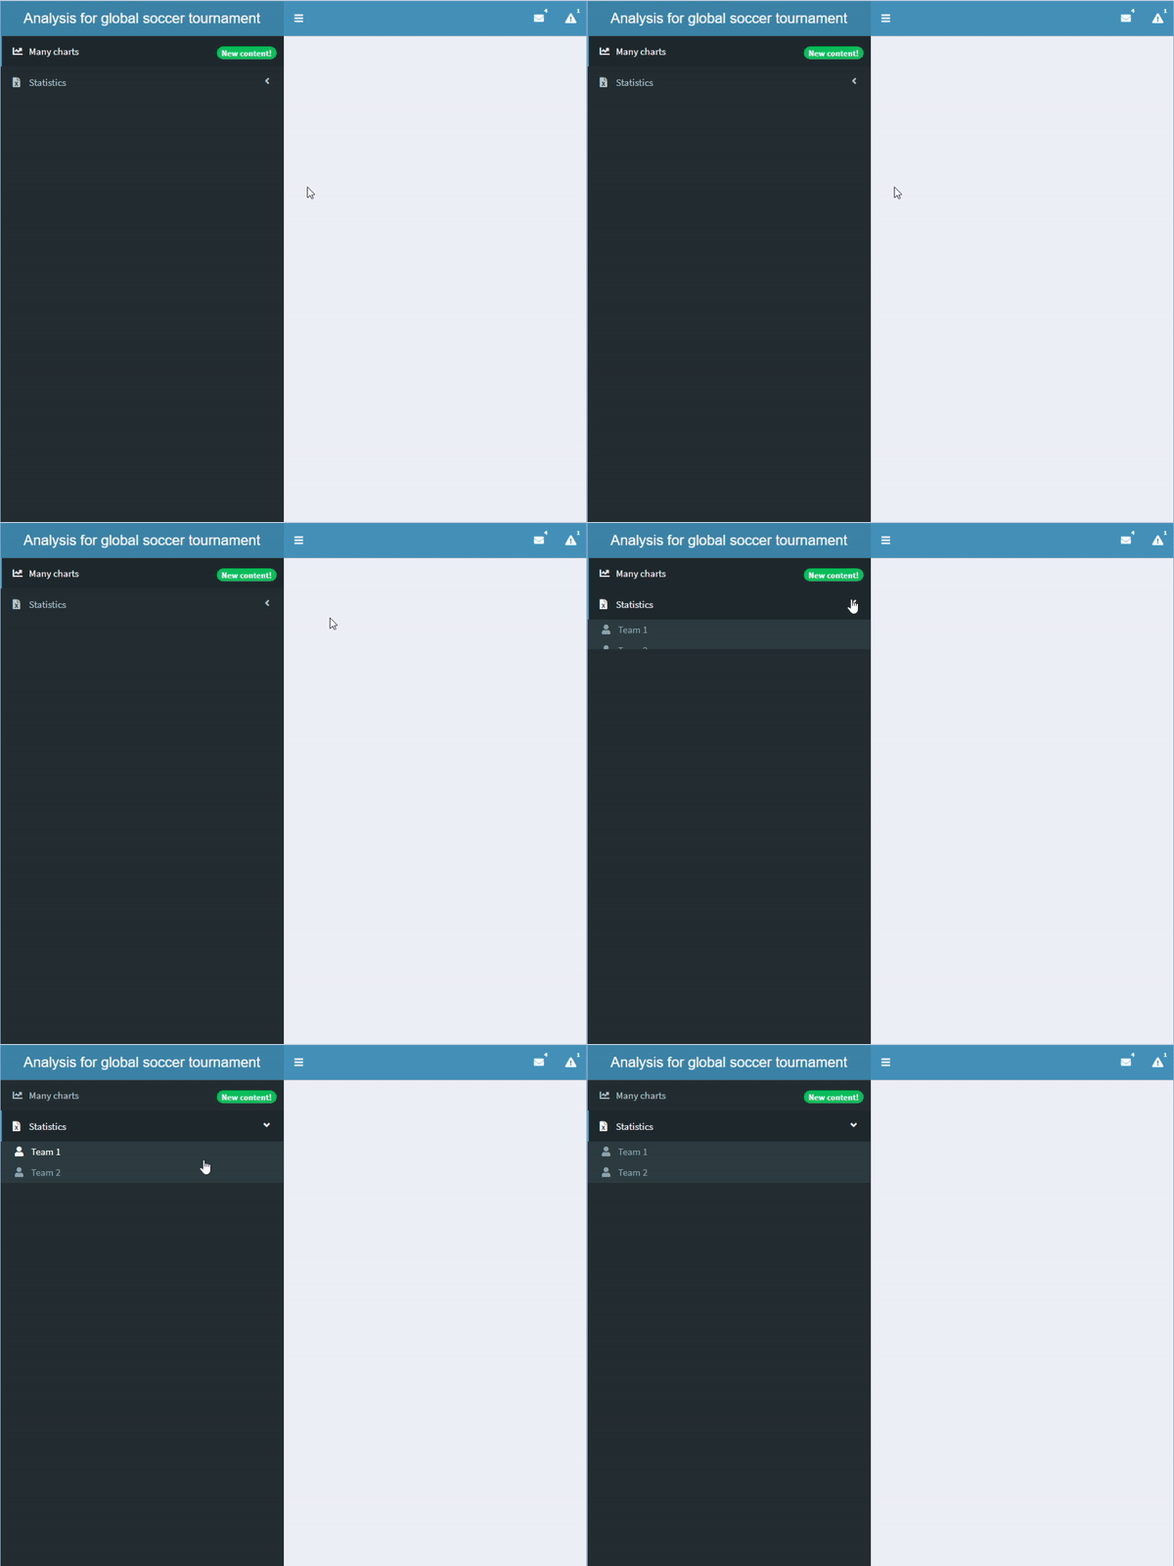
แถบด้านข้างที่มีแท็บย่อย

sidebar <- dashboardSidebar(width=400,
  sidebarMenu(
    id = "pages",
    menuItem("Many charts", tabName = "charts", 
             icon = icon("chart-line"),
             badgeLabel = "New content!", 
             badgeColor = "green"),
    menuItem("Statistics", icon = icon("file-excel"), 
            tabName = "stats", 
            menuSubItem("Team 1", tabName = "team1", 
                     icon=icon("user")),
            menuSubItem("Team 2", tabName = "team2", 
                     icon=icon("user")))
  )
)
การสร้างแดชบอร์ดด้วย shinydashboard

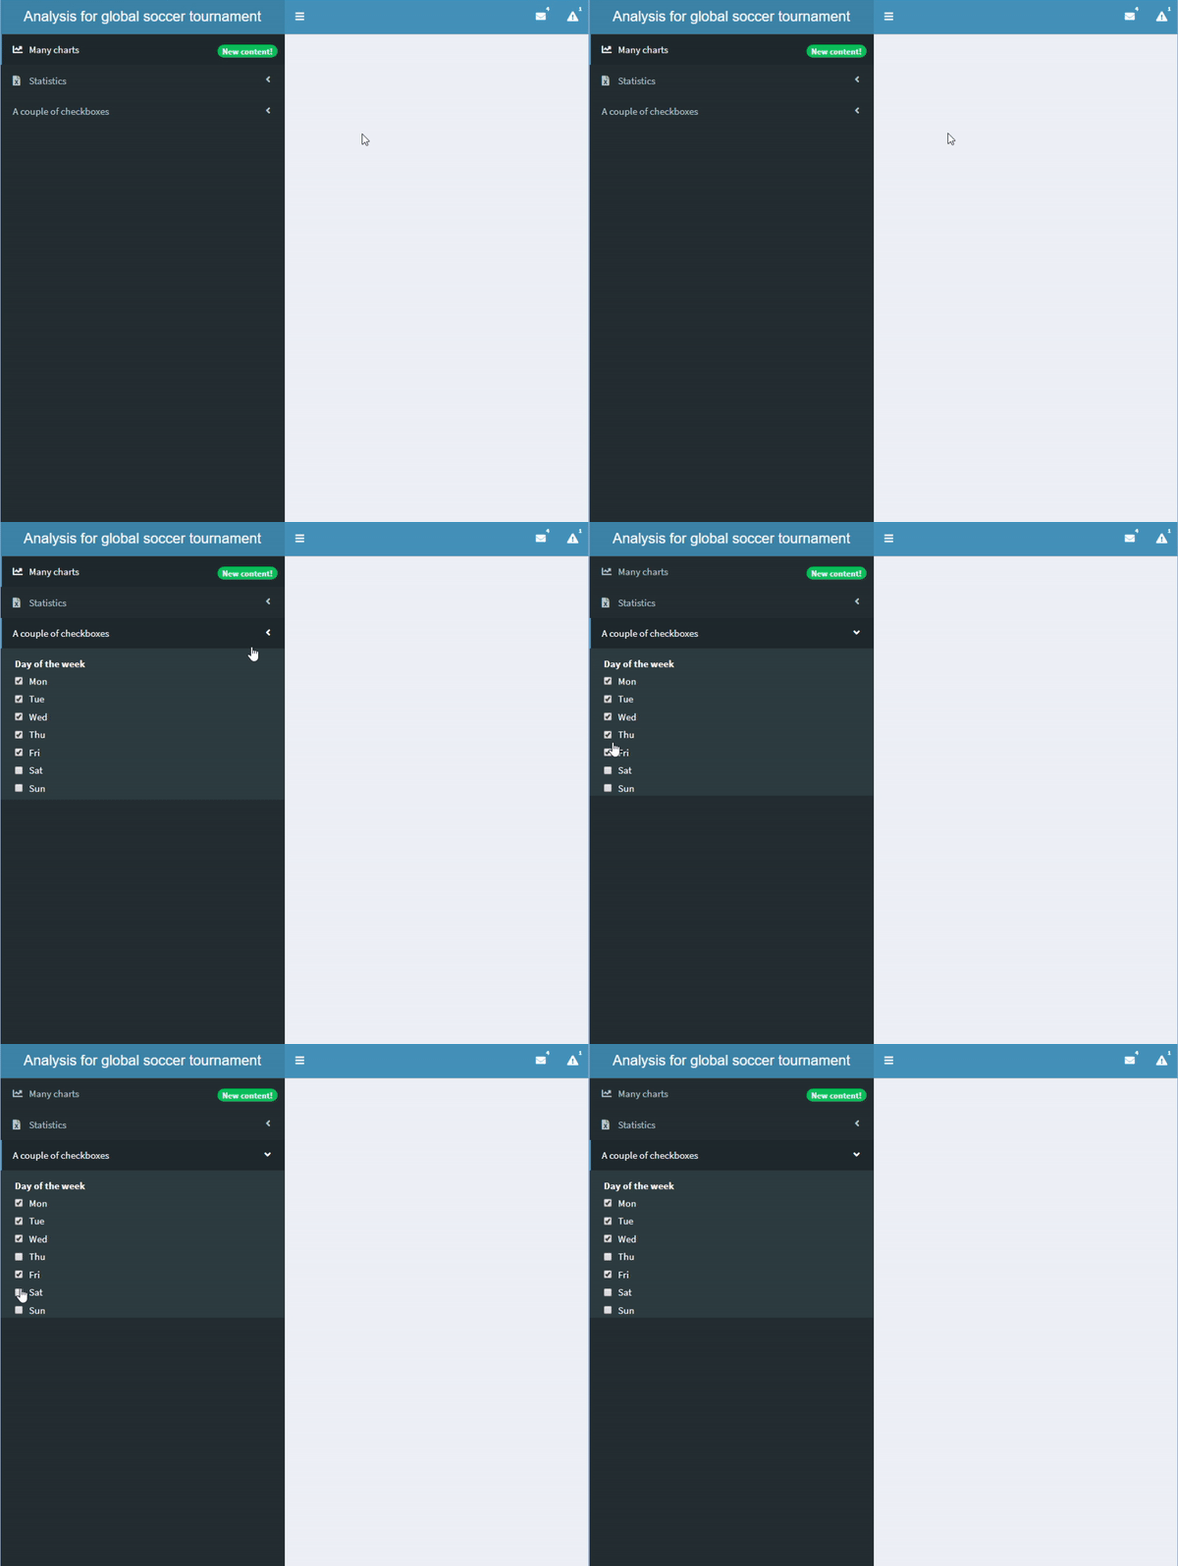
การเพิ่ม input และ output ในแถบด้านข้าง

  • เพิ่ม input และ output ในแถบด้านข้างได้
  • ต้องกำหนด input และ output ใน server ด้วย

แถบด้านข้างที่มี checkboxGroupInput()

sidebar <- dashboardSidebar(width=400,
  sidebarMenu(
    id = "pages",
    menuItem("Many charts", tabName = "charts", 
             icon = icon("chart-line"),
             badgeLabel = "New content!", 
             badgeColor = "green"),
    menuItem("Statistics", icon = icon("file-excel"), 
            tabName = "stats", 
            menuSubItem("Team 1", tabName = "team1", 
            icon=icon("user")),
            menuSubItem("Team 2", tabName = "team2", 
            icon=icon("user"))),

menuItem("A couple of checkboxes", checkboxGroupInput("checkboxes", "Day of the week", choices = c("Mon","Tue","Wed","Thu","Fri","Sat","Sun"), selected = c("Mon","Tue","Wed","Thu","Fri"))) ) )
การสร้างแดชบอร์ดด้วย shinydashboard

มาฝึกกันเถอะ!

การสร้างแดชบอร์ดด้วย shinydashboard

Preparing Video For Download...