ฟังก์ชันความสูญเสีย ส่วนที่ 1

การออกแบบ Machine Learning Workflows ด้วย Python

Dr. Chris Anagnostopoulos

Honorary Associate Professor

ชุดข้อมูล KDD '99 cup

kdd.iloc[0]
kdd.iloc[0]
duration                         51
protocol_type                   tcp
service                        smtp
flag                             SF
src_bytes                      1169
dst_bytes                       332
land                              0
...
dst_host_rerror_rate              0
dst_host_srv_rerror_rate          0
label                          good
การออกแบบ Machine Learning Workflows ด้วย Python

False positive กับ false negative

แปลง label ให้เป็นไบนารี:

kdd['label'] = kdd['label'] == 'bad'

เทรน Gaussian Naive Bayes classifier:

clf = GaussianNB().fit(X_train, y_train)
predictions = clf.predict(X_test)
results = pd.DataFrame({
    'actual': y_test,
    'predicted': predictions
})

การออกแบบ Machine Learning Workflows ด้วย Python

False positive กับ false negative

แปลง label ให้เป็นไบนารี:

kdd['label'] = kdd['label'] == 'bad'

เทรน Gaussian Naive Bayes classifier:

clf = GaussianNB().fit(X_train, y_train)
predictions = clf.predict(X_test)
results = pd.DataFrame({
    'actual': y_test,
    'predicted': predictions
})

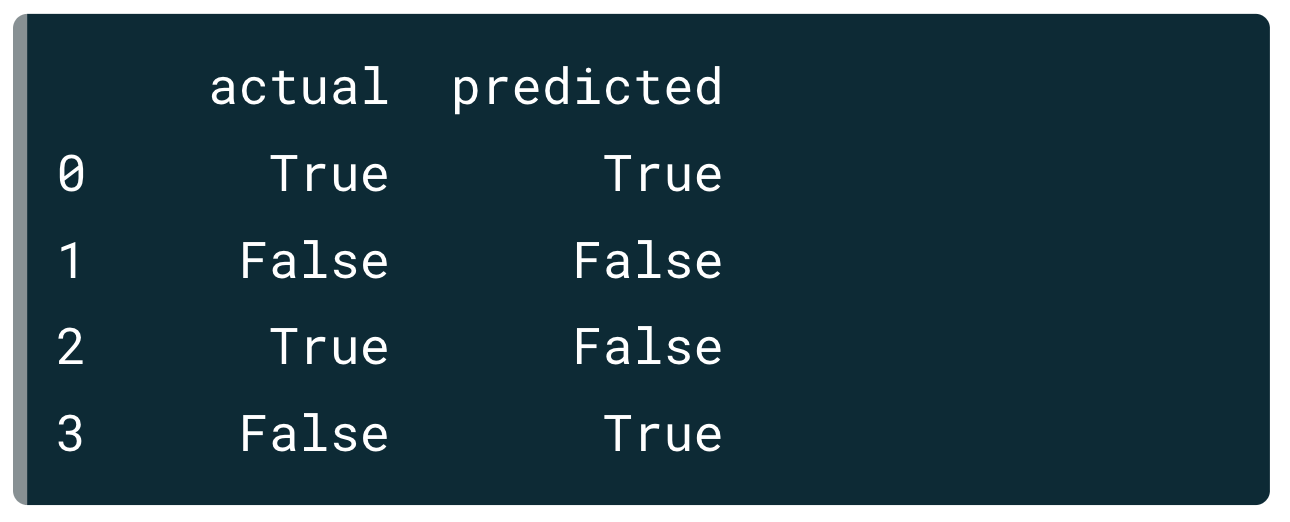
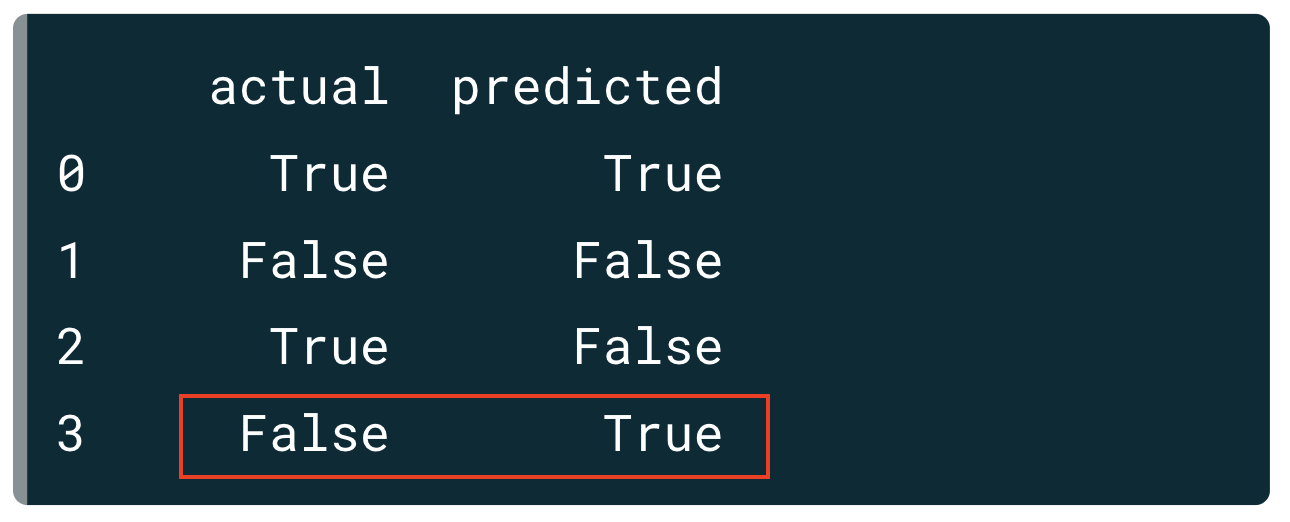
มีสี่กรณีที่เป็นไปได้ของ label เทียบกับ prediction ได้แก่ ทั้งคู่เป็น True, ทั้งคู่เป็น False, label เป็น True แต่ prediction เป็น False และ label เป็น False แต่ prediction เป็น True โดยกรณีสุดท้ายถูกไฮไลต์ไว้ที่นี่

การออกแบบ Machine Learning Workflows ด้วย Python

False positive กับ false negative

แปลง label ให้เป็นไบนารี:

kdd['label'] = kdd['label'] == 'bad'

เทรน Gaussian Naive Bayes classifier:

clf = GaussianNB().fit(X_train, y_train)
predictions = clf.predict(X_test)
results = pd.DataFrame({
    'actual': y_test,
    'predicted': predictions
})

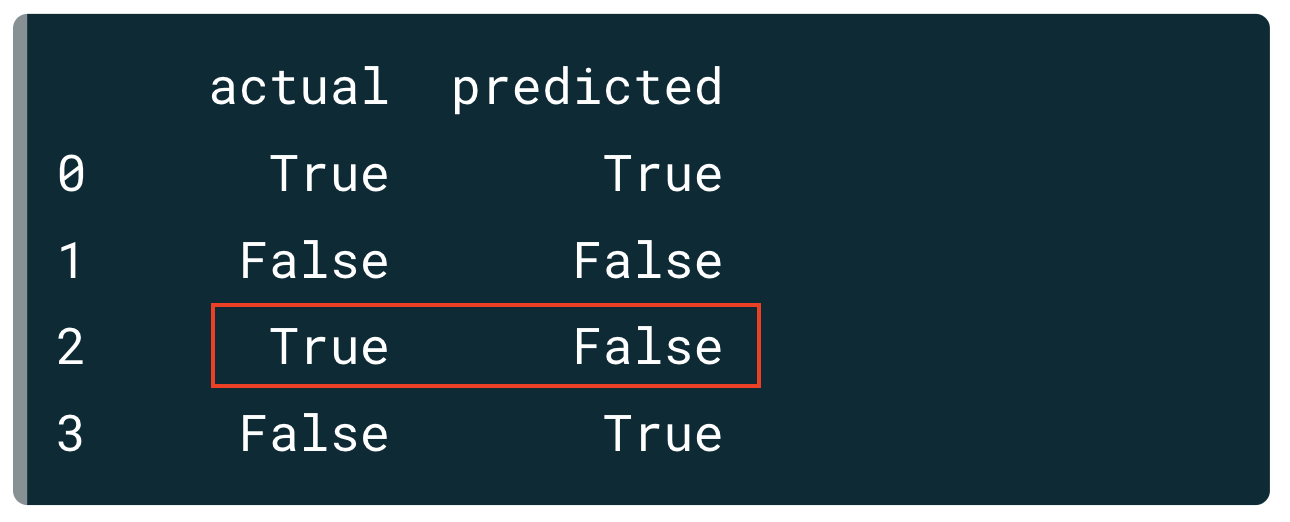
คราวนี้ กรณีที่ label เป็น True แต่ prediction เป็น False ถูกไฮไลต์แทน

การออกแบบ Machine Learning Workflows ด้วย Python

False positive กับ false negative

แปลง label ให้เป็นไบนารี:

kdd['label'] = kdd['label'] == 'bad'

เทรน Gaussian Naive Bayes classifier:

clf = GaussianNB().fit(X_train, y_train)
predictions = clf.predict(X_test)
results = pd.DataFrame({
    'actual': y_test,
    'predicted': predictions
})

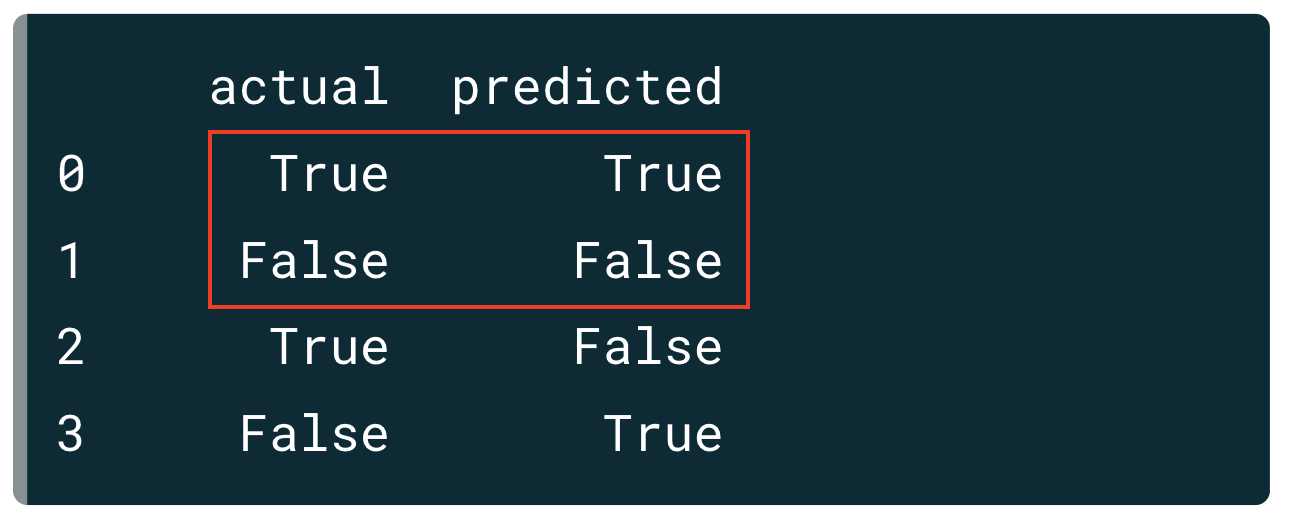
ไฮไลต์สองกรณีที่ prediction ตรงกับ label

การออกแบบ Machine Learning Workflows ด้วย Python

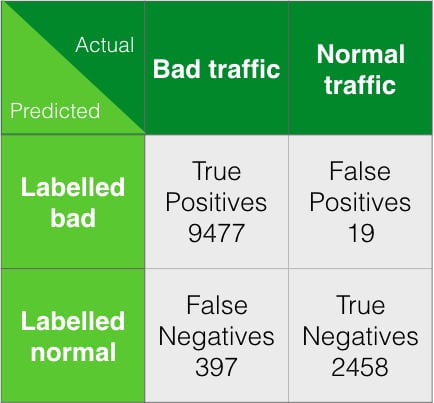
Confusion matrix

conf_mat = confusion_matrix(
    ground_truth, predictions)
array([[9477,   19],
       [ 397, 2458]])
tn, fp, fn, tp = conf_mat.ravel()
(fp, fn)
(19, 397)

confusion matrix แสดงจำนวนกรณีของทั้งสี่ชุดค่าผสมสำหรับชุดข้อมูลนี้

การออกแบบ Machine Learning Workflows ด้วย Python

เมตริกประสิทธิภาพแบบสเกลาร์

accuracy = 1-(fp + fn)/len(ground_truth)

recall = tp/(tp+fn)
fpr = fp/(tn+fp)
precision = tp/(tp+fp)
f1 = 2*(precision*recall)/(precision+recall)
accuracy_score(ground_truth, predictions)
recall_score(ground_truth, predictions)
precision_score(ground_truth, predictions)
f1_score(ground_truth, predictions)
การออกแบบ Machine Learning Workflows ด้วย Python

False positive กับ false negative

Classifier A:

tn, fp, fn, tp = confusion_matrix(
    ground_truth, predictions_A).ravel()
(fp,fn)
(3, 3)
cost = 10 * fp + fn
33

Classifier B:

tn, fp, fn, tp = confusion_matrix(
    ground_truth, predictions_B).ravel()
(fp,fn)
(0, 26)

cost = 10 * fp + fn
26
การออกแบบ Machine Learning Workflows ด้วย Python

Classifier ไหนดีกว่ากัน?

การออกแบบ Machine Learning Workflows ด้วย Python

Preparing Video For Download...