用擴散模型進行影像編輯

使用 Hugging Face 的多模態模型

James Chapman

Curriculum Manager, DataCamp

Diffusers
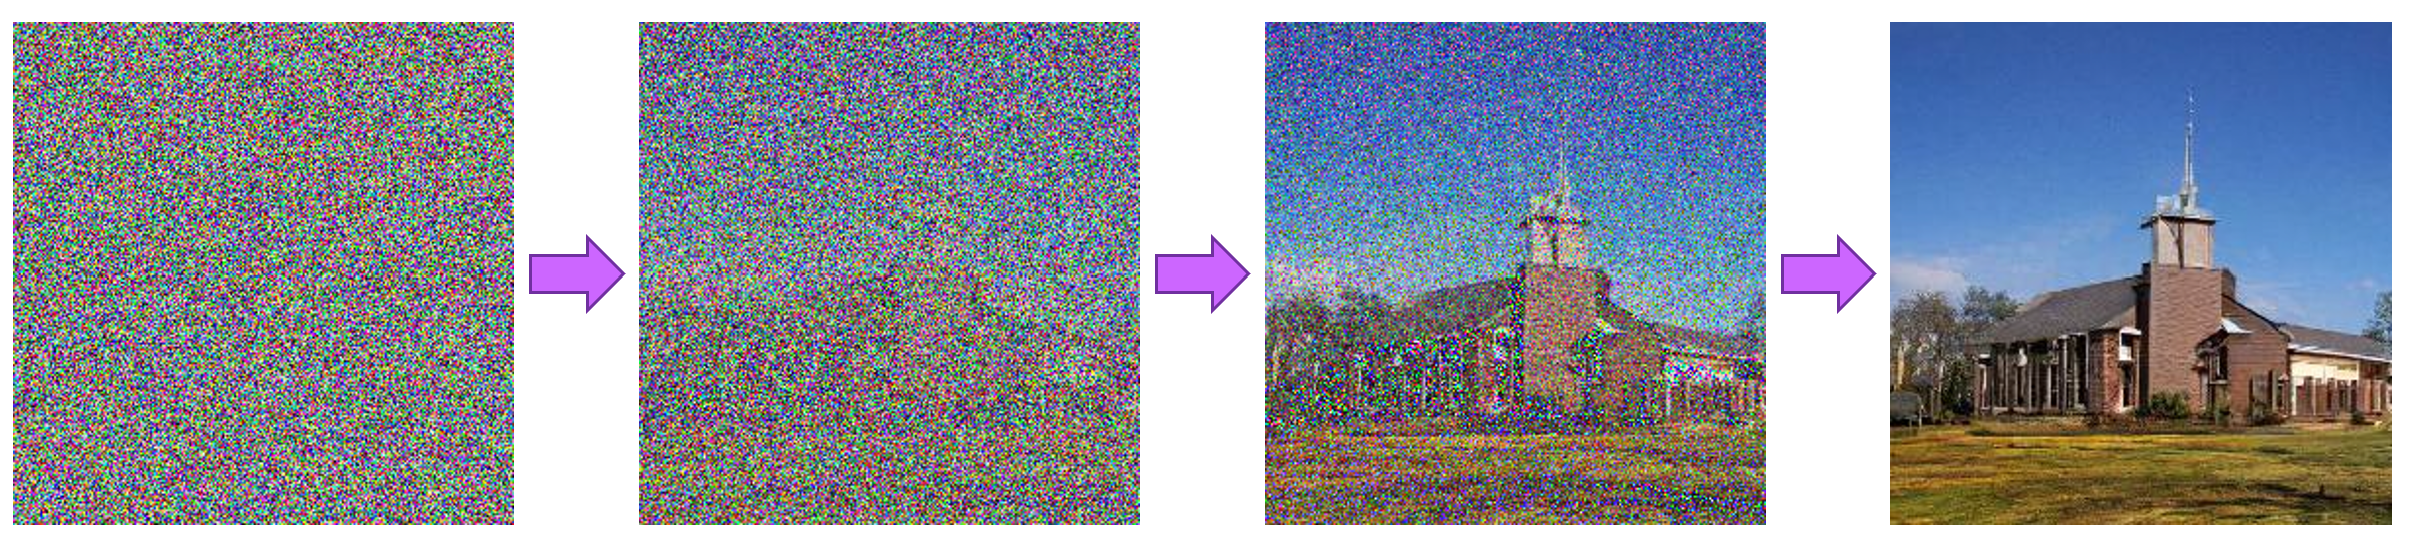
擴散模型從雜訊生成影像的步驟

  • 訓練目標:將雜訊映射成影像
  • CLIP + Diffusion → 兩種條件式生成
    • 生成:Text → image
    • 修改:Text+image → image
1 https://huggingface.co/docs/diffusers
使用 Hugging Face 的多模態模型

自訂影像編輯

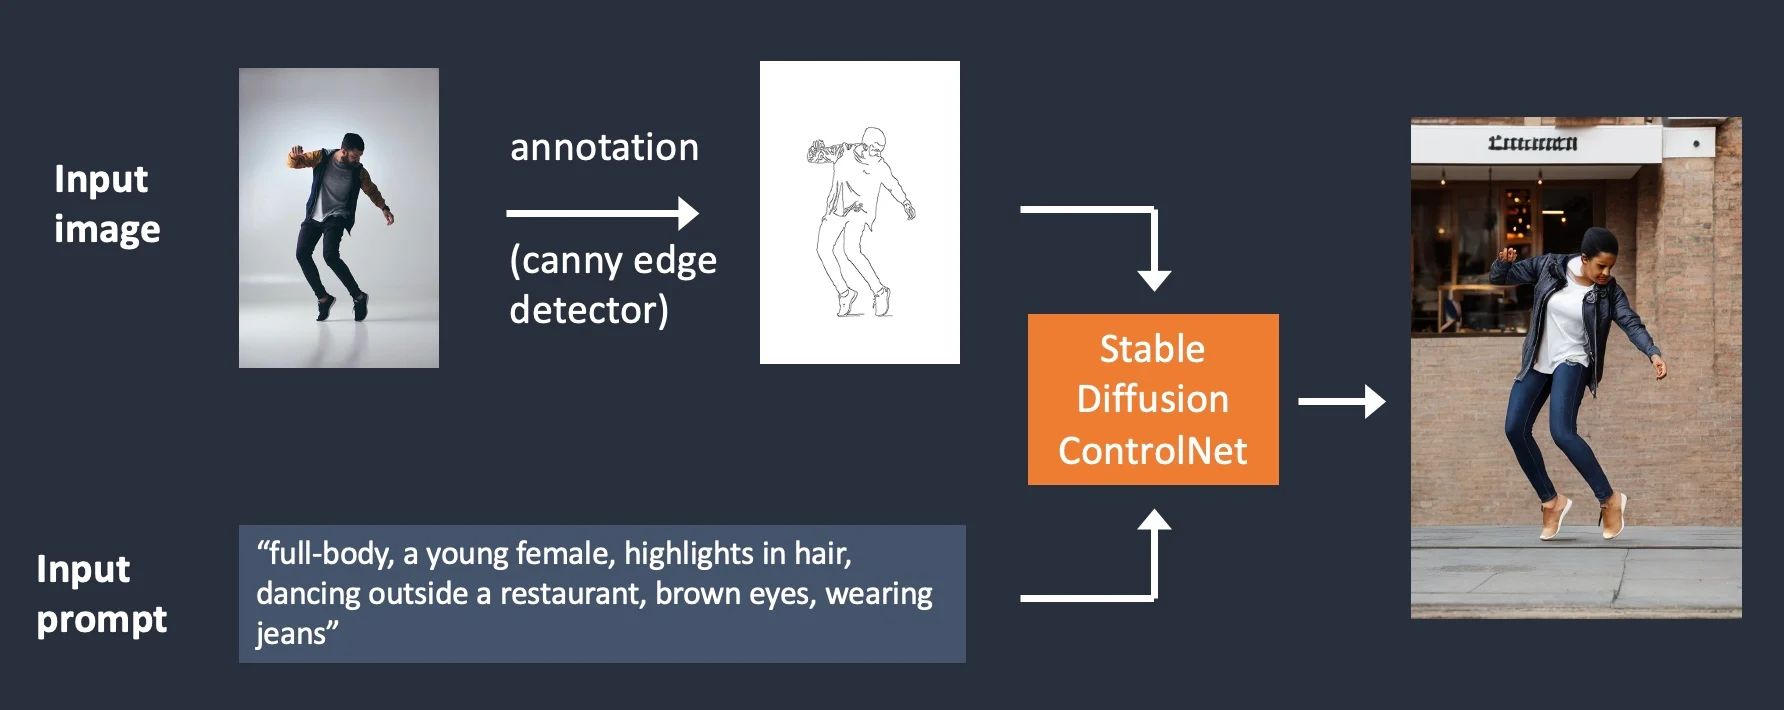
ControlNet:影像與文字引導的條件式生成

包含 Canny 濾鏡與 ControlNet 的自訂影像編輯流程圖

1 https://stable-diffusion-art.com/controlnet/
使用 Hugging Face 的多模態模型

自訂影像編輯

from diffusers.utils import load_image

image = load_image("http://301.nz/o81bf")

import cv2 from PIL import Image import numpy as np image = cv2.Canny(np.array(image), 100, 200)
image = image[:, :, None] image = np.concatenate([image, image, image], axis=2)

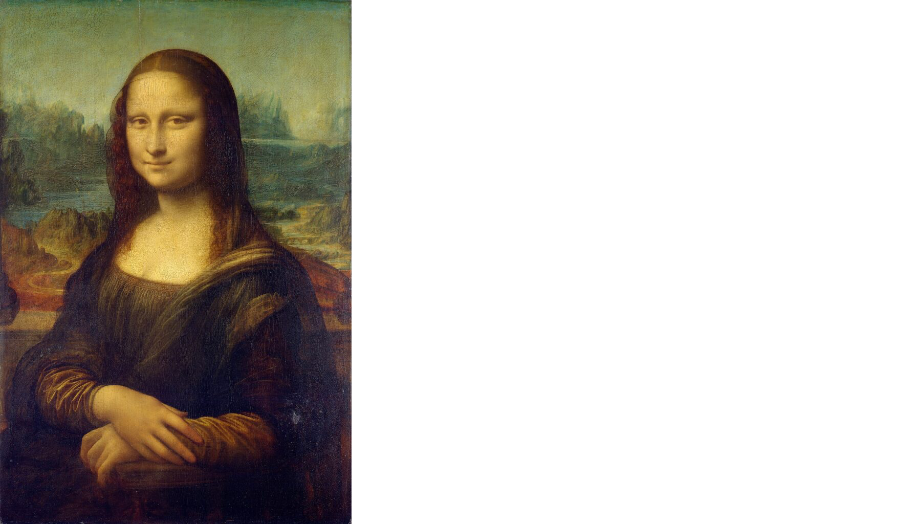
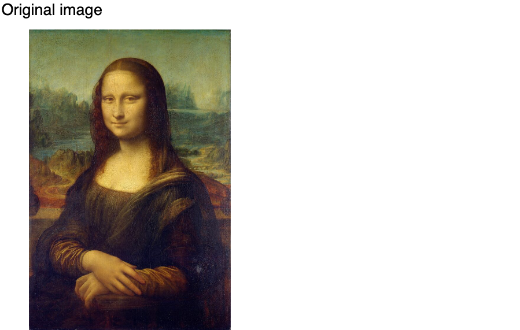
蒙娜麗莎影像

使用 Hugging Face 的多模態模型

自訂影像編輯

from diffusers.utils import load_image

image = load_image("http://301.nz/o81bf")

import cv2
from PIL import Image
import numpy as np

image = cv2.Canny(np.array(image), 100, 200)
image = image[:, :, None]
image = np.concatenate([image, image, image], 
                       axis=2)
canny_image = Image.fromarray(image)

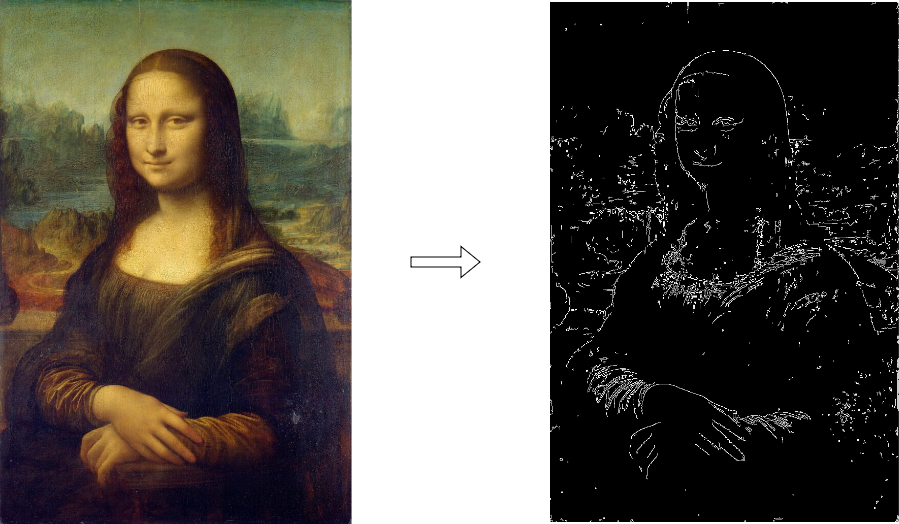
蒙娜麗莎與 Canny 濾鏡版本

使用 Hugging Face 的多模態模型

自訂影像編輯

from diffusers import StableDiffusionControlNetPipeline
from diffusers import ControlNetModel
import torch

controlnet = ControlNetModel.from_pretrained("lllyasviel/sd-controlnet-canny", 
                                             torch_dtype=torch.float16)


pipe = StableDiffusionControlNetPipeline.from_pretrained( "runwayml/stable-diffusion-v1-5", controlnet=controlnet, torch_dtype=torch.float16 )
pipe = pipe.to("cuda")
使用 Hugging Face 的多模態模型

自訂影像編輯

prompt = ["Albert Einstein, 
          best quality, 
          extremely detailed"]

generator = [ torch.Generator(device="cuda").manual_seed(2)]
output = pipe( prompt, canny_image, negative_prompt=["monochrome, lowres, bad anatomy, worst quality, low quality"], generator=generator, num_inference_steps=20)

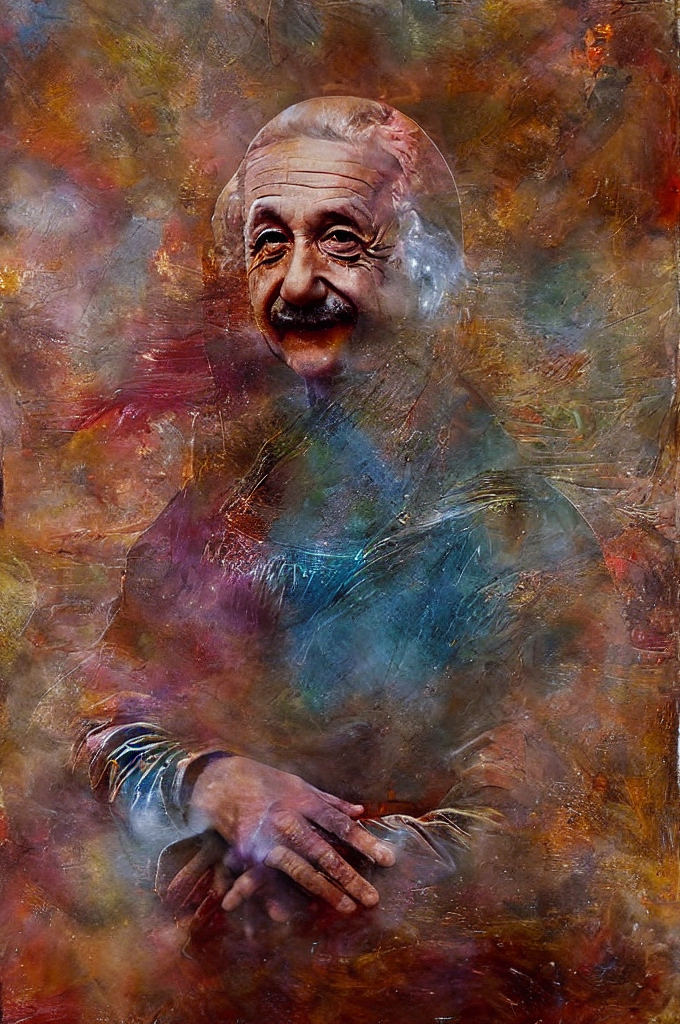
愛因斯坦擺出蒙娜麗莎姿勢

使用 Hugging Face 的多模態模型

影像修補(Inpainting)

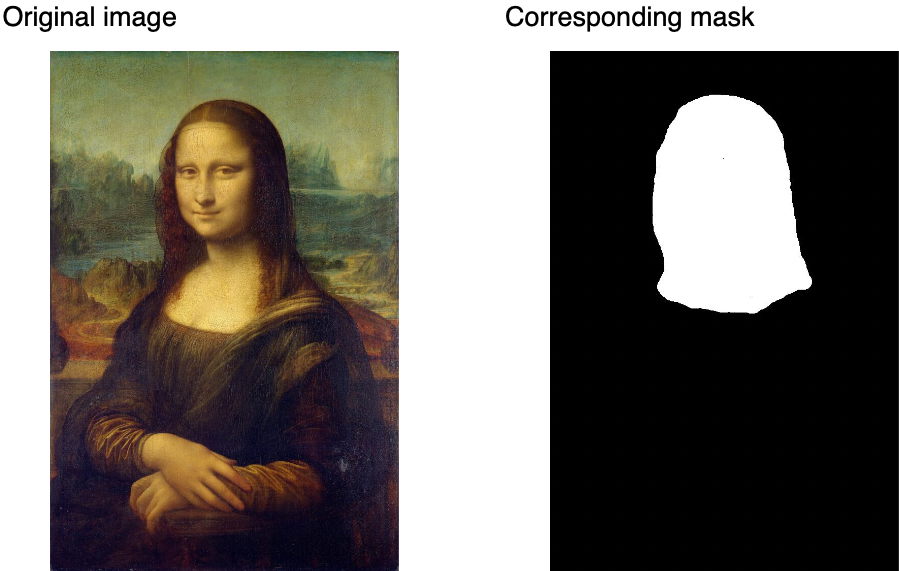
  • 在指定區域生成新的內容

無遮罩的蒙娜麗莎

使用 Hugging Face 的多模態模型

影像修補(Inpainting)

  • 在指定區域生成新的內容
  • 「二元遮罩」:白色(1)、黑色(0
  • 遮罩可來自分割結果,或由使用者預先定義(例如使用 InpaintingMask-Generation

蒙娜麗莎與我們的遮罩

使用 Hugging Face 的多模態模型

影像修補(Inpainting)

from diffusers import StableDiffusionControlNetInpaintPipeline, ControlNetModel


controlnet = ControlNetModel.from_pretrained("lllyasviel/control_v11p_sd15_inpaint", torch_dtype=torch.float16, use_safetensors=True)
pipe = StableDiffusionControlNetInpaintPipeline.from_pretrained( "stable-diffusion-v1-5/stable-diffusion-v1-5", controlnet=controlnet, torch_dtype=torch.float16, use_safetensors=True )
使用 Hugging Face 的多模態模型

影像修補(Inpainting)

def make_inpaint_condition(image, image_mask):
    image = np.array(image.convert("RGB")).astype(np.float32) / 255.0
    image_mask = np.array(image_mask.convert("L")).astype(np.float32) / 255.0


image[image_mask > 0.5] = -1.0
image = np.expand_dims(image, 0).transpose(0, 3, 1, 2) image = torch.from_numpy(image) return image control_image = make_inpaint_condition(init_image, mask_image)
使用 Hugging Face 的多模態模型

影像修補(Inpainting)

output = pipe(
    "The head of the mona lisa in the 
  same style and quality as the original
  mona lisa with a clear smile and a 
  slightly smaller head size",

num_inference_steps=40,
eta=1.0,
image=init_image, mask_image=mask_image, control_image=control_image, ).images[0]

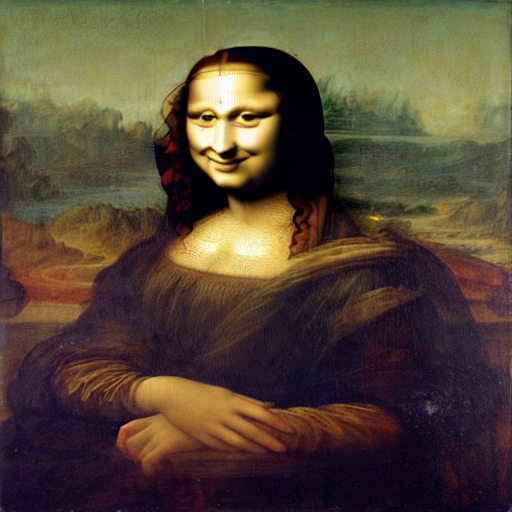
露出微笑的蒙娜麗莎

使用 Hugging Face 的多模態模型

一起來練習吧!

使用 Hugging Face 的多模態模型

Preparing Video For Download...